Quote:
|
Painting engine and bay? Wire tuck? Throttle bodies?
|
Benders
|
Quote:
I think he should cam it! |
Update this!
|
I will shortly! This morning!
|
I got bored and decided a rebuild was entirely the right course of action, no going back now!
I quite honestly haven't decided what way I'm intending to go with it, whether it'll turn out to be a cheap and cheerful rebuild and lash back together as standard, or whether I'll look at building something specifically geared more towards an intended application, ie high comp N/A or lower comp / stronger boost. I suspect half of that decision will depend on the condition of the block and whether the cylinders are beyond honing and need bored. Anyway, pics of oily bits: Last time we were left with this: 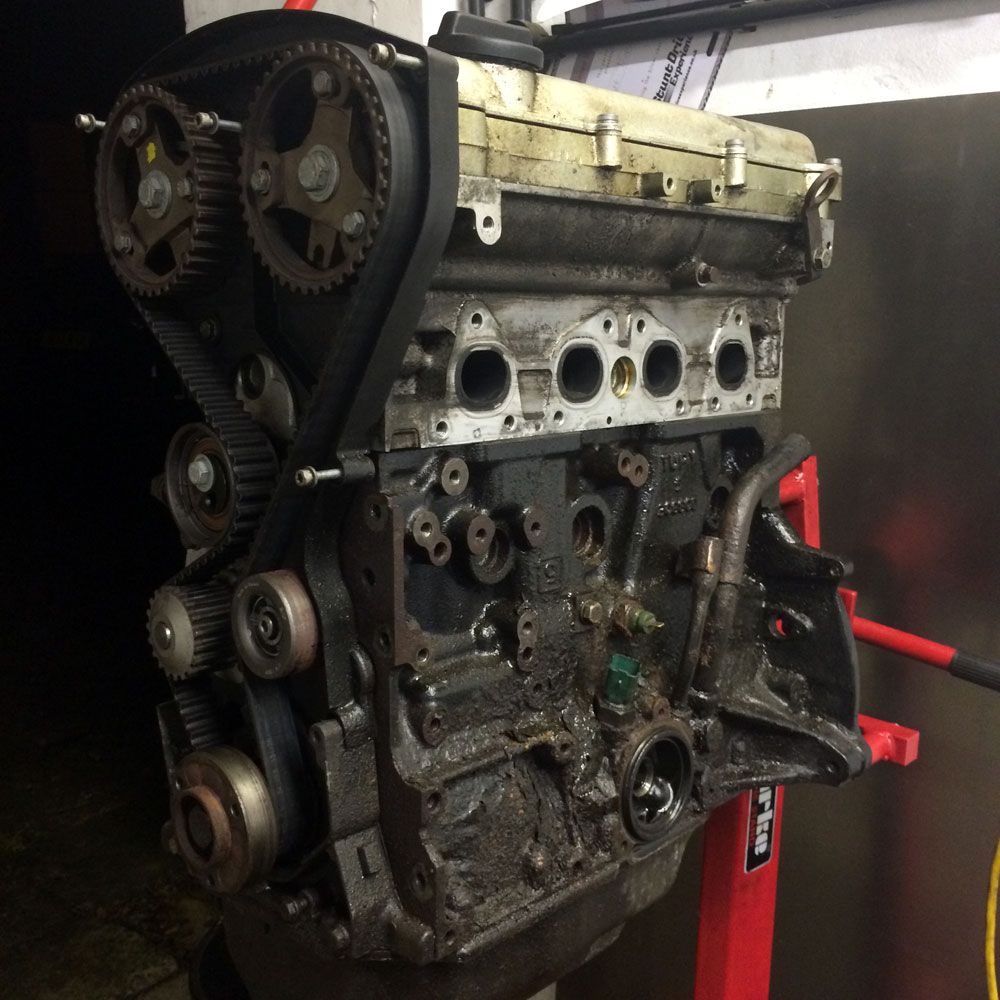 Time to whip the plugs out: 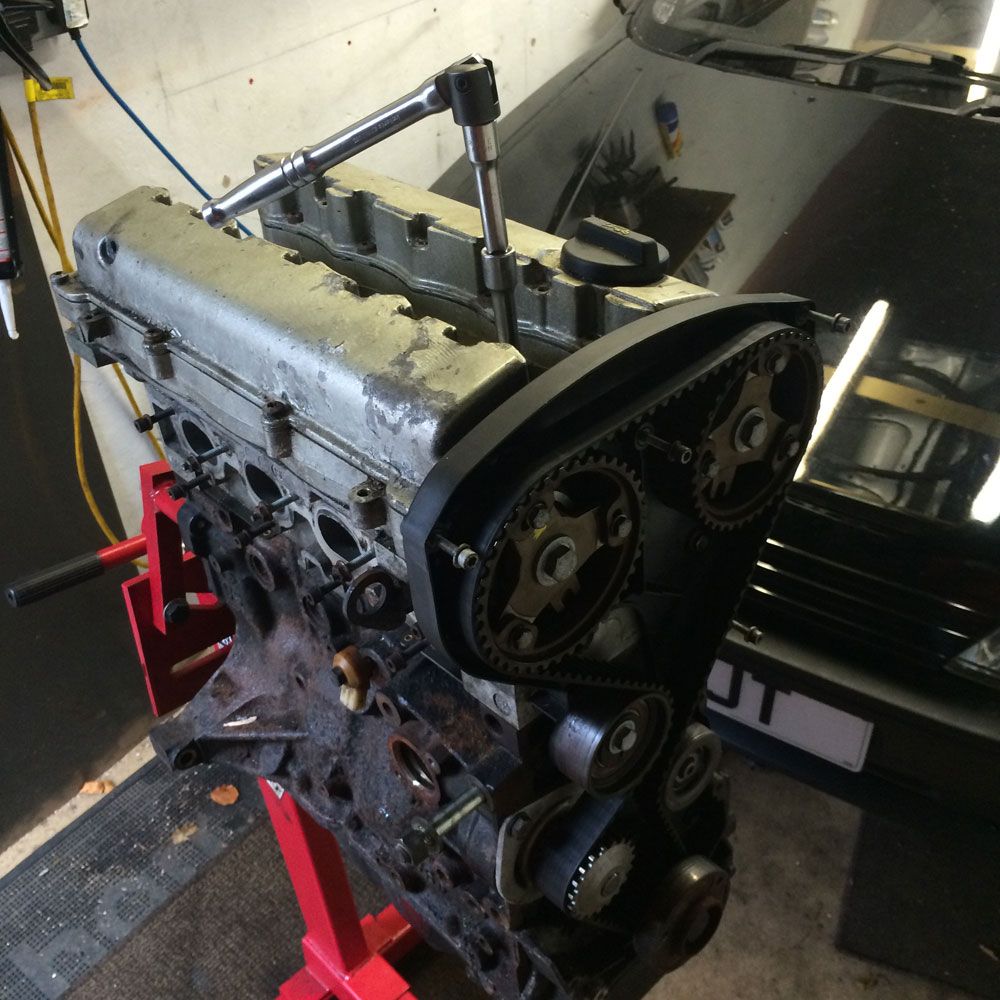 I also removed the large stud from the rear of the engine that the rear water pump housing / engine mount bolts up to: 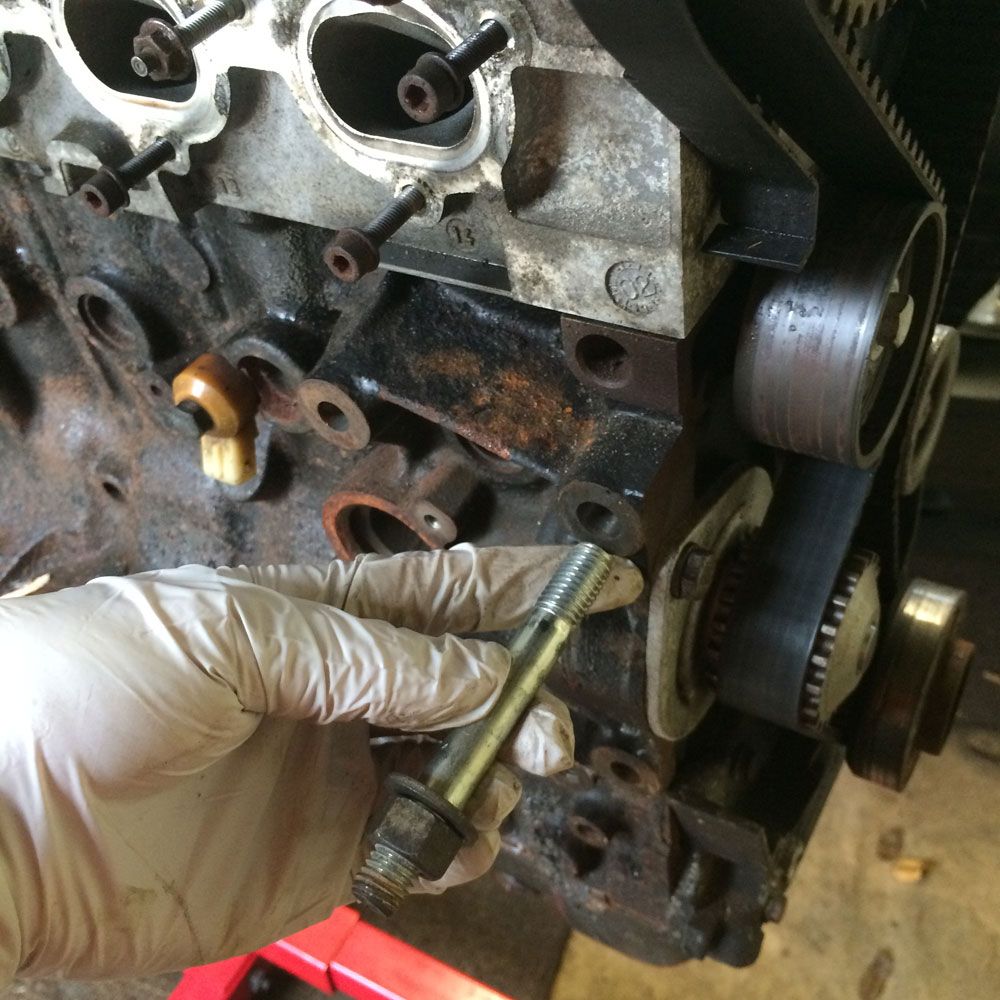 and remove the timing belt. I rotated the engine to line up with the timing marks and slackened the belt tensioner: 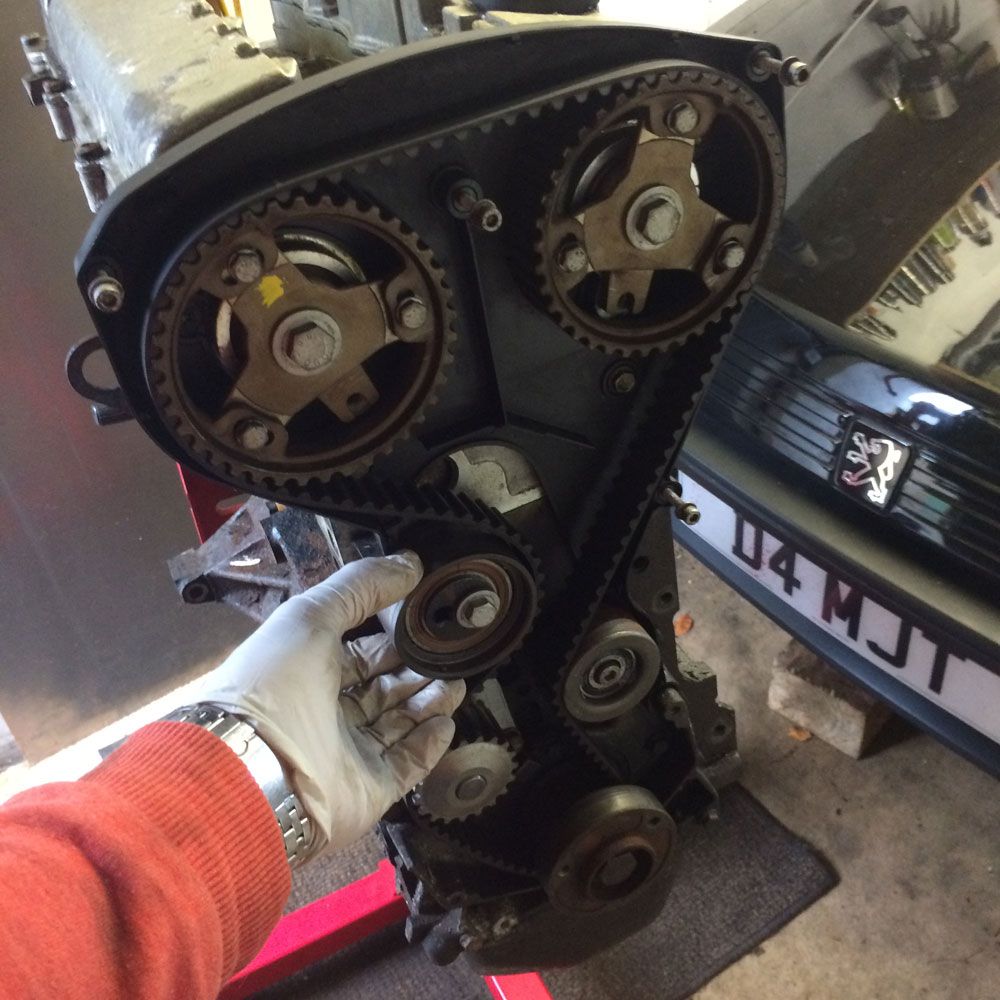 Then it's a simple case of popping the belt off: 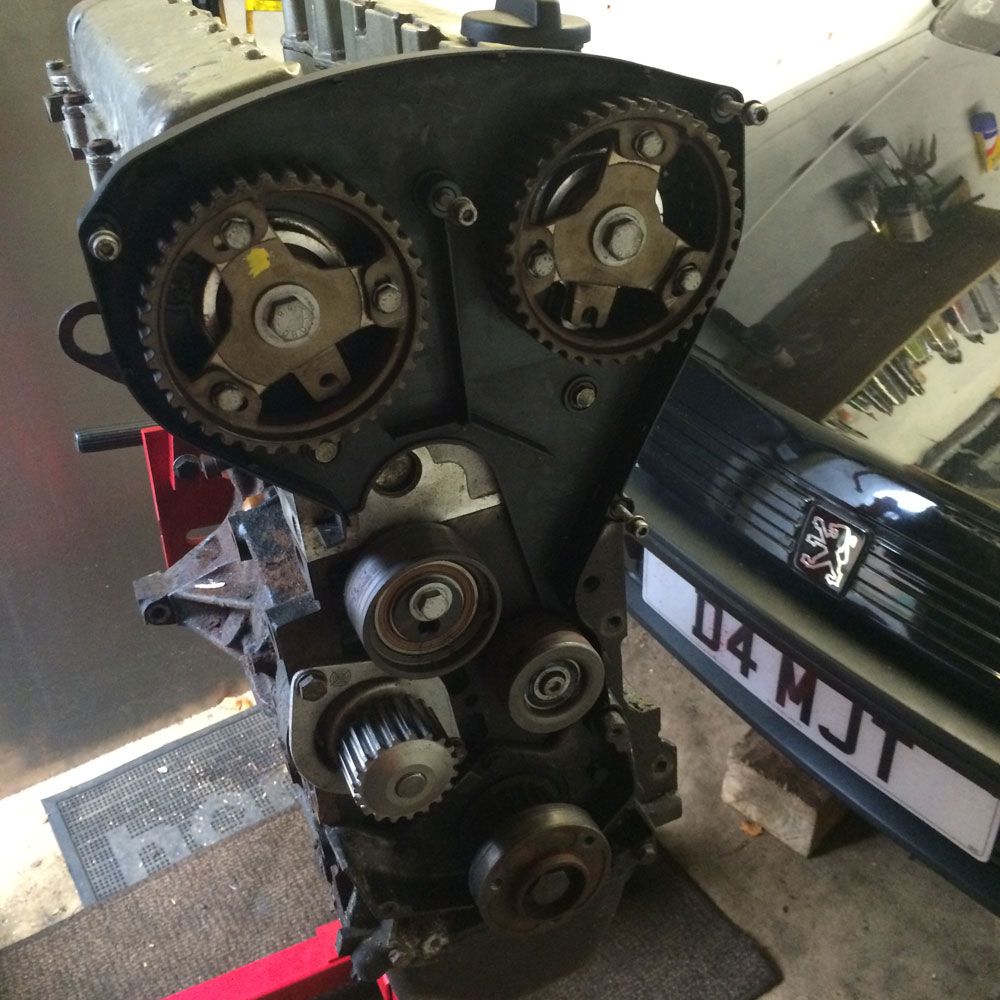 If you don't have an impact gun, it's worth cracking the cam pulley bolts (15mm) loose before you slacken the belt off as it makes keeping the pulley from rotating a lot easier. If you have a windy gun you're laughing.  You can remove the tensioner guide pin: 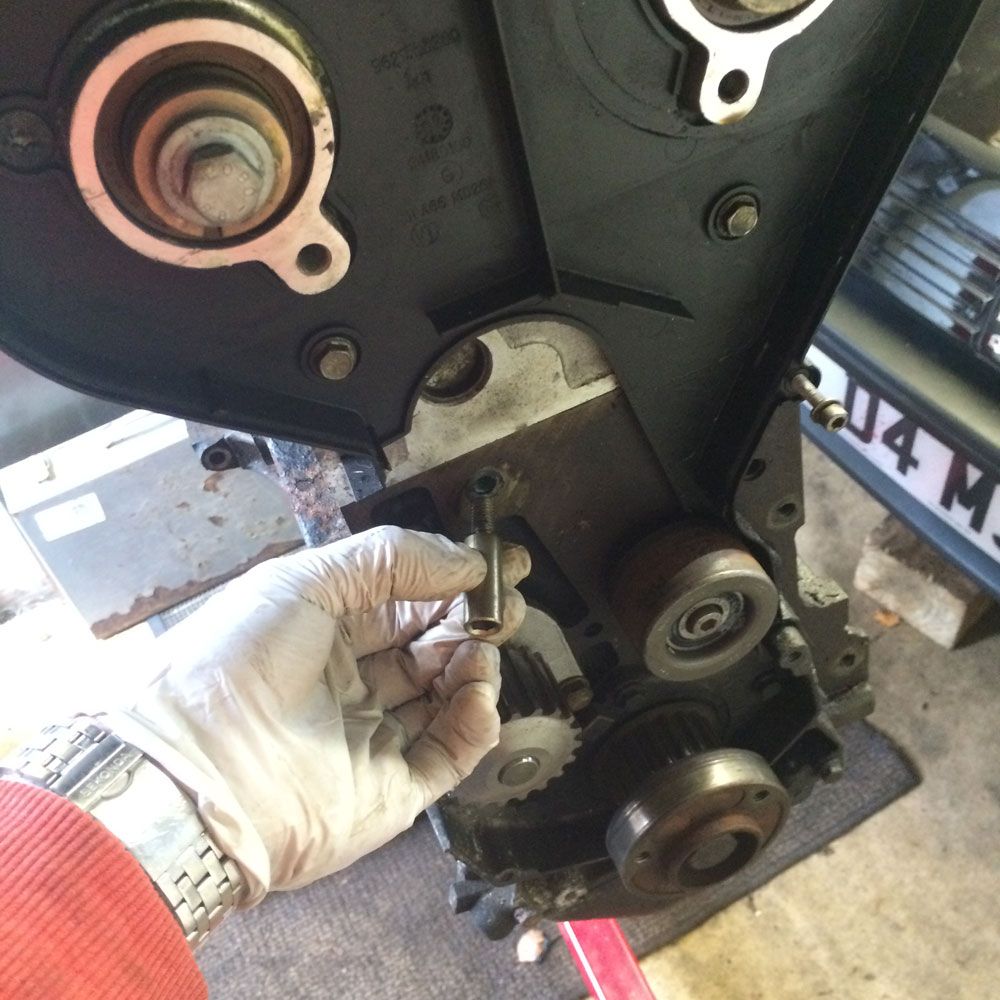 Remove the idler pulley: 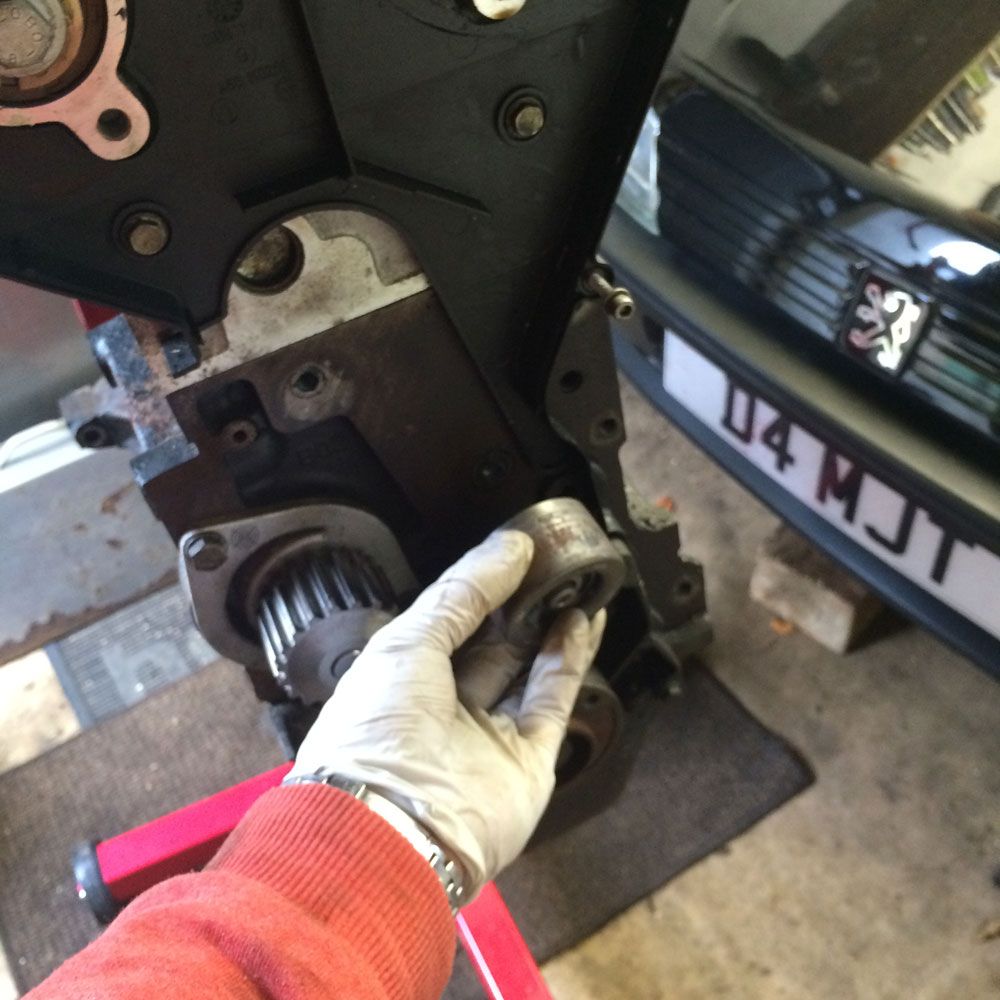 And pop out the water pump. These can be stuck fast into the block if they've not been changed in a long time, whacking it with a rubber mallet can help to loosen it up. 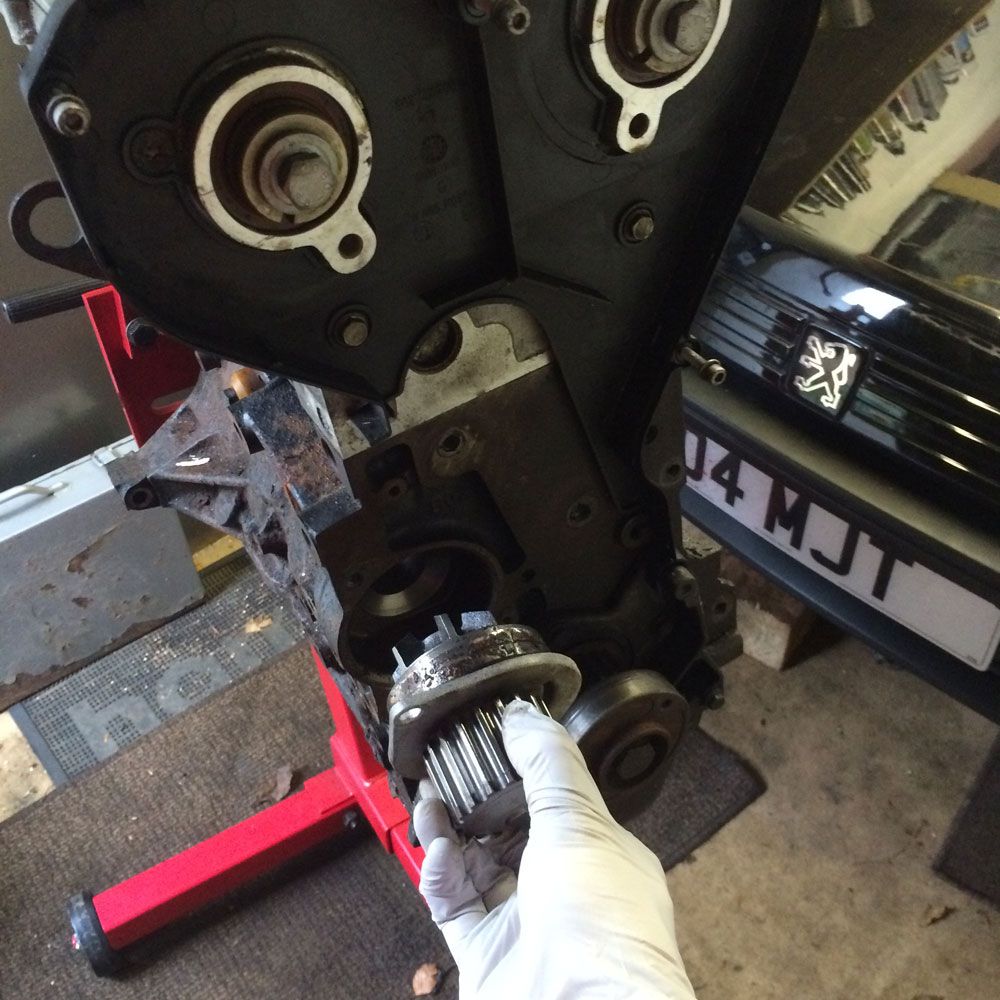 With all the water pump and timing gubbins gone, you can remove the rear timing cover easily: 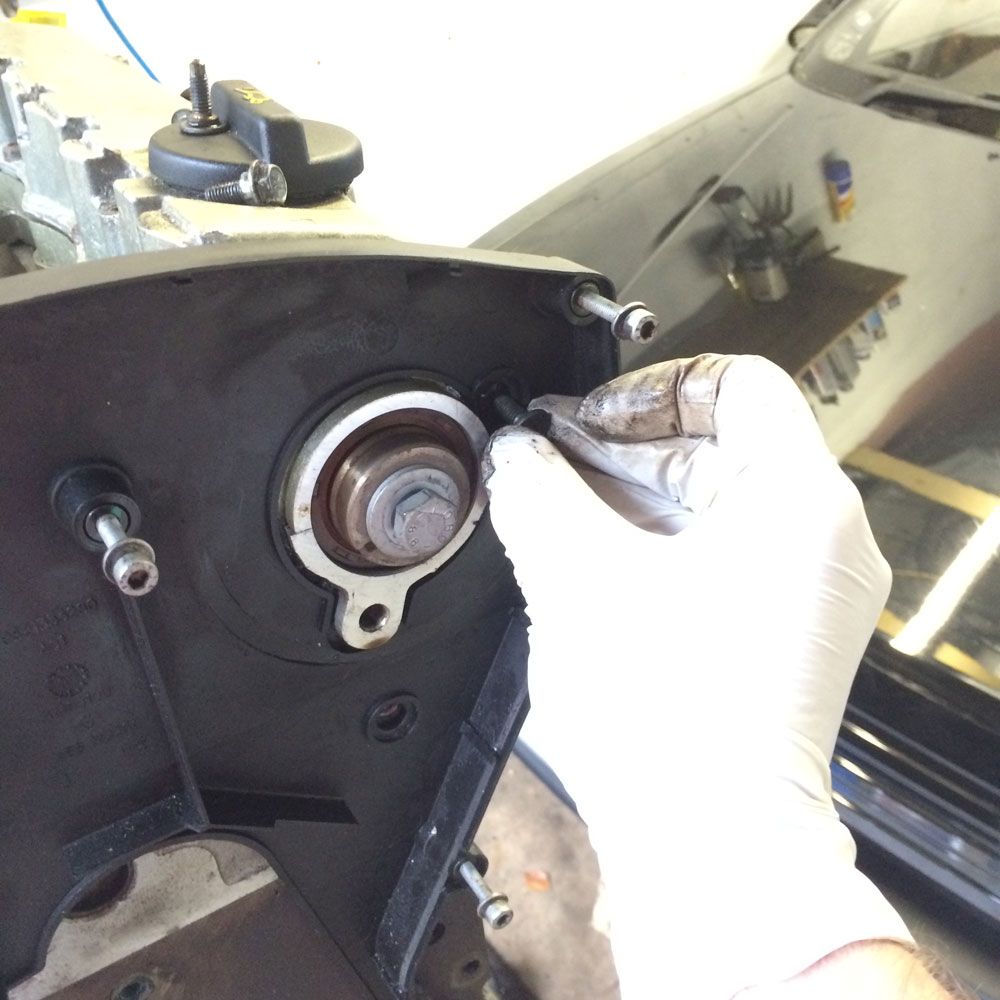 Which leaves a nice bare engine on one side: 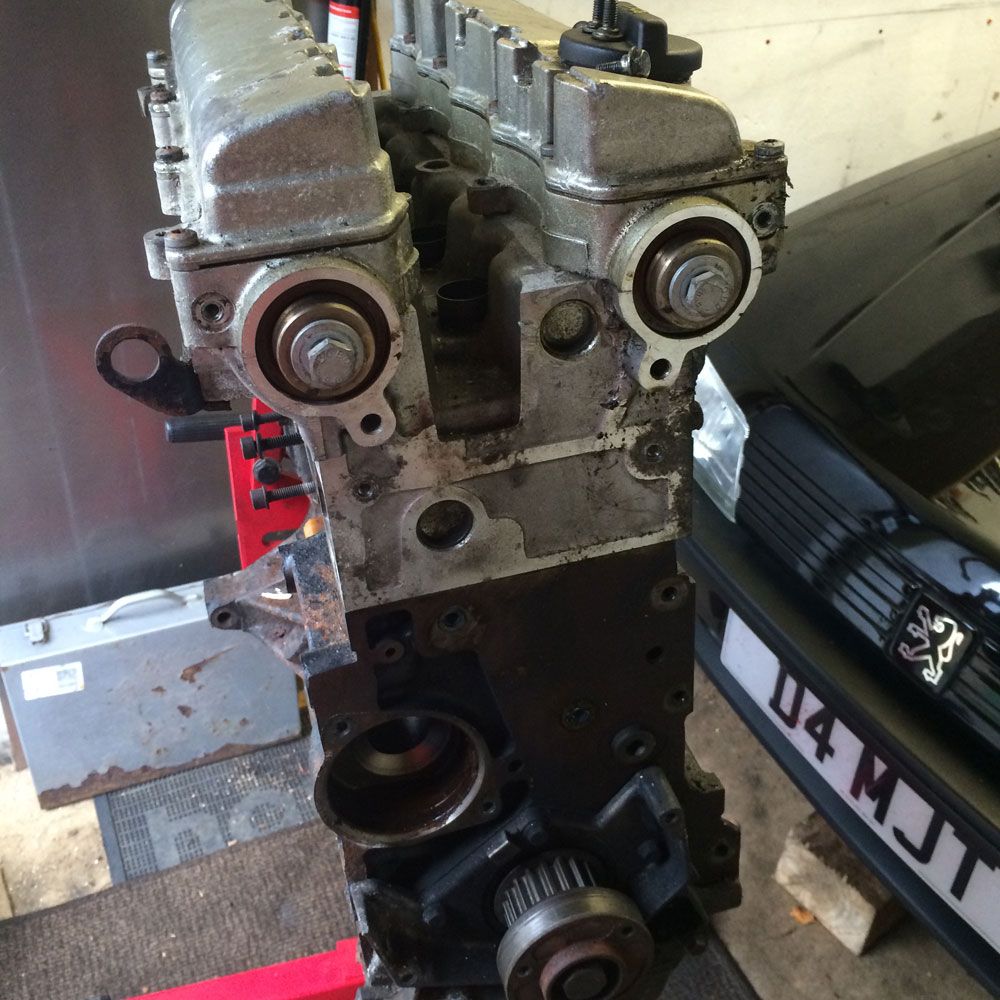 Moving around the other side of the engine, remove the thermostat housing: 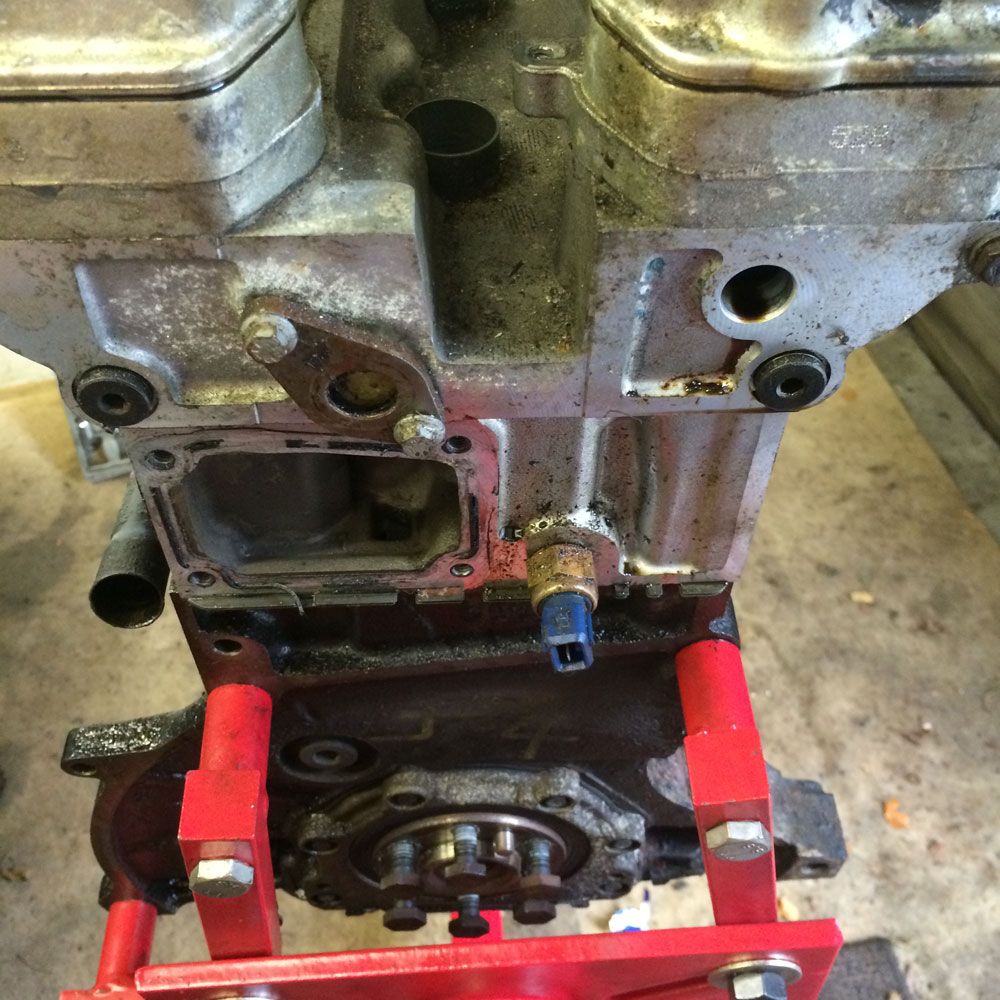 and the temp sensor: 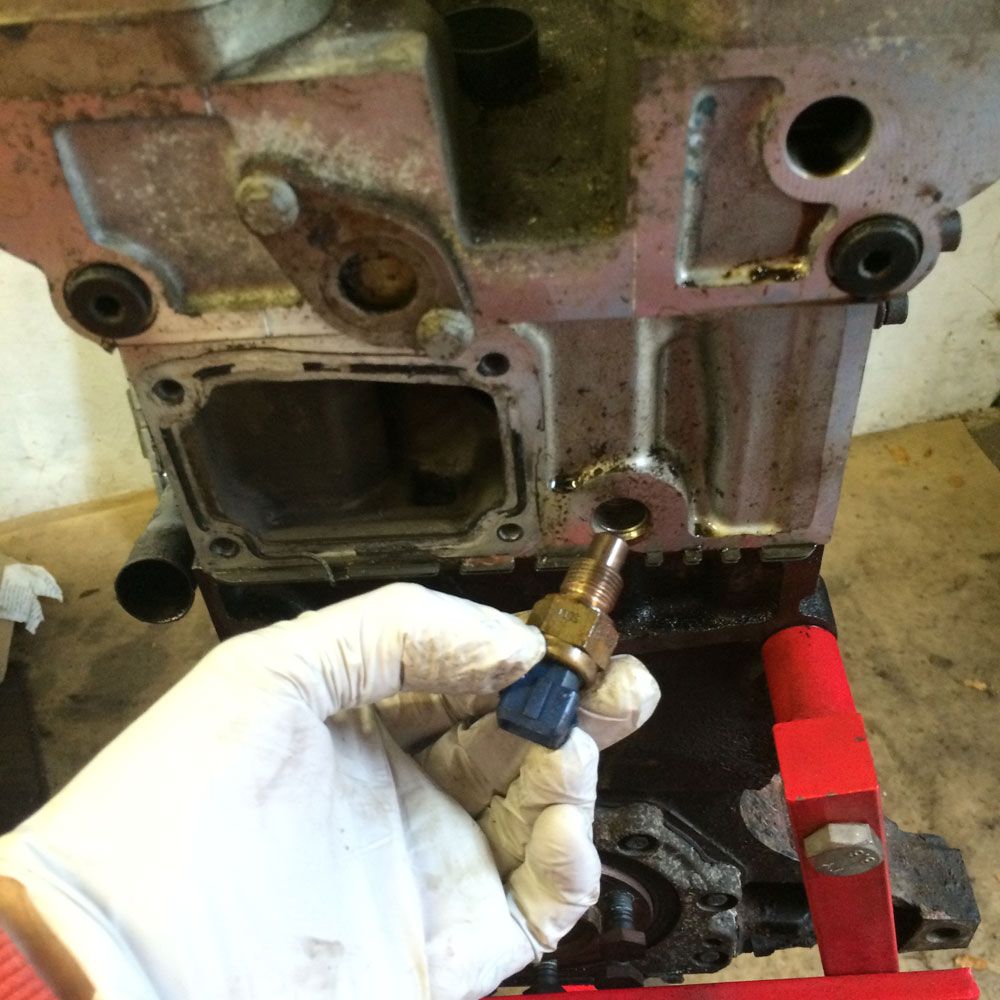 On the inlet side, I removed the 3 studs for the uppermost inlet manifold nuts: 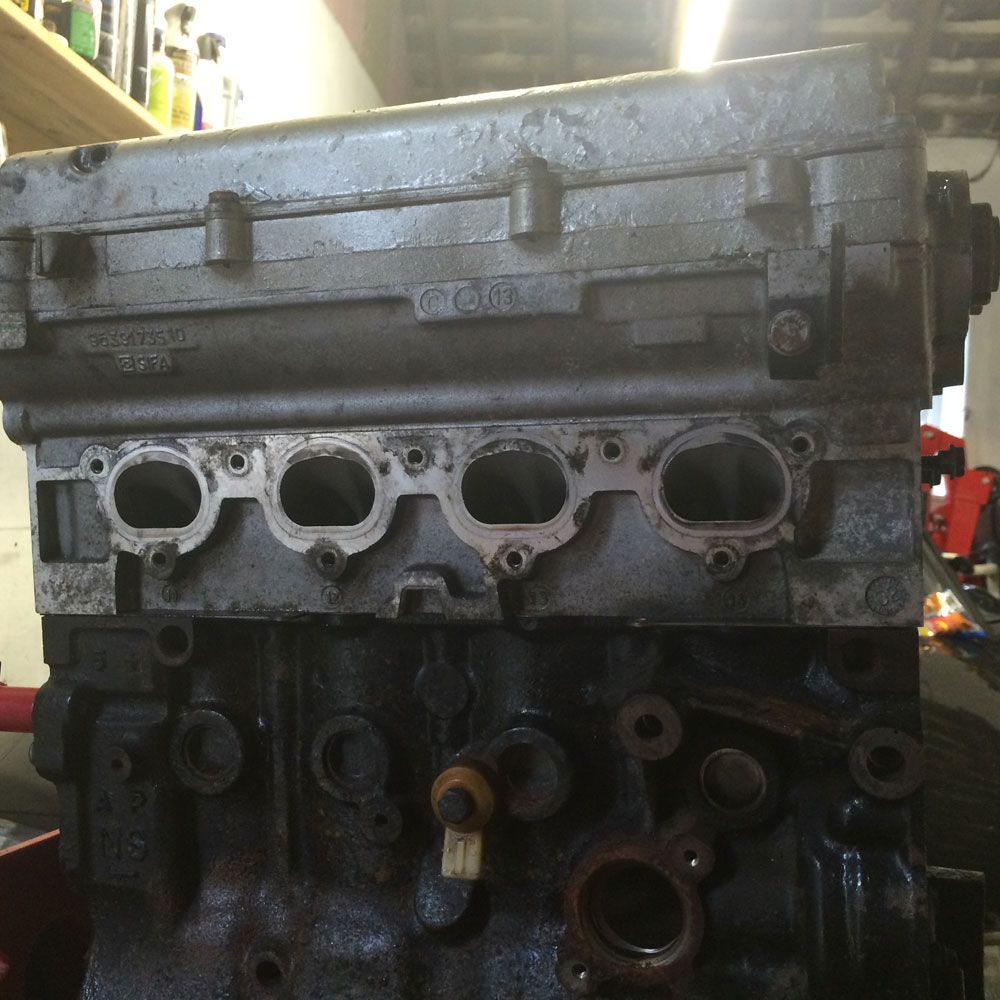 now I started stripping the top end of the engine down, so off come the cam covers, and slacken the 20 bolts that hold the cam ladders in place: 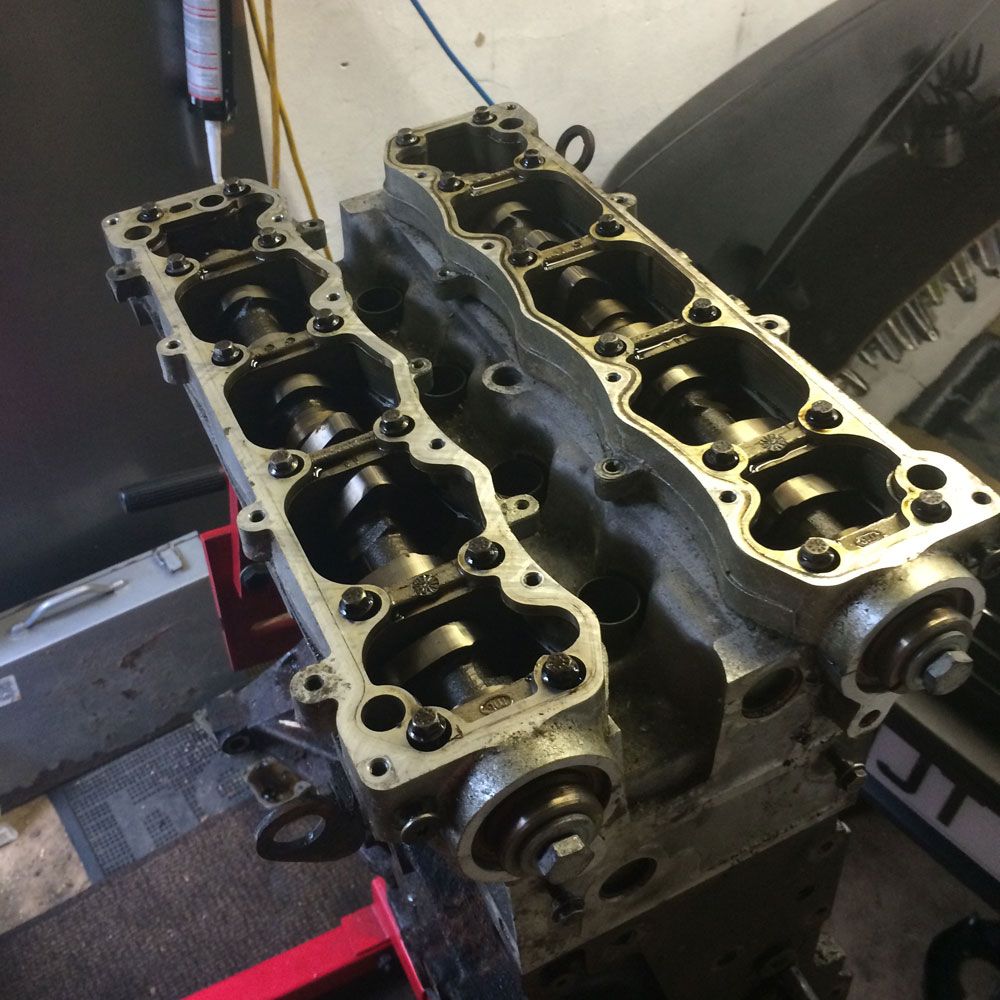 These now pull away, and the cams are left exposed: 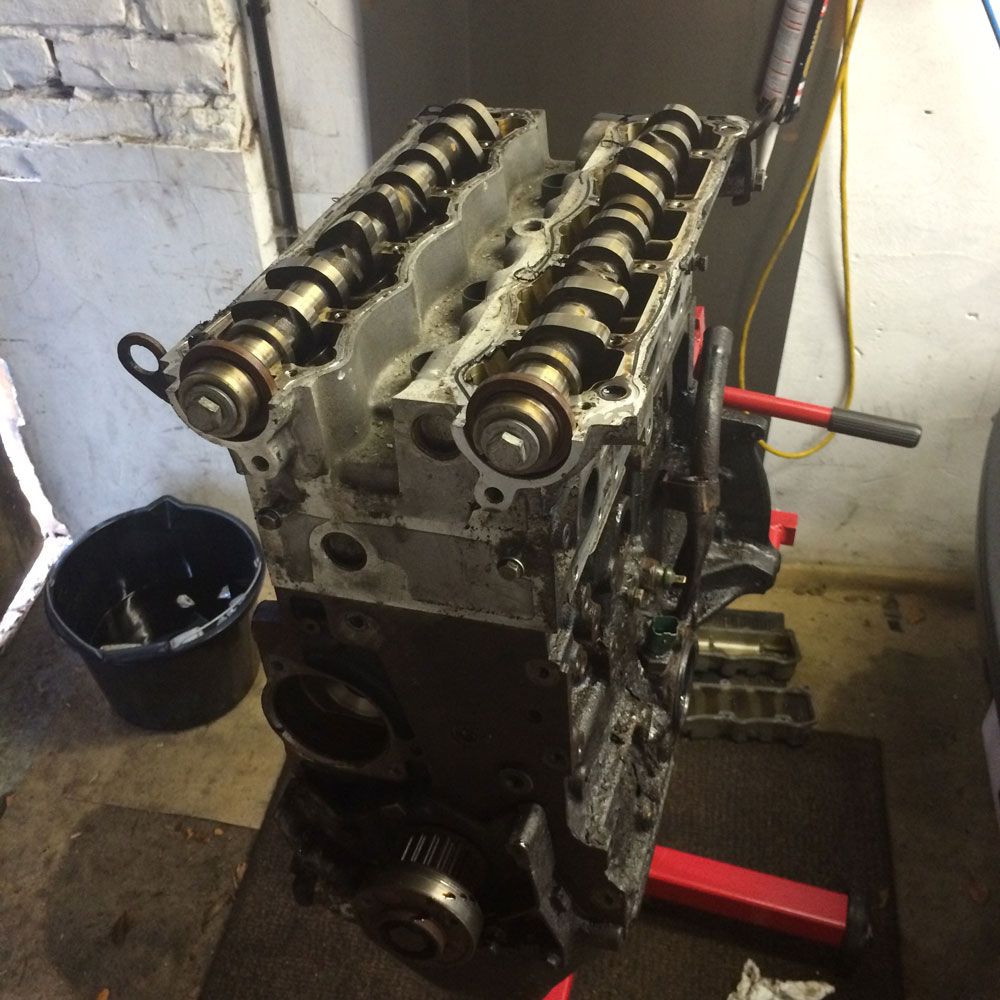 You can now pull the cams out and pop them somewhere safe:  and slacken the head bolts and remove the cylinder head: 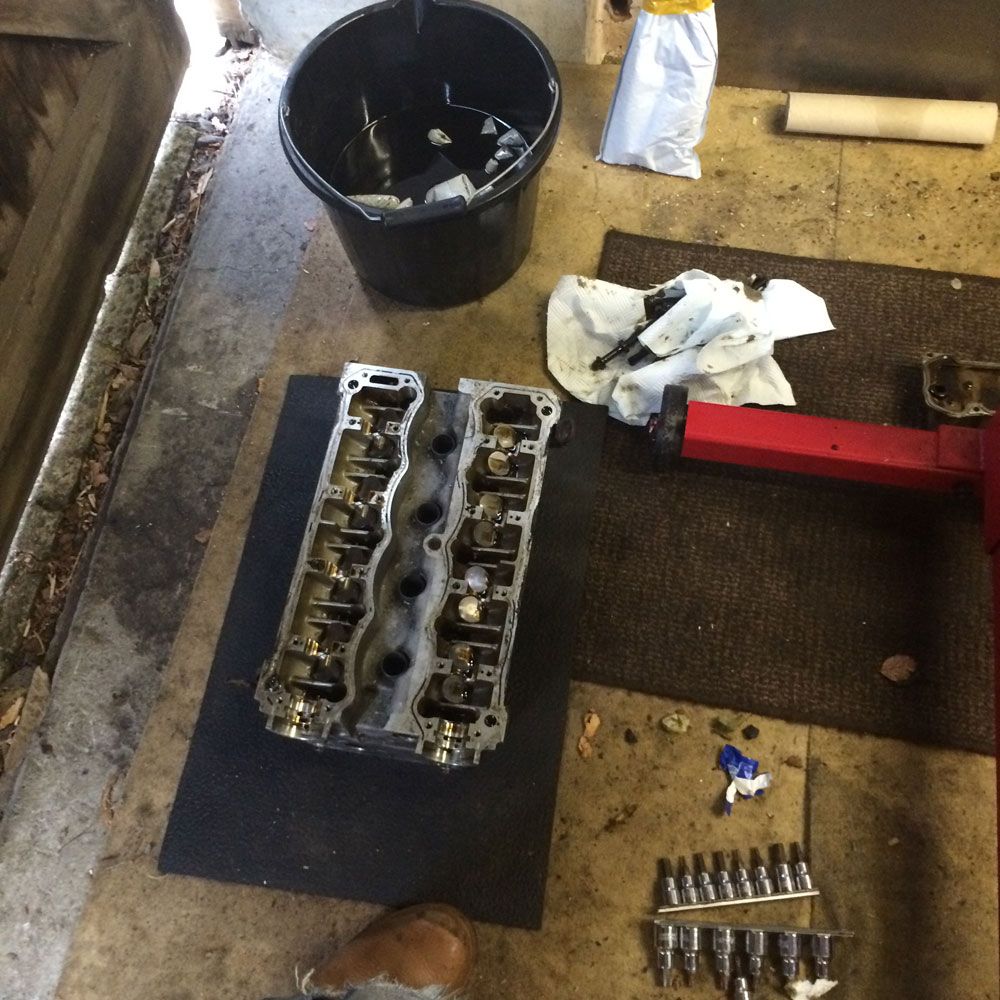 The head gasket may or may not come away with the head, it remained on the block here: 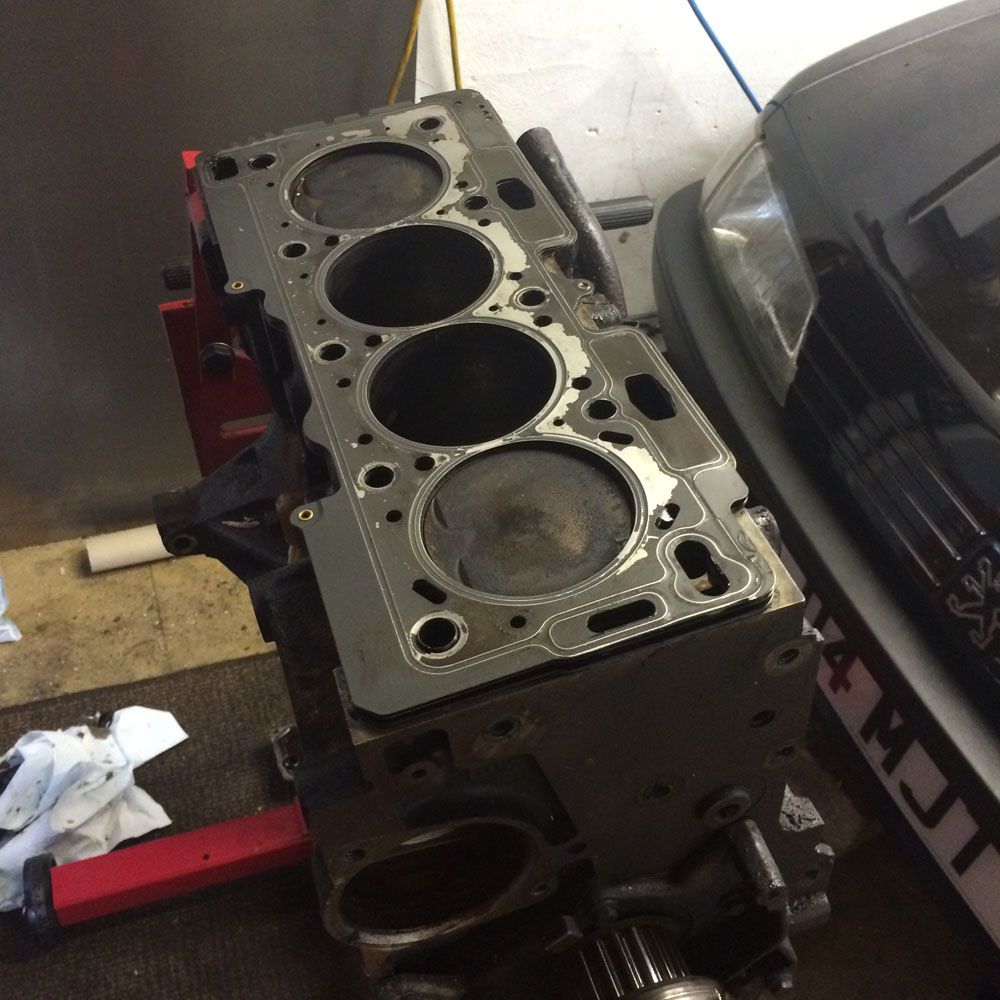 Remove this and throw away, one bottom end:  Time to turn the engine over, and start fiddling with the sump, there are around 20 nuts / bolts ish to remove: 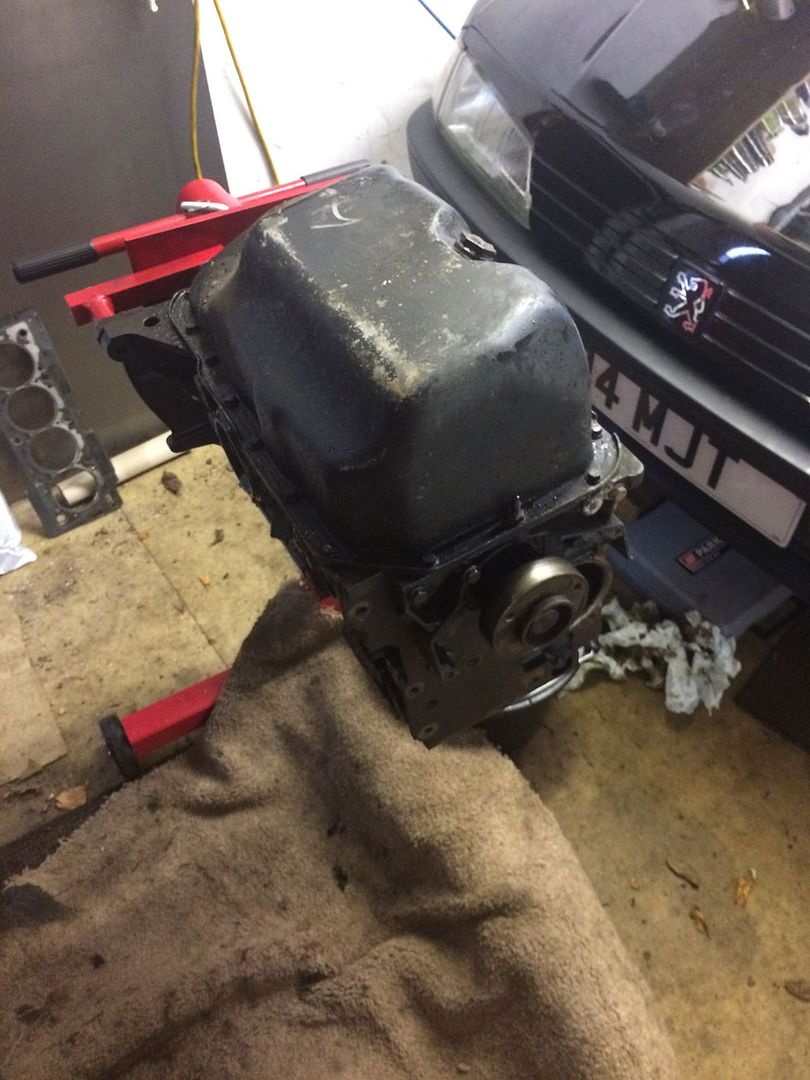 Bosh: 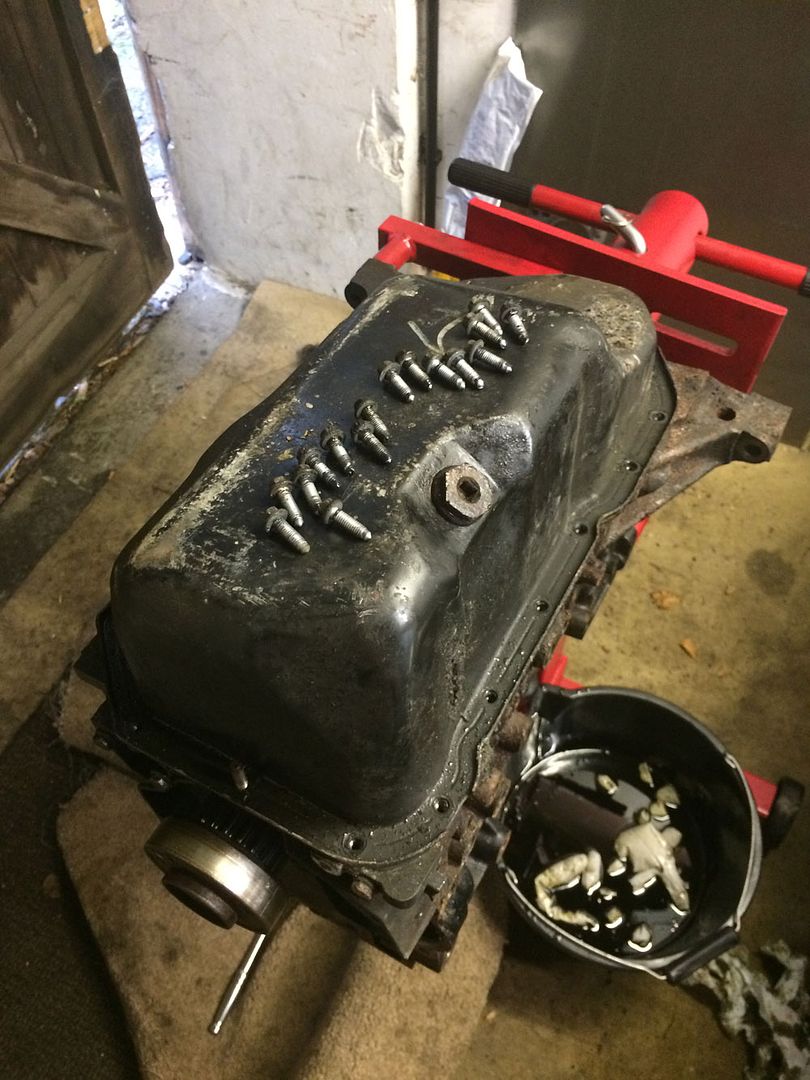 With some persuasion the sump should lift away and you will be able to see the oil pump: 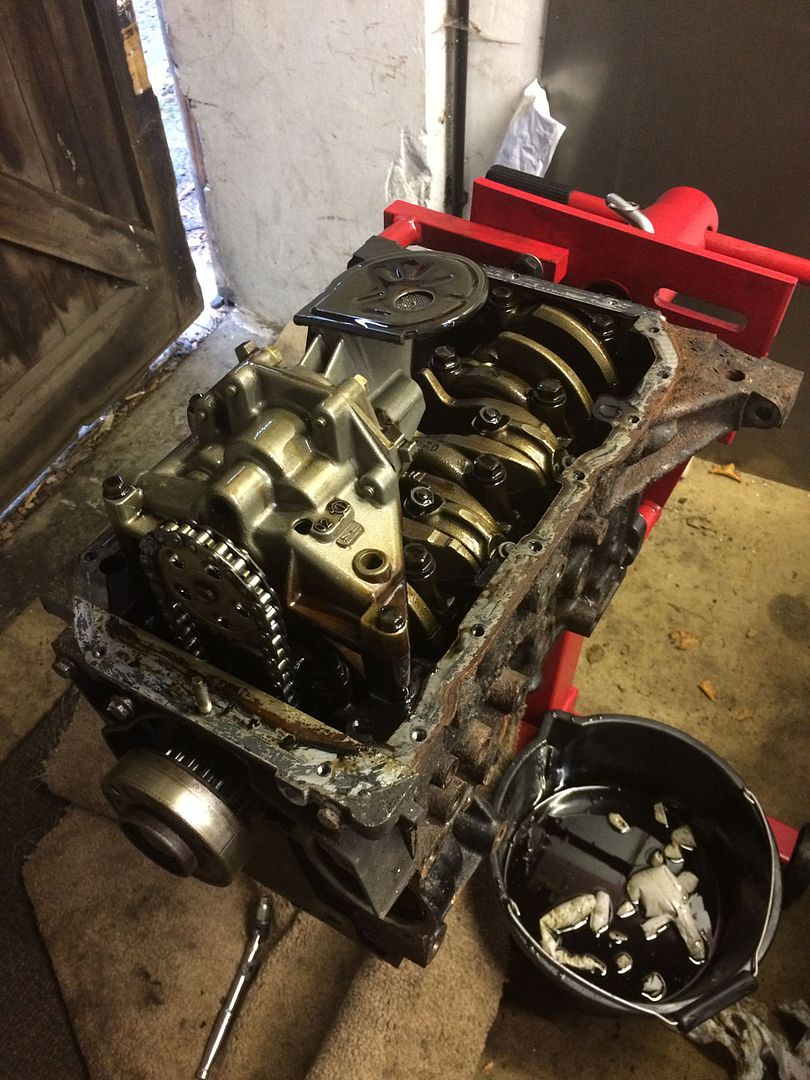 Check the oil pickup strainer, basically you want to see a nice clear gauze with no metal shavings in it, much like this. Oh. Errrrrrrrr 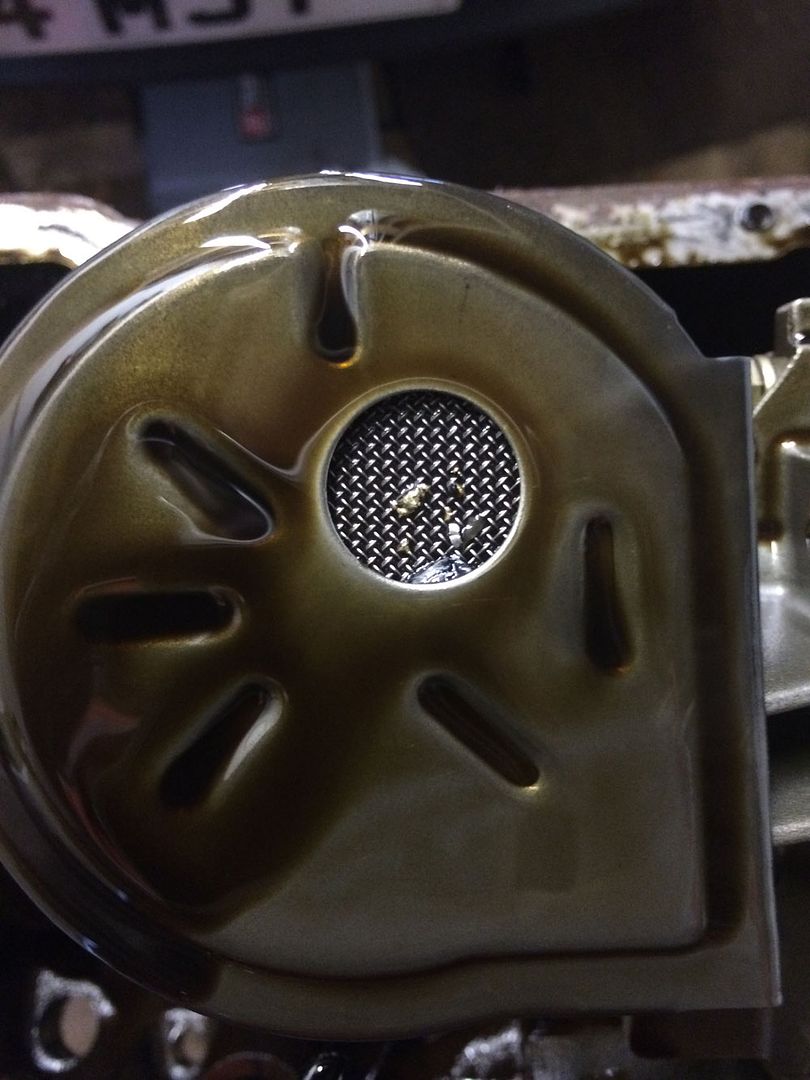 There are 3 bolts holding the oil pump in, remove these and remove the oil pump, lift from the opposite end to the chain and it will come out. Next the crank end plates need to come off, this is the crank pulley end, there are 5 or 6 10mm bolts to remove and it will pull away: 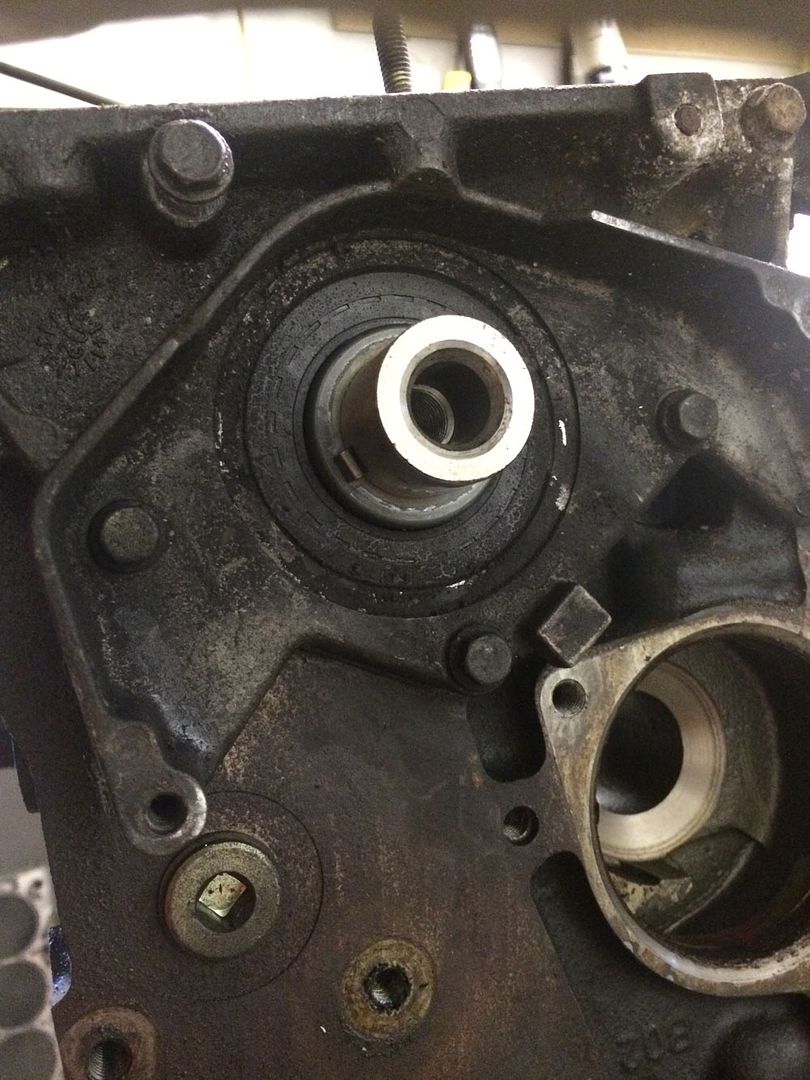 Tada: 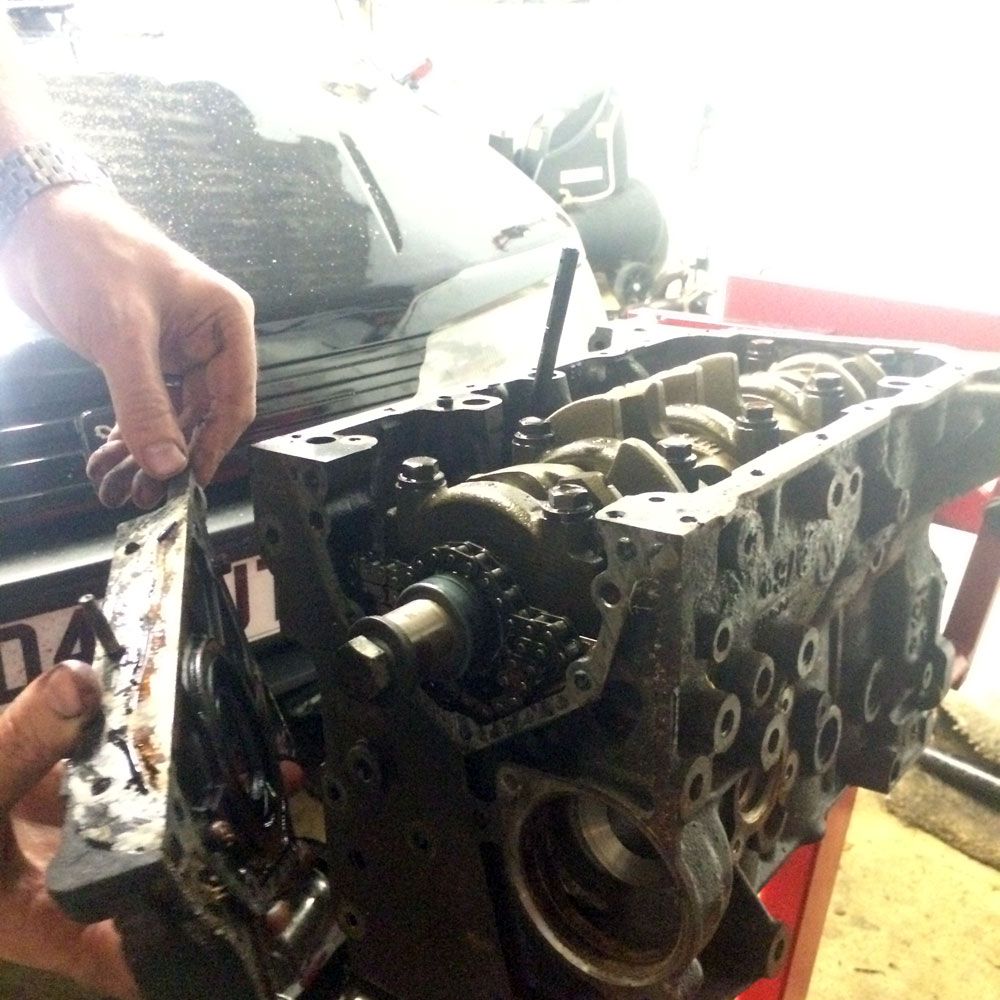 Crank n ting: 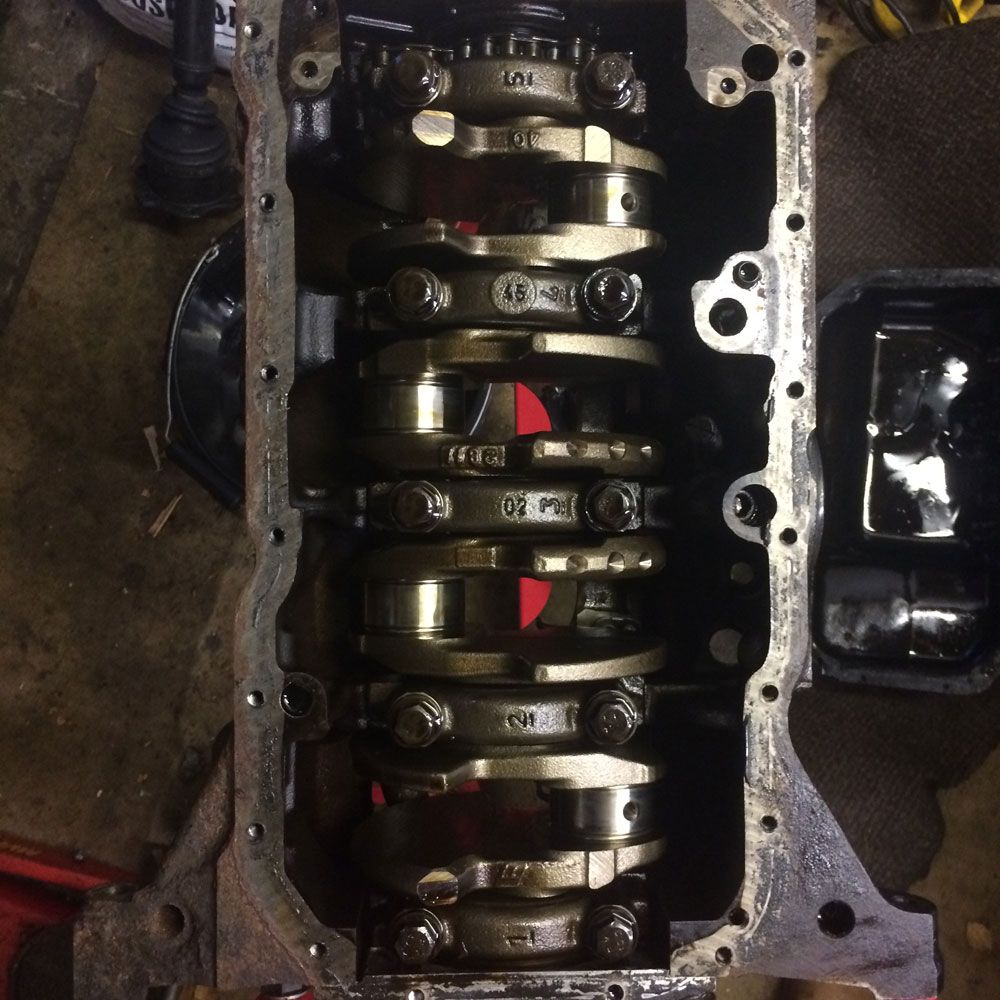 I didn't get any pictures but at this point I removed the pistons by unbolting the conrods, and using the wooden shaft of a hammer to gently tap the rods down through the cylinders, catching them as they came out. These were then bagged and labelled. One or two of the rod bearings were showing signs of wear:  And also the piston skirts, the consensus of opinion seems to be that this is caused by piston slap, and opinions are differing on whether it's worth re-using them or not: 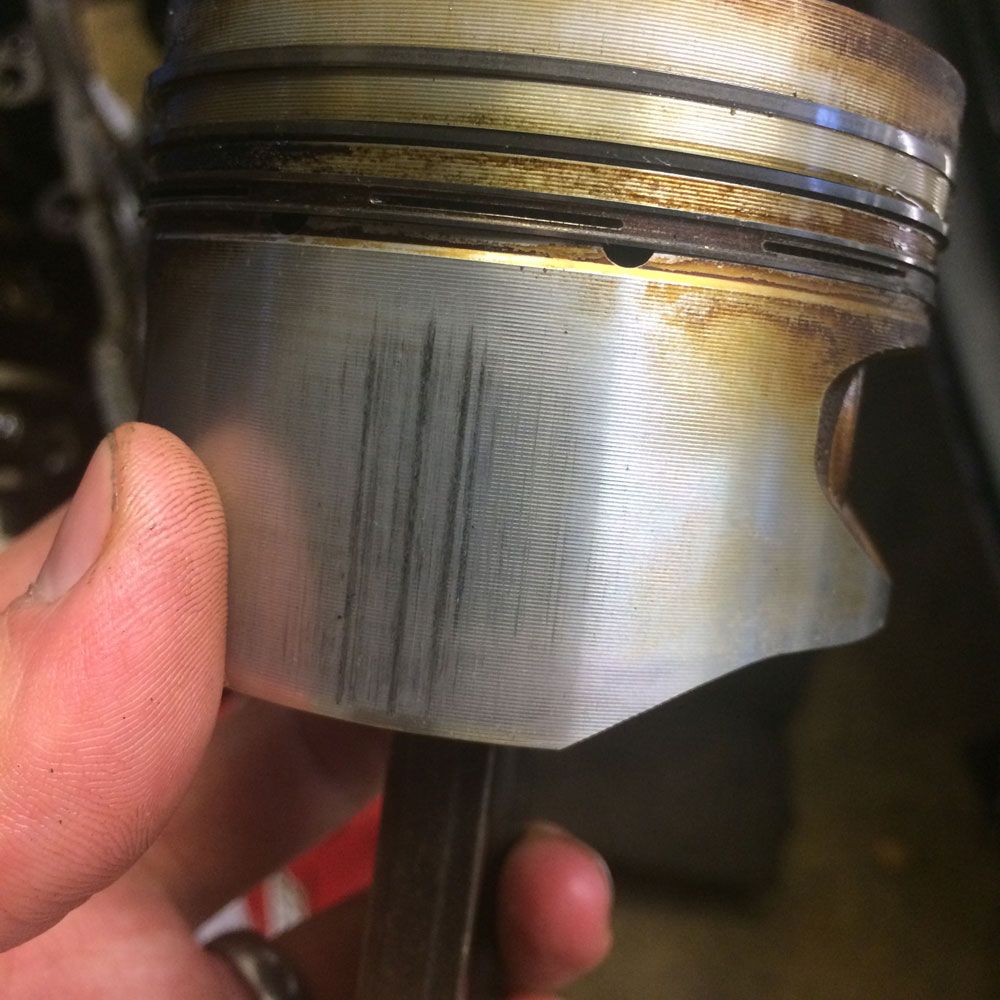 I now dropped the block off the stand and onto the floor so I could get access to the rear crank plate, removing the engine stand from the engine was necessary to access all bolts: 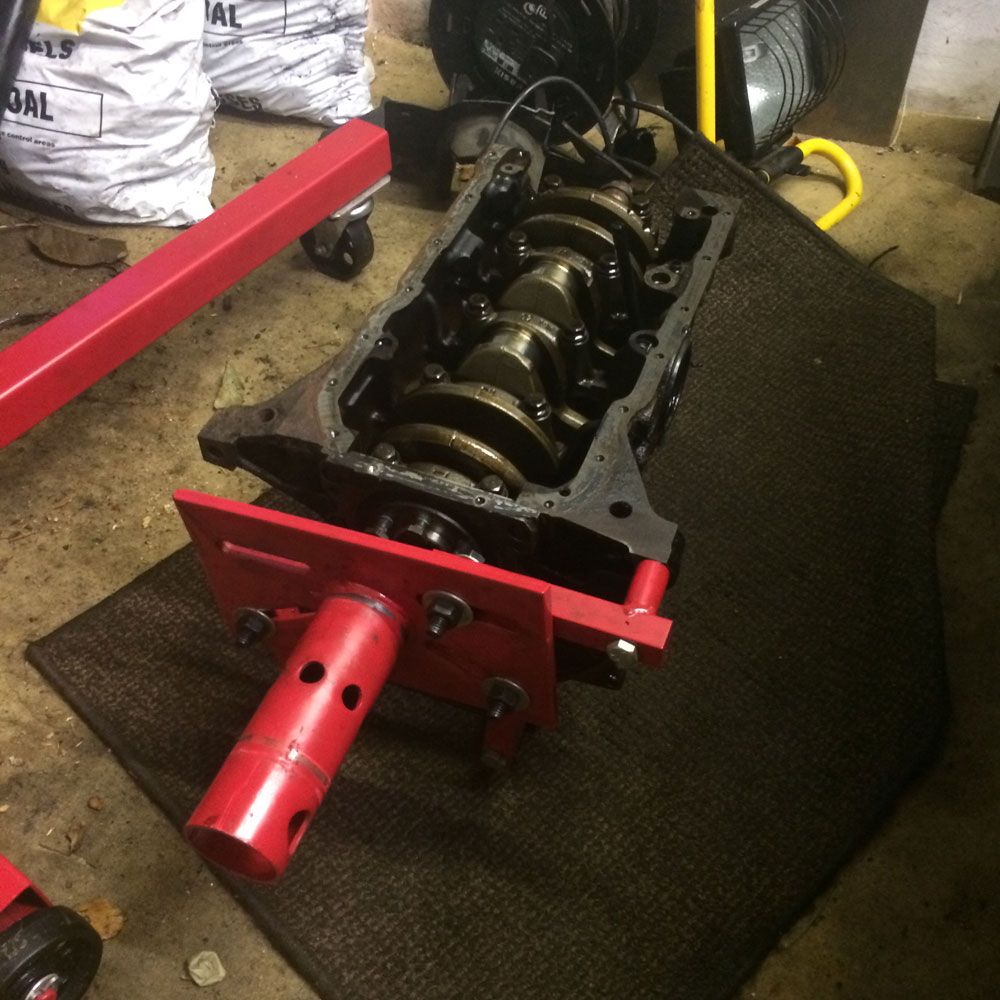 At this point I just removed the main crank bearings and bolts and lifted the crank out: 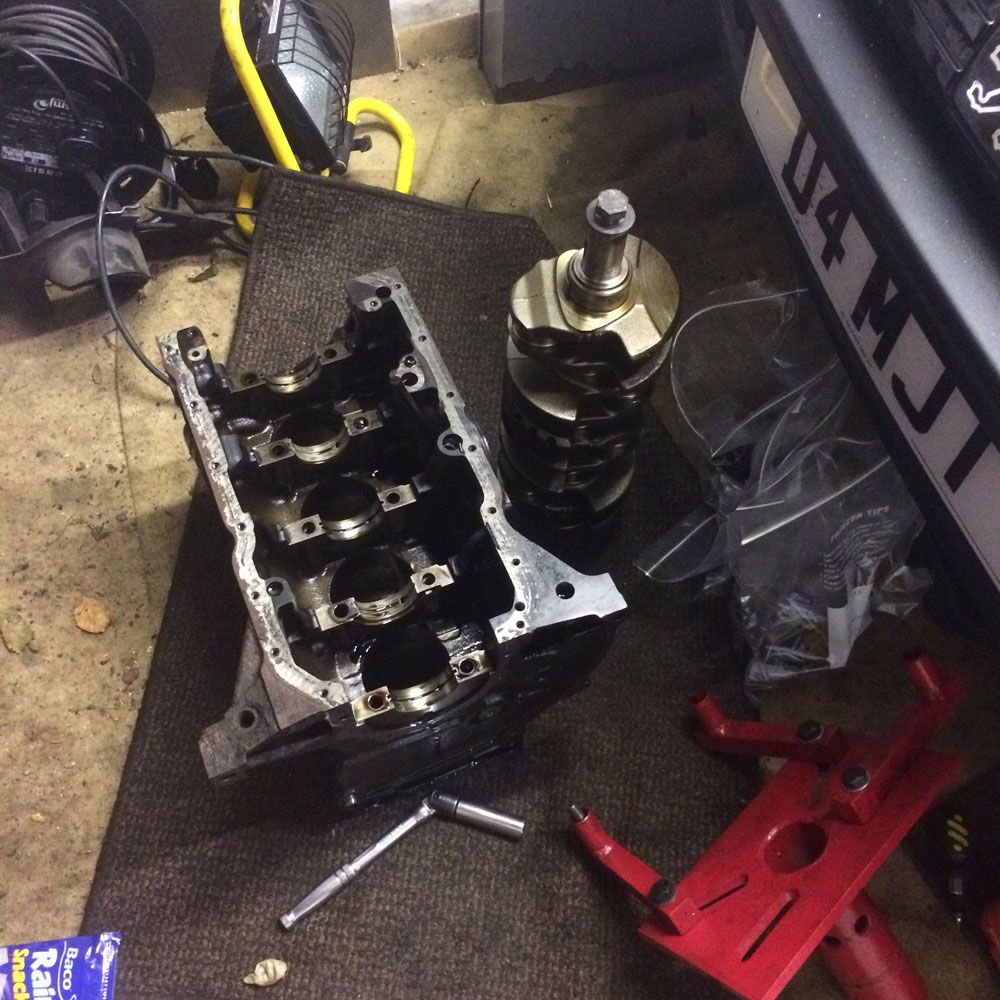 There are some marks present in the cylinders, this is probably the worst: 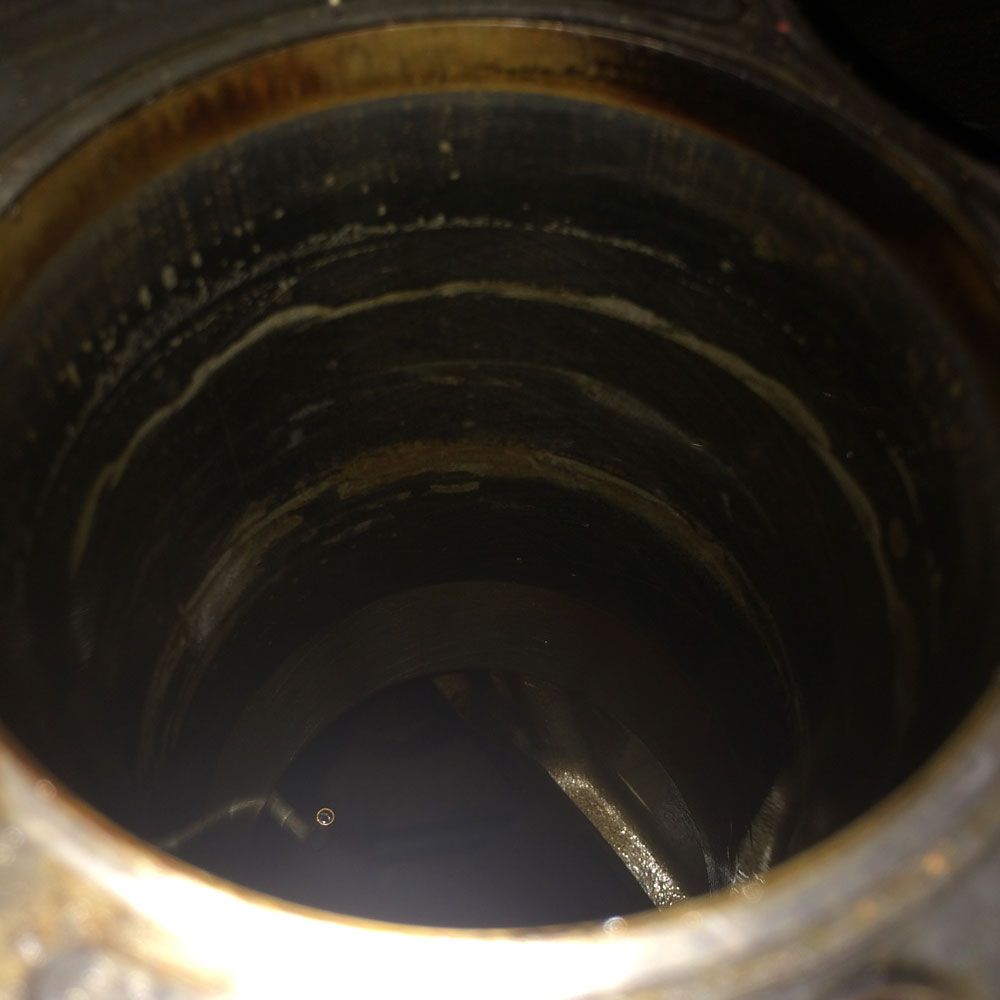 Next plan of attack is going to be getting everything cleaned up and establishing what condition the block / cylinders are in. No point worrying about re-using pistons if the block needs a bore lol. It's all quite fun, enjoying it thus far, obviously it'll never work again. Also, the above is the steps I've taken, not necessarily the right ones. If I've done anything blindingly stupid do point it out! :y: |
Good work! I was the same and had never done it before but you get into the swing of it and it's all rather simple really.
|
Quote:
tee hee x |
Should be quite nippy with a valver in being a S1! must weigh the same as a bag of peanuts? Salted OC.
|
Quote:
|
edit: repost
|
Quote:
|
Gloves? Fucking bender.
|
Quote:
|
Bit more progress with this, slowly slowly..
Mickswan was a legend and sent me his valve removal tools and giblets, so I've been able to crack on and get the head stripped down a bit. One head:  Once you remove the lifter, and compress the valve spring, you can remove these little badgers from the top of the valve: 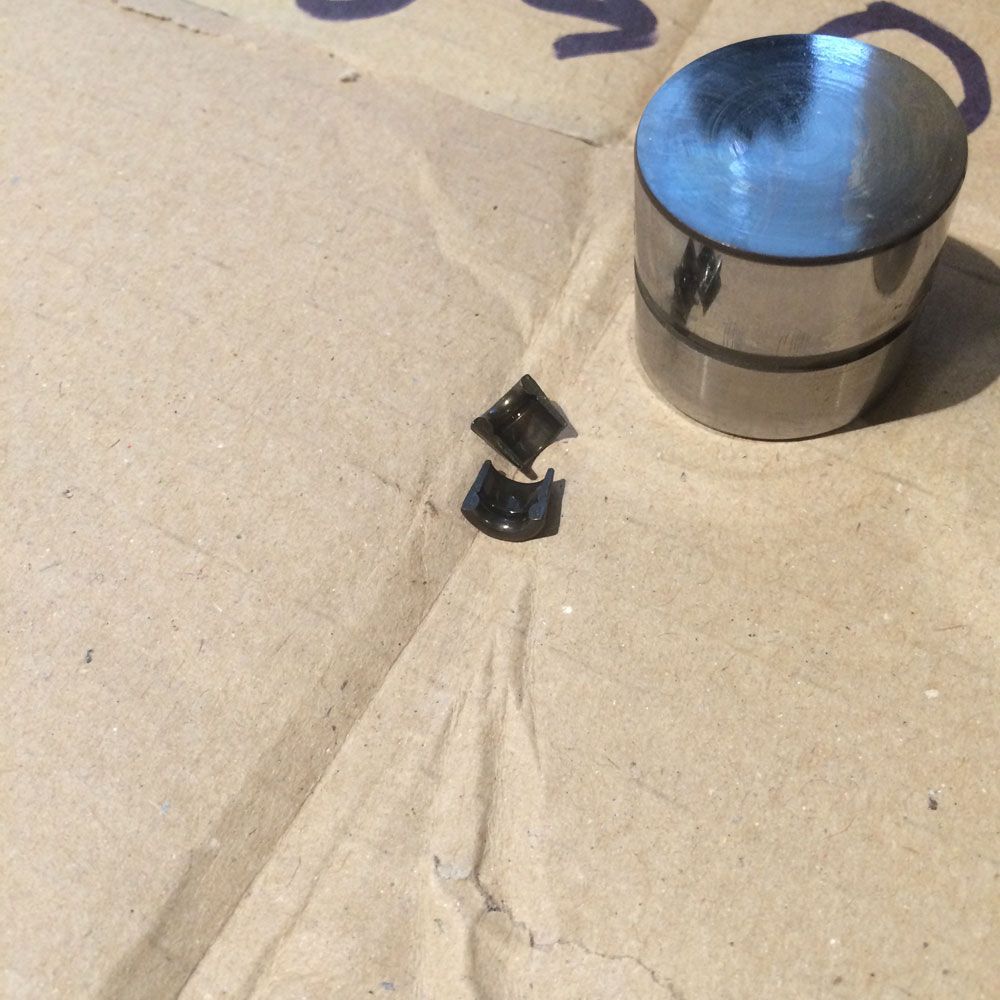 Then when you decompress the valve, you can just lift out the retainer and valve spring: 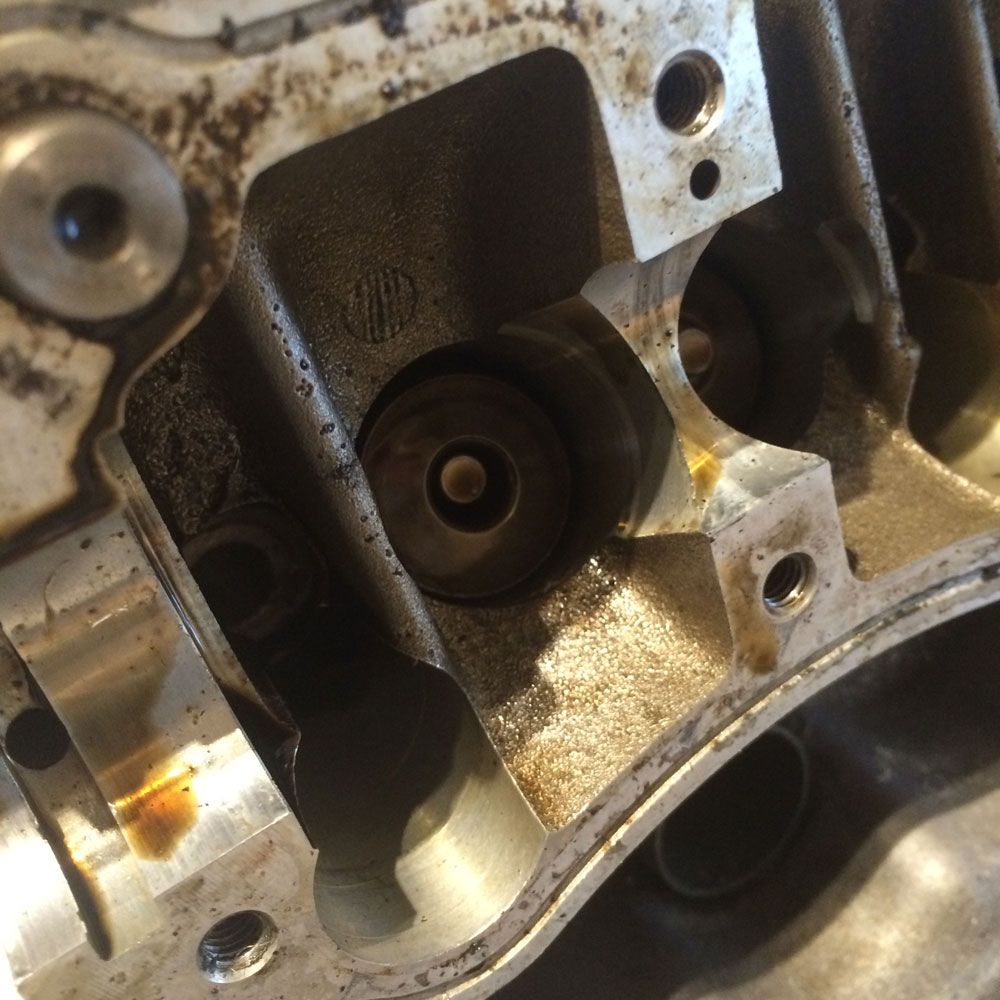 Removed: 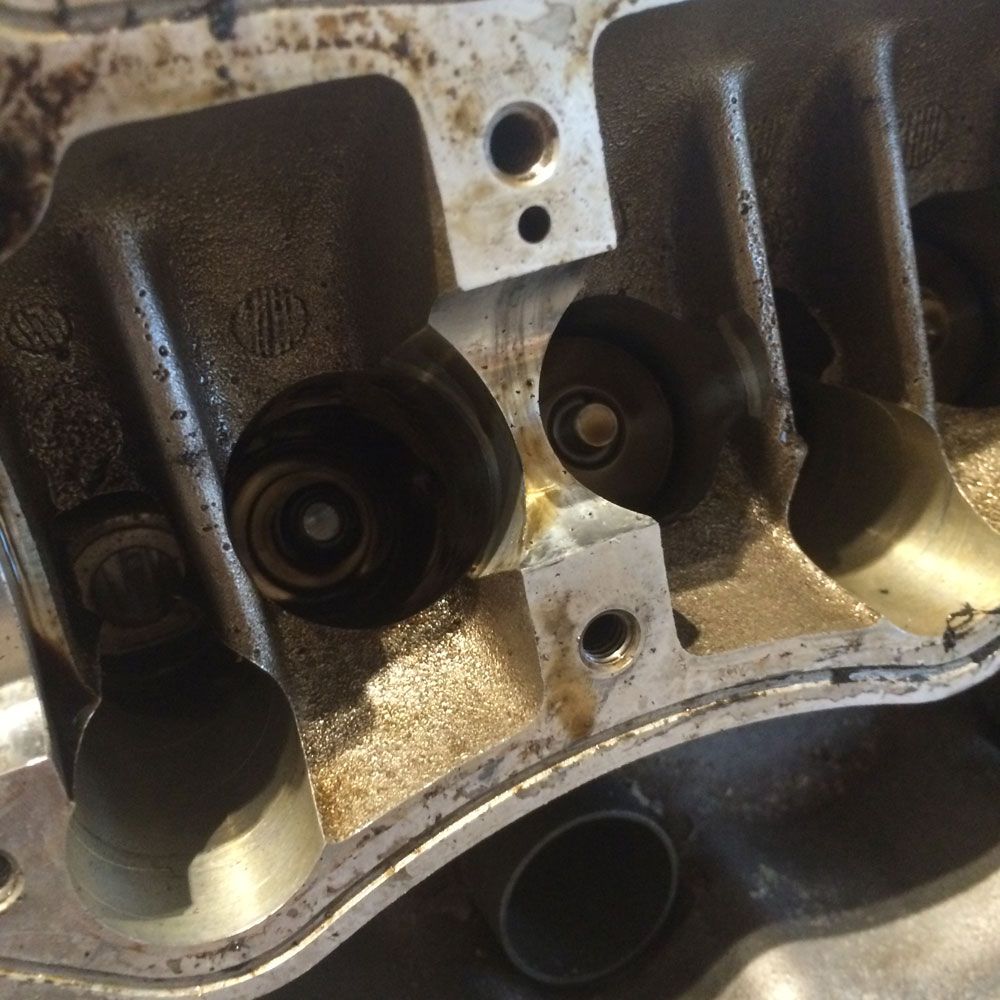 Repeat this a bit: 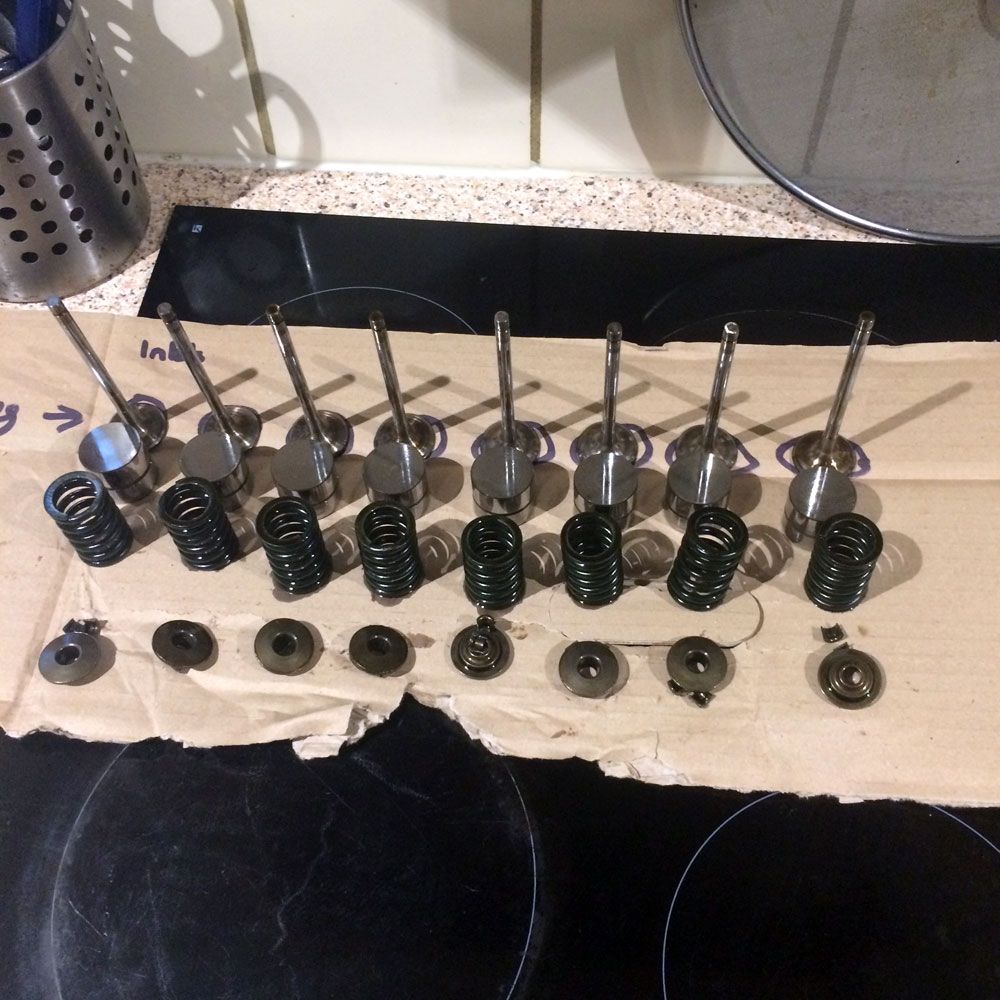 and voila, no inlet valves: 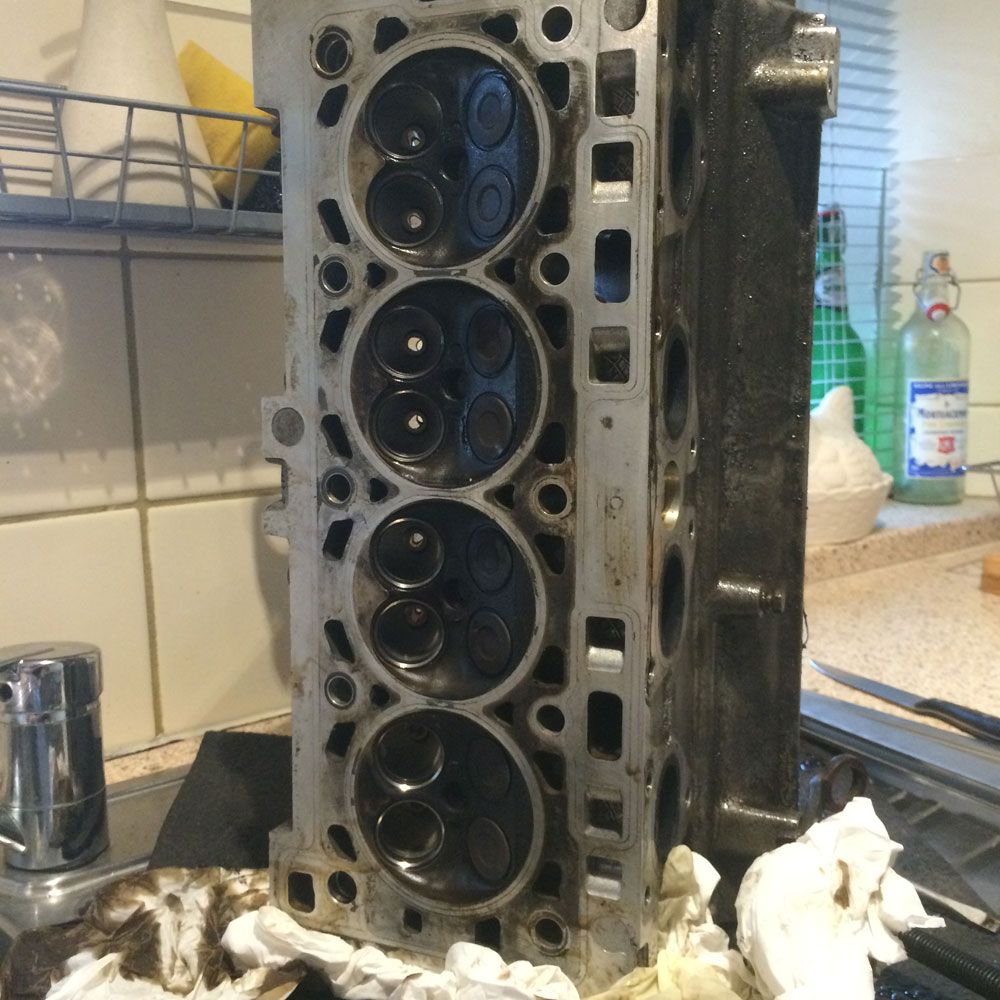 I've been tied up with Audi's and work and boring stuff so I've still got the exhaust valves to remove, and the valve stem oil seals to take out, but it's all progress! |
Nice update
|
Any updates bumder?
|
Quote:
I've done nothing. FML. Depending on how much work I get through today, I may push it out of the garage a bit later on. |
New year thread resurrection city.
So, still got an engine to build, and I'm also looking at what bits need doing to the shell. I've pulled it into it's new garage the other day, and had a peek at what's what. The underside rear of the car that I cleaned up last year is in good order, the beam itself has some surface rust so I might pull that off and tart it up, but the car is in good nick, forwards of the petrol tank still needs cleaned and protected, and painted, and the bay needs to be tidied. Other plans are to strengthen the strut tops, and probably add the Satchell Engineering front chassis strengthening kit. I'm also going to strip and tidy up the loom, so I can relocate the ECU gubbins inside the car rather than have it in the bay. I've also been busy sexing the wife, so we have a little one due in September, so between now and then the plan is basically to crack on cleaning up the shell and getting it ready to drop an engine into, then evaluate the engine plans, and either get cracking and finish my engine build, or continue with it at a slower pace, and just lob another used lump in to run while I do that. Dem gratuitous "as it stands" pics:  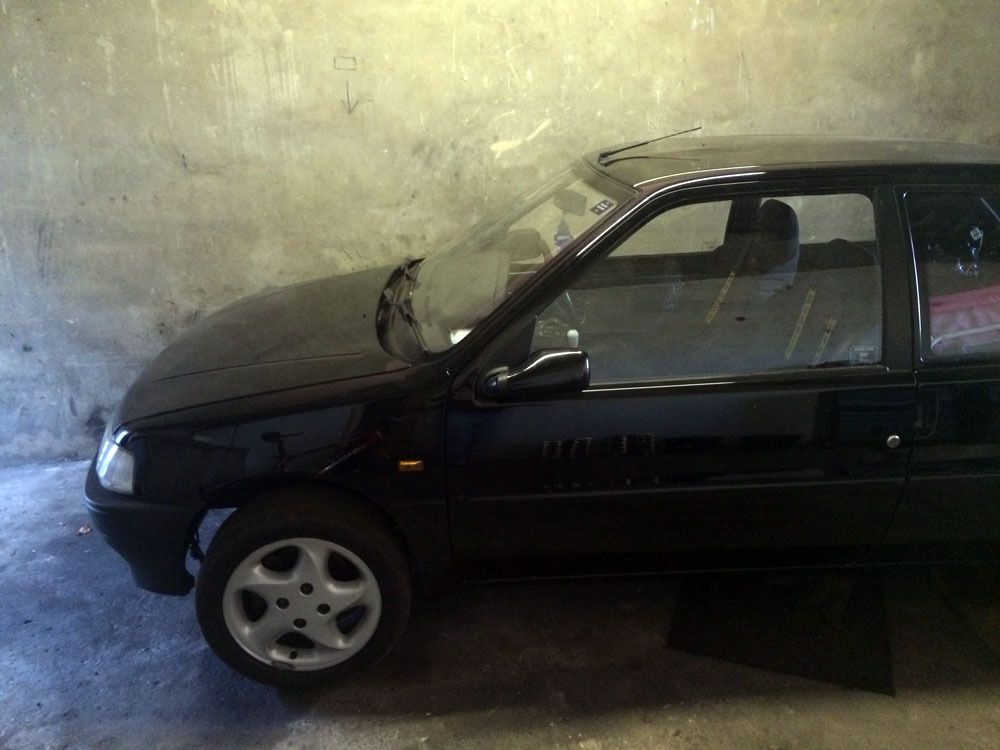  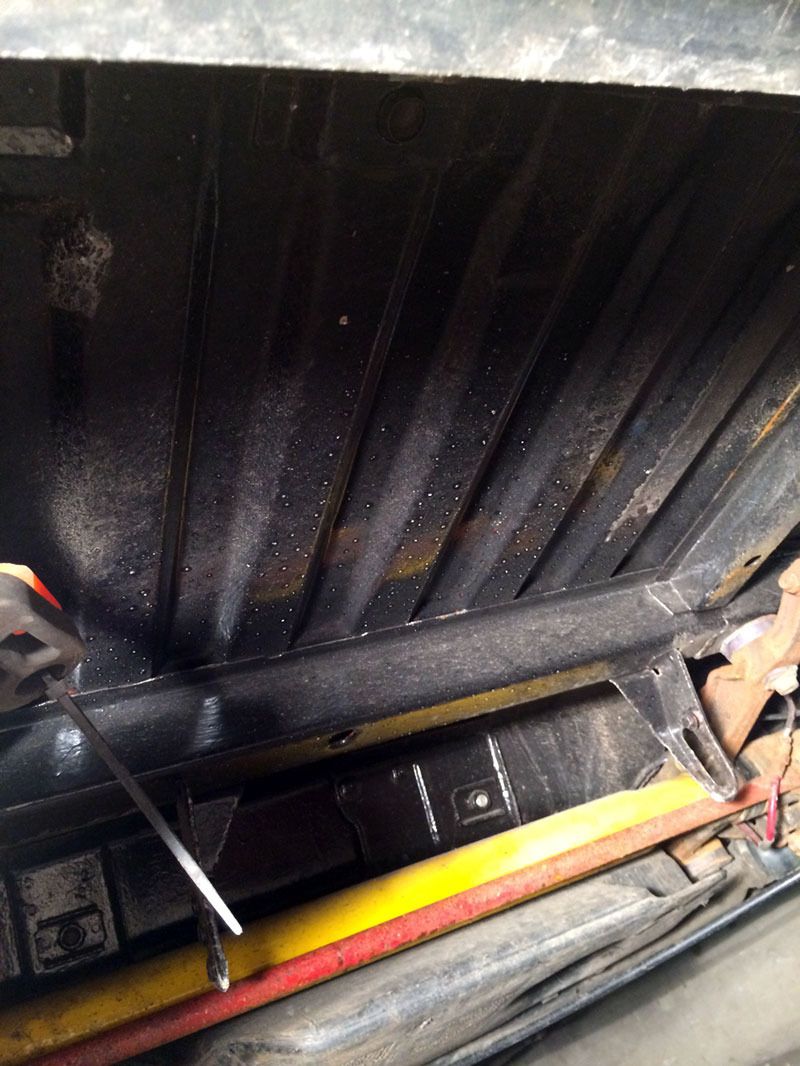 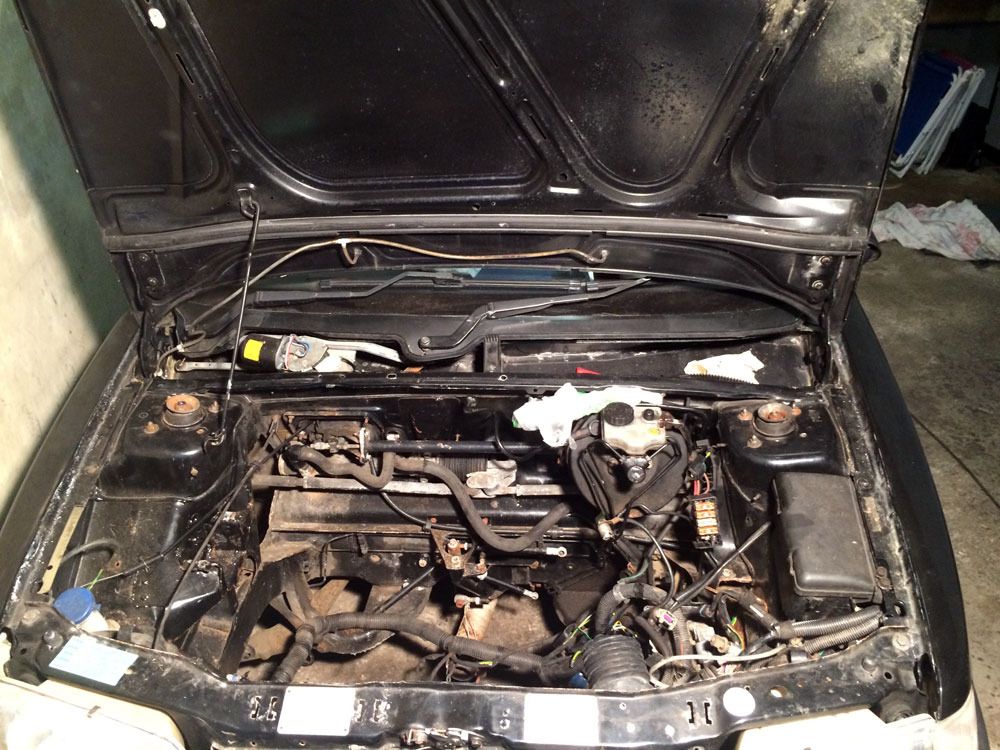 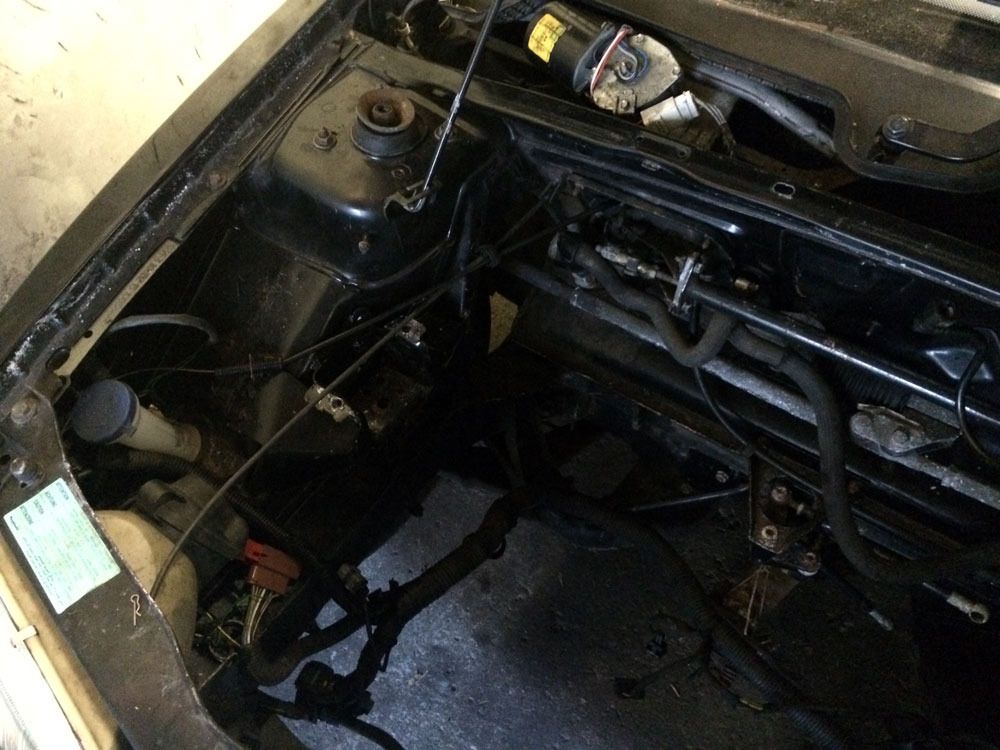 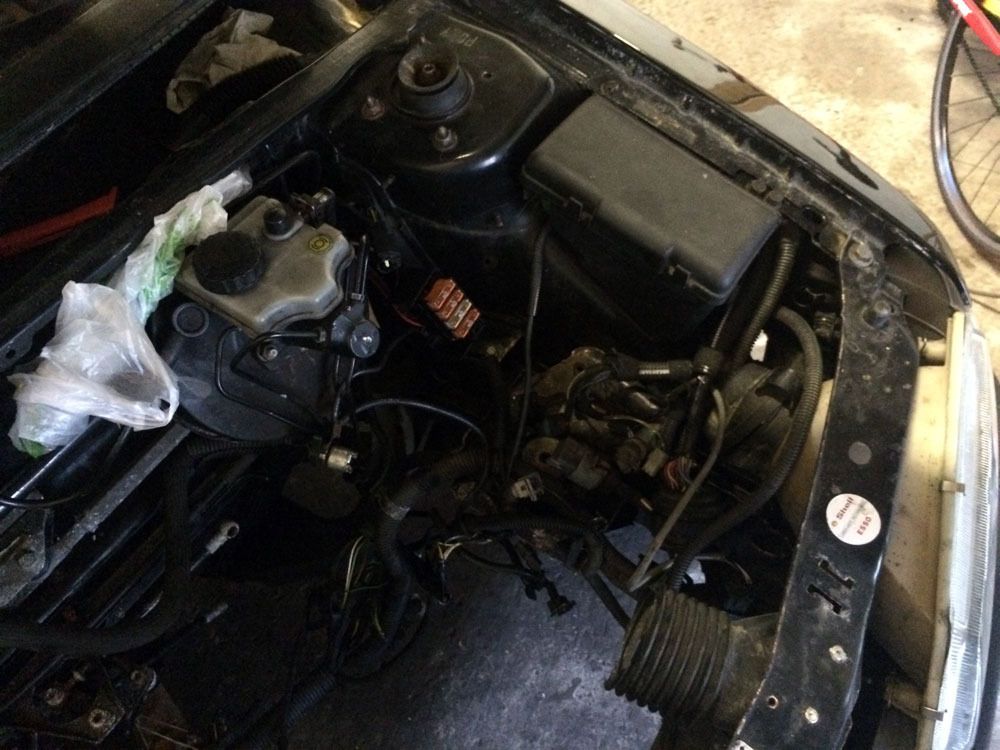 Also I need to clean this up a bit, urgh. 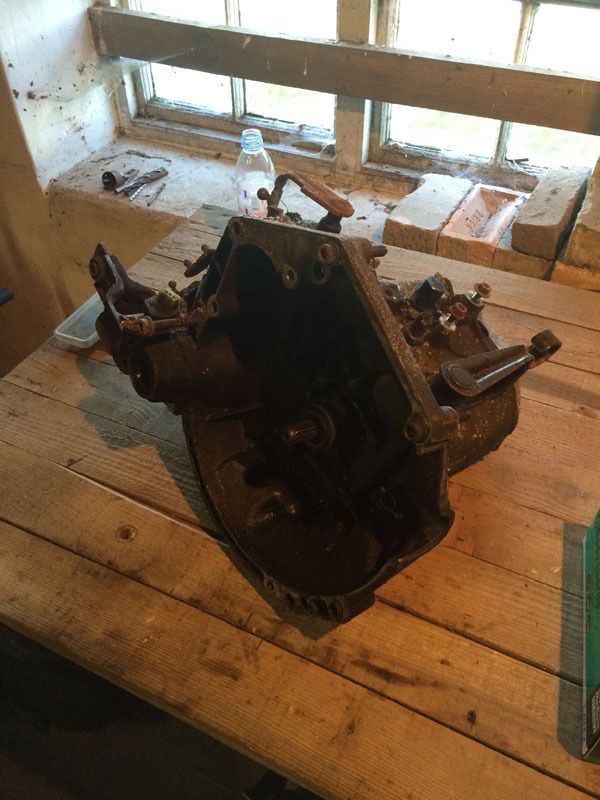 |
| All times are GMT. The time now is 08:26. |
Powered by vBulletin® Version 3.8.2
Copyright ©2000 - 2024, Jelsoft Enterprises Ltd.