* Tutorial * ( bodykit, fully photoshopping a car )
hey again peeps, quite a few of you lot said that i should make a tutorial on how i do the bodykits, so i thought i would give it ago,
Hope you like it as it took me agers :y: so here it goes, SideSkirts to start off with use the "polygonal lasso tool" and cut around the bit that you want as the vent in the side, as the pic below shows, 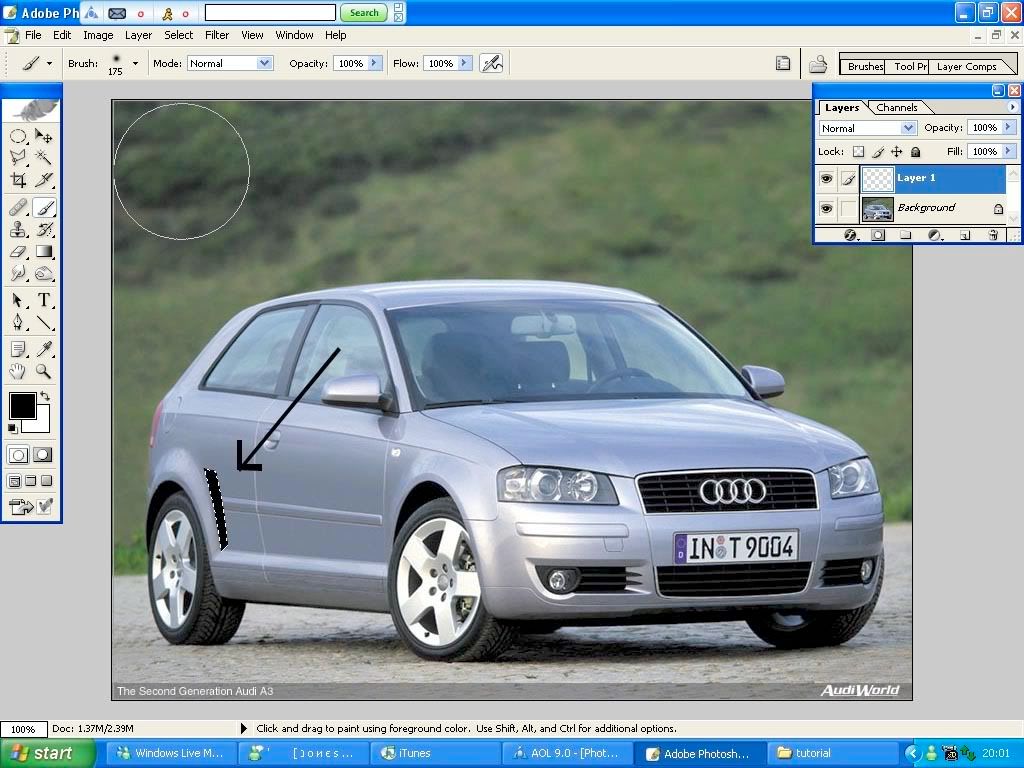 and fill it in black using the paint brush, then press "ctrl D" to deselect the "polygonal lasso tool" so you can do the next bit. Now you have got the basic shape of a vent you want to make it look more real with abit of shadowing at the top, as pic below shows cut around the vent and the body work in the same place where i have in the next pic and use the brush tool on the air brush so the colour fades onto the pic, dnt go inside the part where the lasso tool is selected as this will giv you a faded look not a solid colour 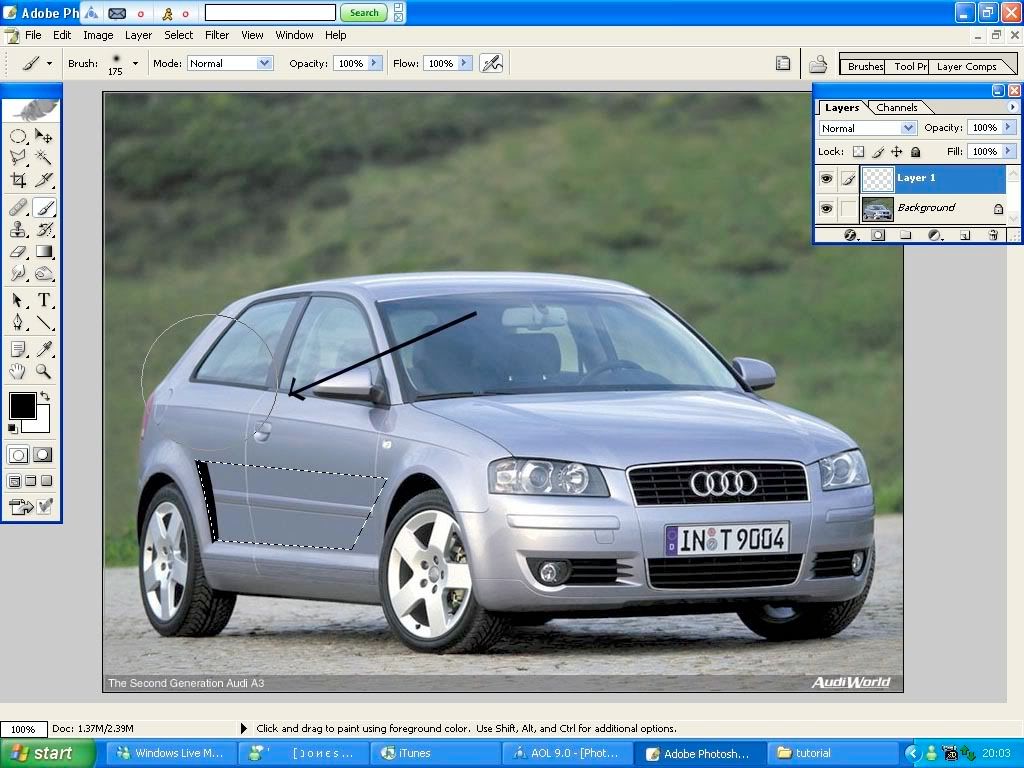 so cut around the side as shown ^^^ using the "polygonal Lasso tool" and spray in the black.  then press "Ctrl D" to deselect. next you want to make it so the car looks wider , cus around the top of where you have just shaded in black and airbrush it in the the same colours around it, then press "Ctrl D" to deselect the lasso tool, 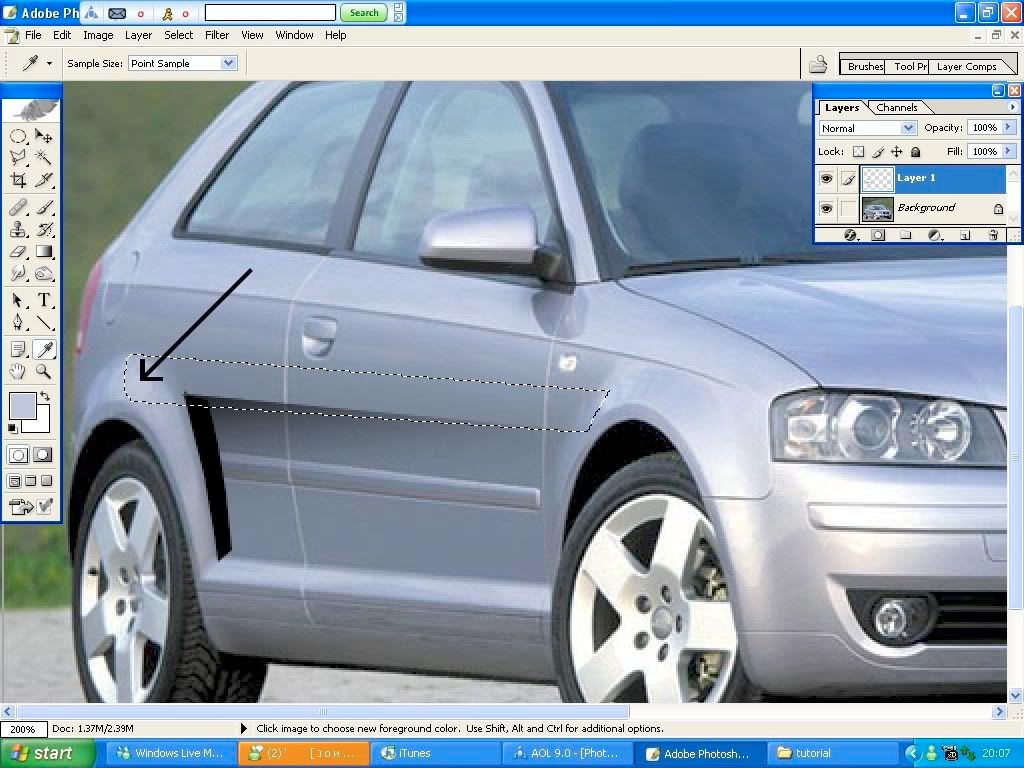  when you have done this you will see that the sides don't blend in to rest of the body work, so use the smudge tool to smudge the 2 colours together as show in the next pic, make sure that the strengh of the smudge tool is't on 100% or is will smudge it to much. you can change the strengh where i have put an arrow pointing on the next pic.  this should be your side skirt done. Archs Right now moving on to the archs so it makes the archs look a little bit wider to do this make a new layer and cut around the arch the top of the side skirt you have just made and colour it in black. then because it is on a new layer, if you right click when you are on the polygonal lasso tool it will come up with a box, click on the bit where it says "feather" and put it on around 2 as it shows in the next pics, 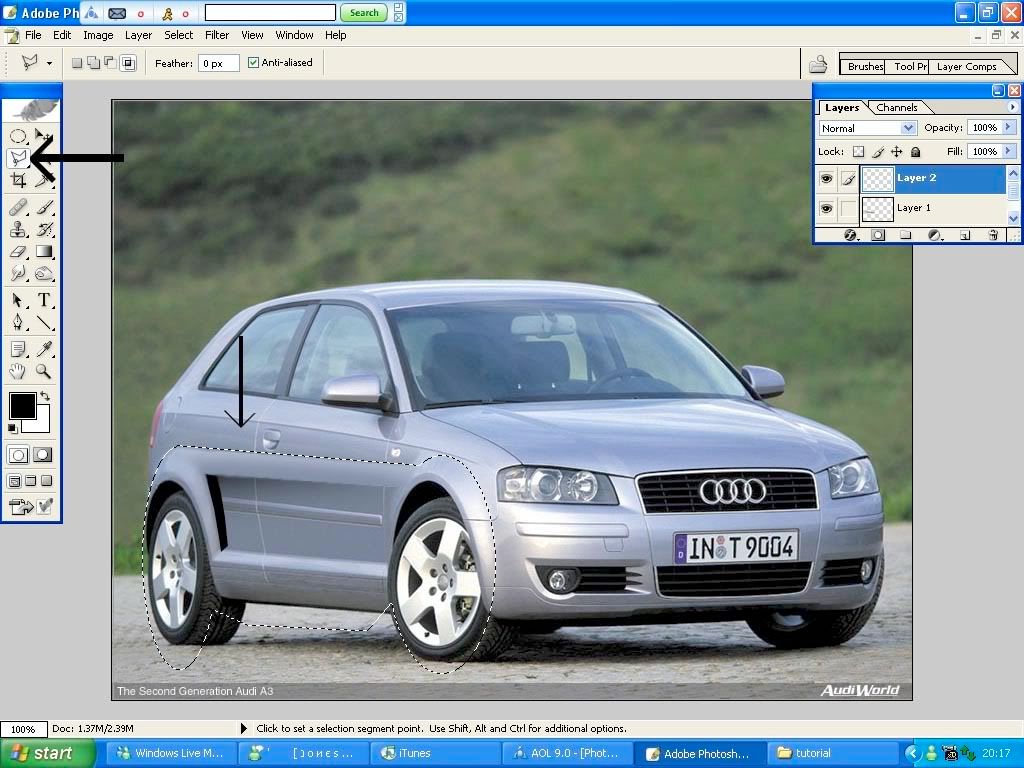 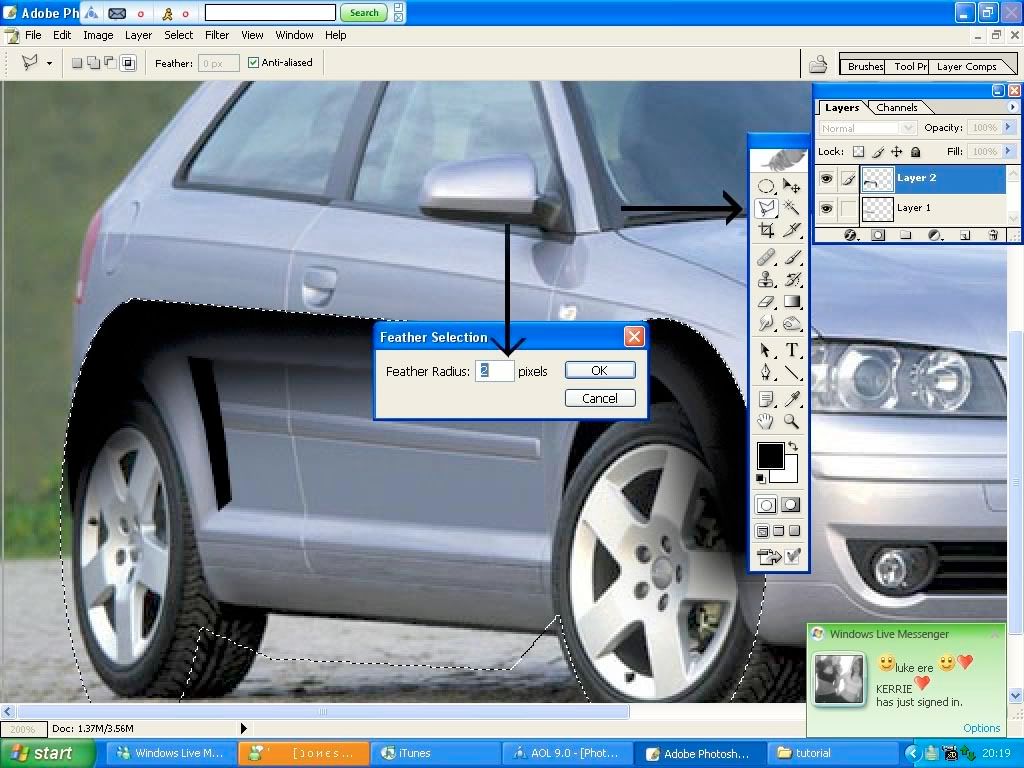 then press ok, this will make a little line all around the top but you will see that it is a solid black line and doesn't look real, so all you have to do is because it is on a new layer you can change the "opacity" down next to the layer in the layer box to make it kind of see though, the "opacity" is shown with a red arrow. 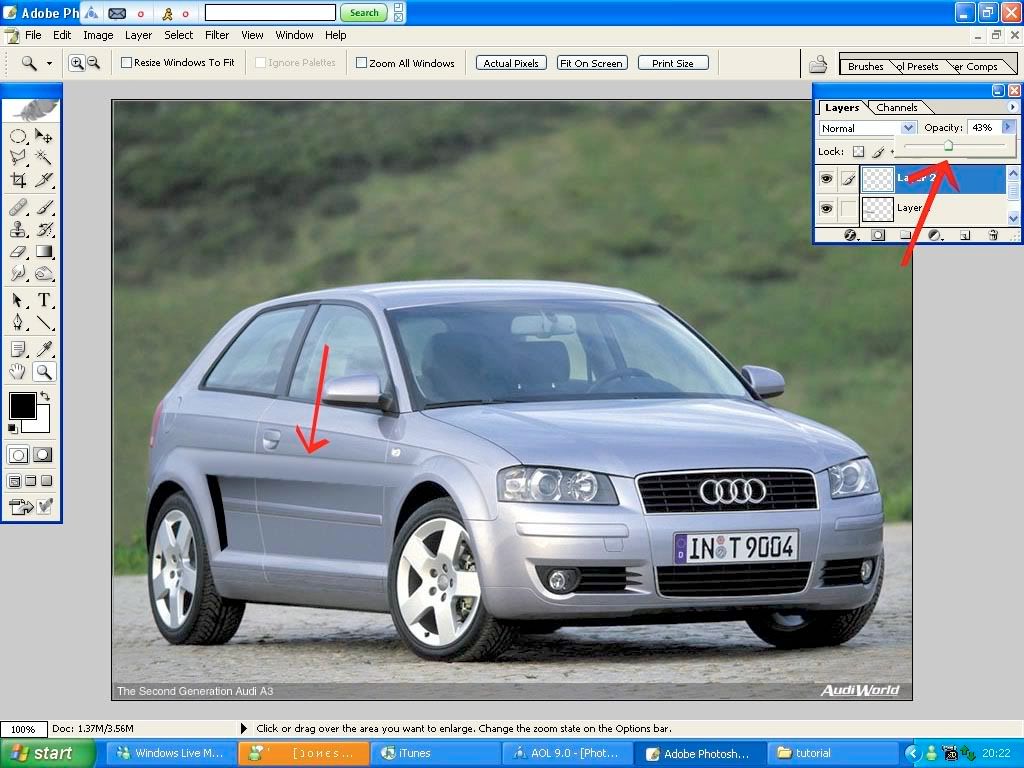 this should be the archs finished, so now we will go on to lowering the car, Lowering Lowering the car is fairly simple, to do this you have to cut around the archs with the "polygonal lasso tool and go to the top of the screen and back round, as shown in the next pic 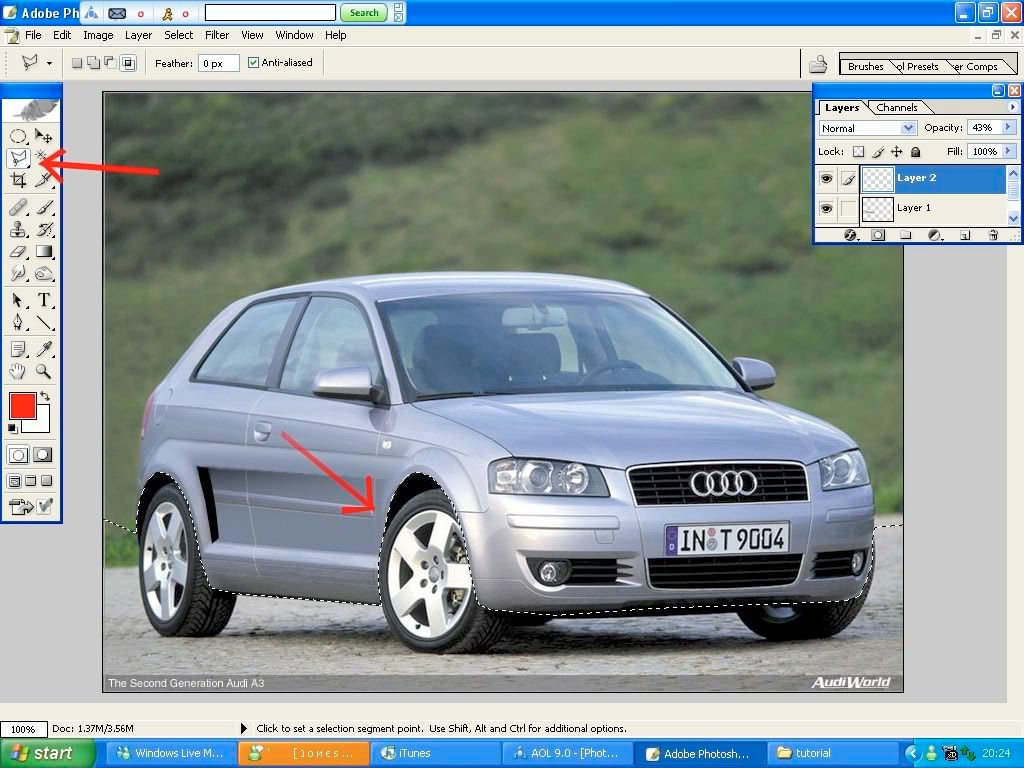 then press "ctrl T" to free transform the pic , the get the little arrow tool at the top of the tools bar and click in the middle of the pic and pull down as shown in the next pic. 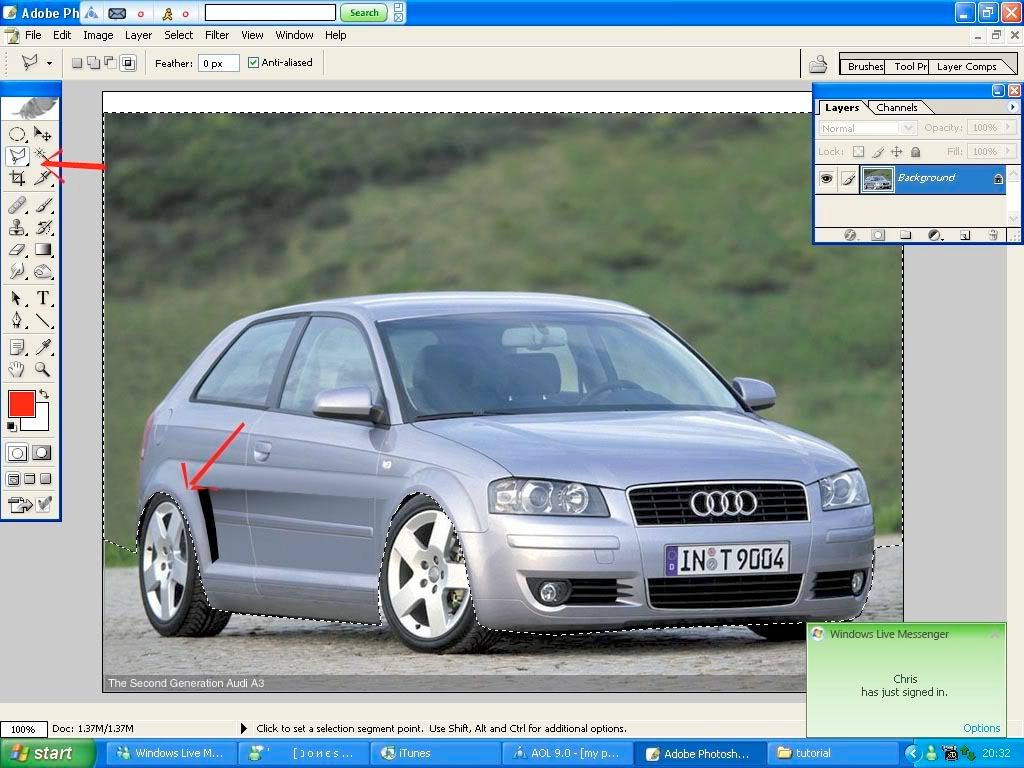 And thats it. |
Part 2
Wheel change
get a set of wheels you like and cut around it with the "polygonal lasso tool" as shown,  copy the wheels by pressing "ctrl C" and past it on to the car that you are photoshopping, to paste press "ctrl V" then move the wheel to where you want it and change the size by pressing "ctrl T2 to free transform if needed, 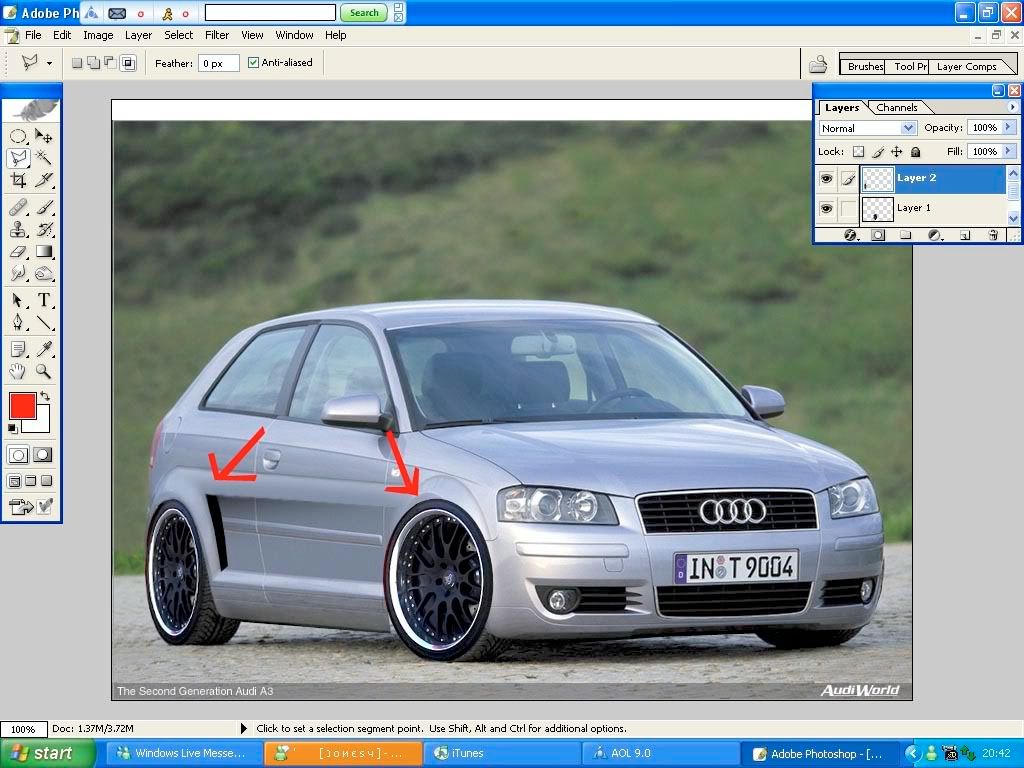 because the wheels are on a new layer you can delete it off the arch so it isn't over the top, cut around it with the "polygonal lasso tool" as shown 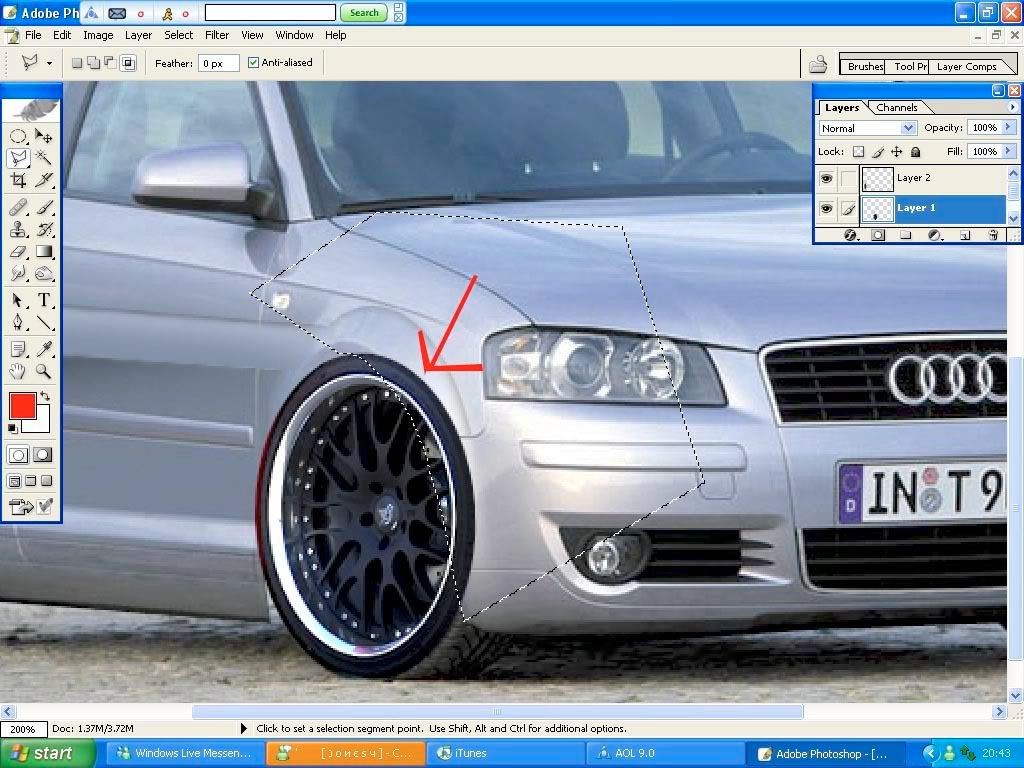 make sure you are on the wheels layer and then press delete so it deletes it away from the arch as shown, 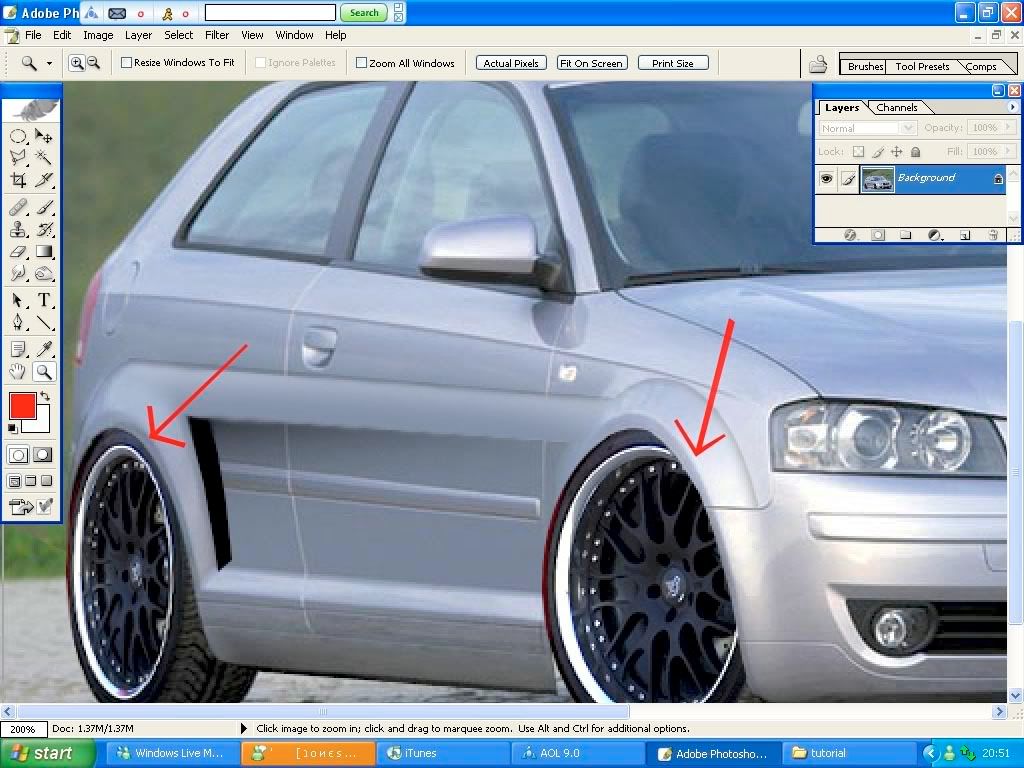 and thats it, Front bumper i didn't do much on the front bumper as there wasn't much to do , so all i did was take out the fog lights and fill it with black, as shown. 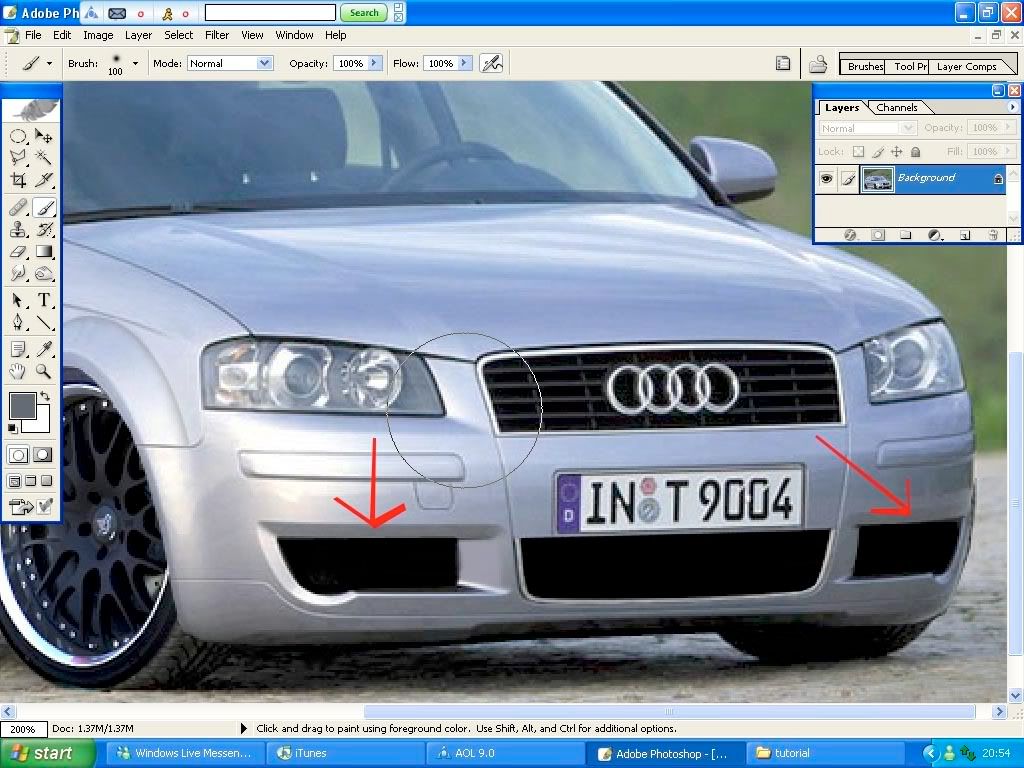 *REMEMBER* to keep pressing "ctrl D" to deselect the lasso tool when you have done with it otherwise it wont let you do anything else Colour change to do the colour change you have to cut all around the car with the polygonal lasso tool, to get rid of the windows and lights press "Alt" when you are on the lasso tool to make it so you have a little " - " simble next to it this will take the windows out so they dont change to the same colour, the red arrown shows where to cut around the outside and the green arrows show where to predd "alt" so they don't change colour, press Ctrl C to copy and Ctrl V to paste, so the colour is on a new layer. 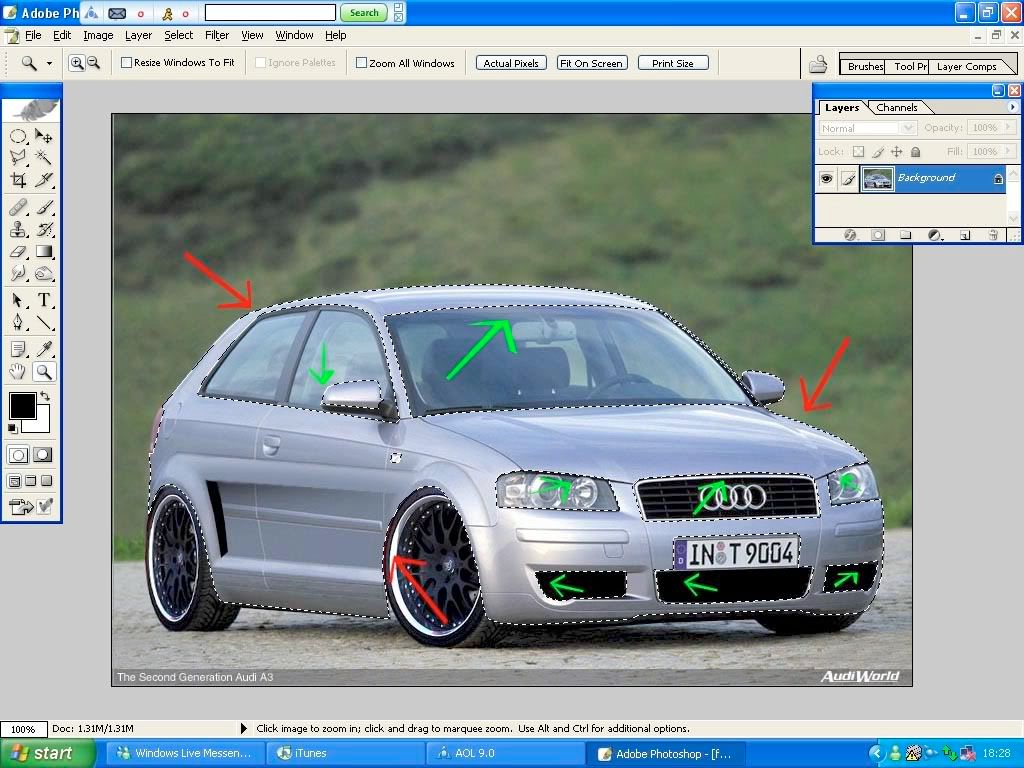 when you have done that, press "shift, ctrl, u" to desaturise the colour of the car, the go to "image, adjustments , brightness contrast and brighten the car up abit depending on what colour you want to do it. 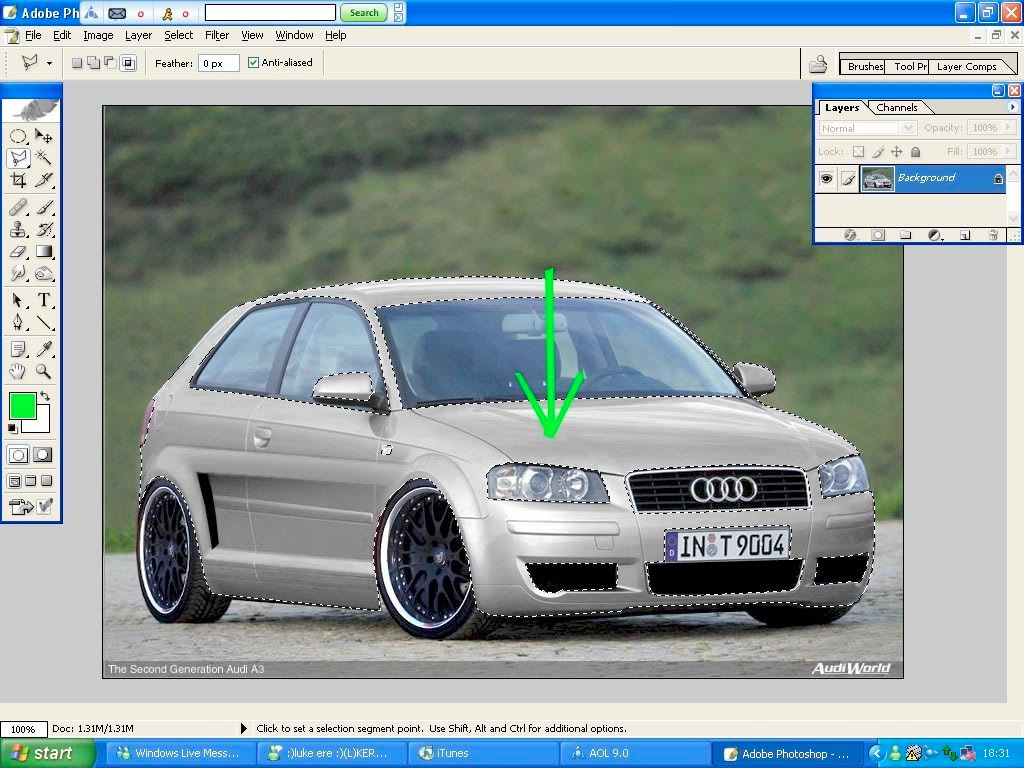 ^^pic shows desaturised colour^^^ 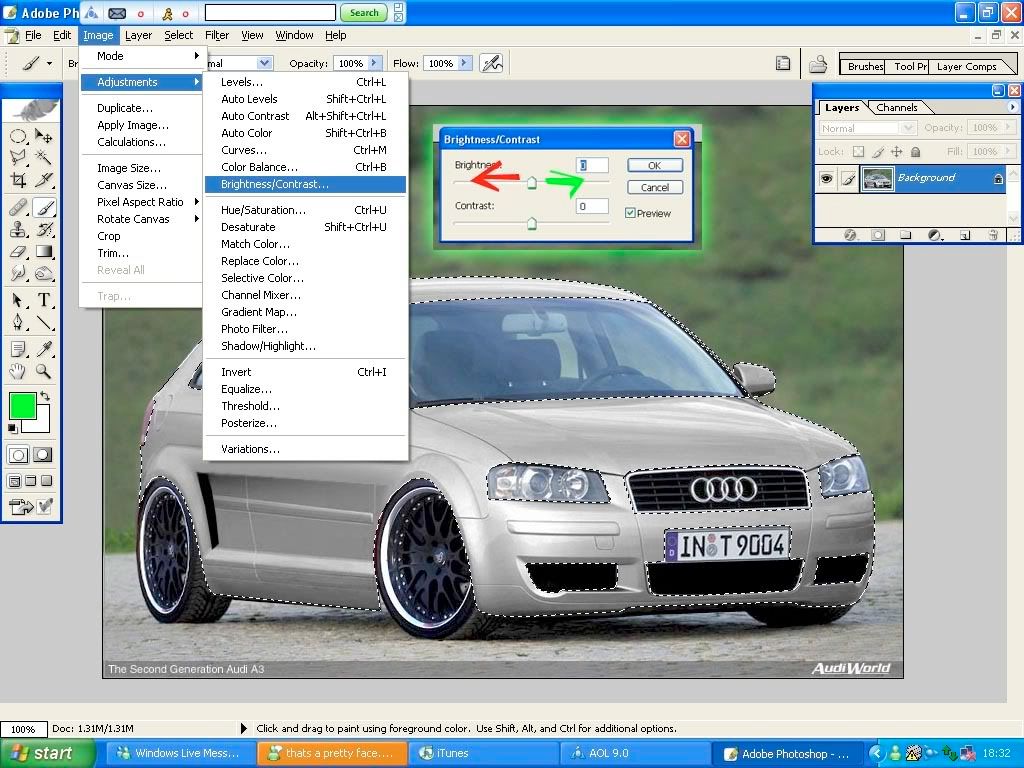 ^^ red arrow changes the car darker, green arrow changes the car lighter, then press ok when you have done this go to "image , Adjustments , Variations" and it will come up as a box as shown, 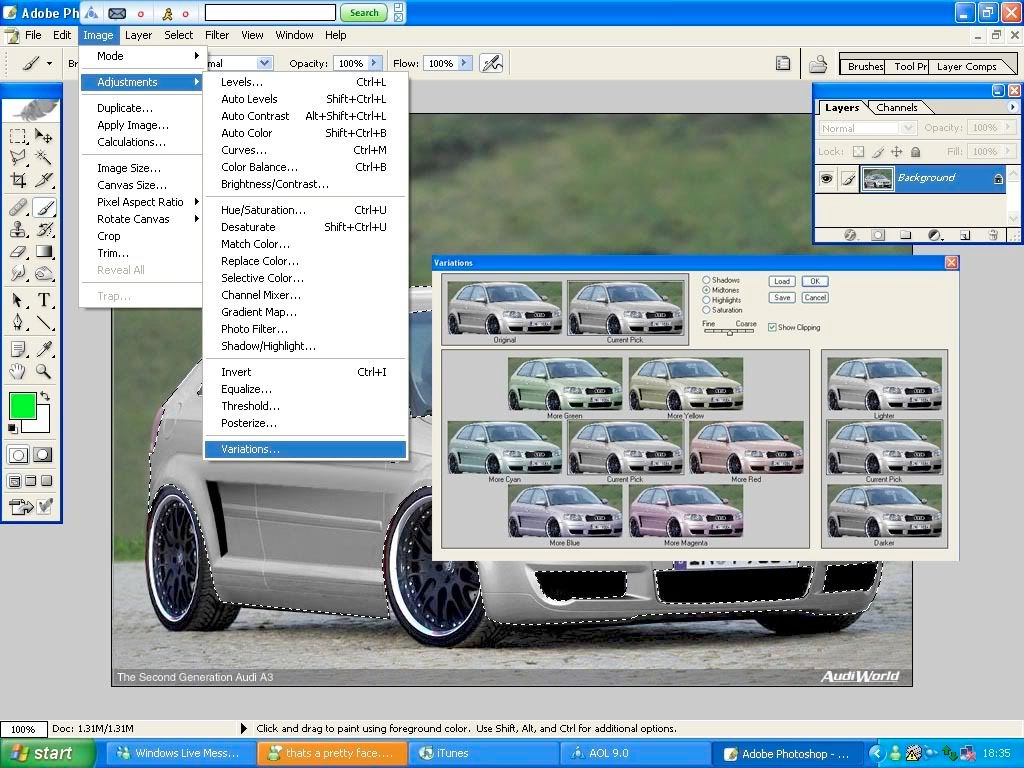 keep clicking on the colour you want untill you have found the right colour, (you can mix the colours so you come up with somthing crazy) when you have the colour you want, press ok and it will be on the layer you copied of the car,then change the "opacity" down on the colour layer so you can see the car shades and bodykit better and this will make it look more real, then press Ctrl D to deseleced and it will look somthing like this, 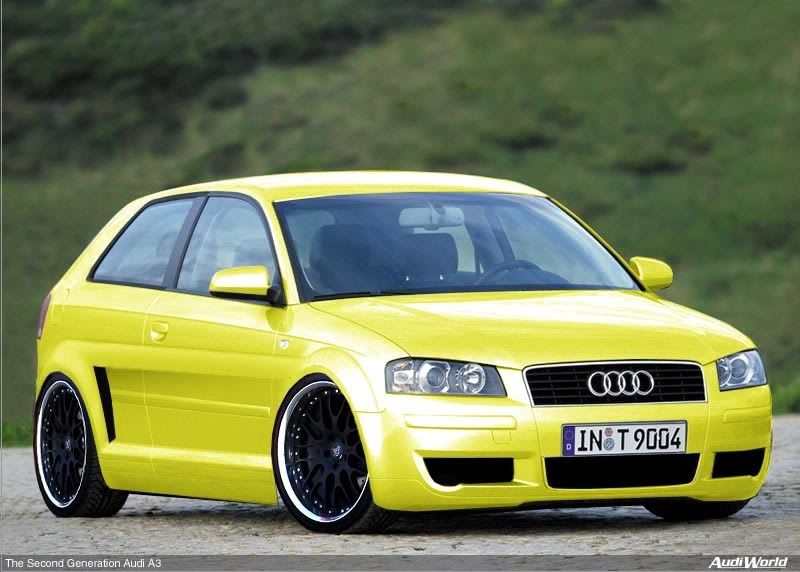 Then the photoshopped car is complete,:panic: Hope you lot like the tutorial as it took agerrrrrrrrrs, All comments wellcome, and if you want to no anything else, PM me Thanks Adam:y: * REMEMBER * Make everything on a new layer so you can delete the layer if you dont like it :y: |
Thats a really good guide mate! Sure that will help a lot of people out.
Rep'd :y: Your too good at photoshop! lol |
lol thanks dude, hopefully it will stay as a sticky:panic:
|
great guide mate :y:
|
JonesyFX, look you are in the pics on the tutorial when we was talking on msn, you feel
special lol |
Very good guide. Photoshop confuses me to the max though!
|
I'm sure this guide will prove sooo useful to loads of people, stickyyyy ;)
|
Realy good , might have to try this when i get Photoshop on to this computer ( my new one :D ) .
|
nice guide matey :y: realy helpful! cheers
|
top guide matey will be using some of this
|
very good matey!
sticky for sure ;) |
so has this helped any of you guys ?, think it should be a sticky :P
|
big respect man
really appreciate the effort you put in top job |
nice guide, now a sticky :y:
|
very big help, cheers mate
|
Cheers for the guide mate, its goin to be well useful, the A3 looks quality
|
quality guide there, will have to give it a go
|
wicked tutorial, well done!
|
that is awsome lol... nice one
|
| All times are GMT. The time now is 04:38. |
Powered by vBulletin® Version 3.8.2
Copyright ©2000 - 2024, Jelsoft Enterprises Ltd.