How-to-Guide: Replacing Wishbones
Even though this didn't solve the problem of the knocking on my vts, I thought I would make a guide for this because I couldn't find a proper one with pictures when I was looking before. It's not a particularly hard to job to do, but some bits are just fiddly. It took me about 2 hours to do both sides. Here it is in easy steps...
Tools Jack Axel stands (optional, but safer!) 17 and 18mm sockets 17mm deep set socket Spanners (like a dick can't remember the sizes but around 17/18!) Hammer Stanley knife WD-40 (or any other penetrating fluid) New pinch bolts for the ball joint. Can get these from Citroen for about a pound each. Part number for pinch bolt: 352243 Part number for self locking nut: 362230 Guide Start off by loosening the wheel nuts, and jacking the front of the car up. You can use 2 axel stands and get the whole front up, but I decided to do one side at a time. Take off the wheel. 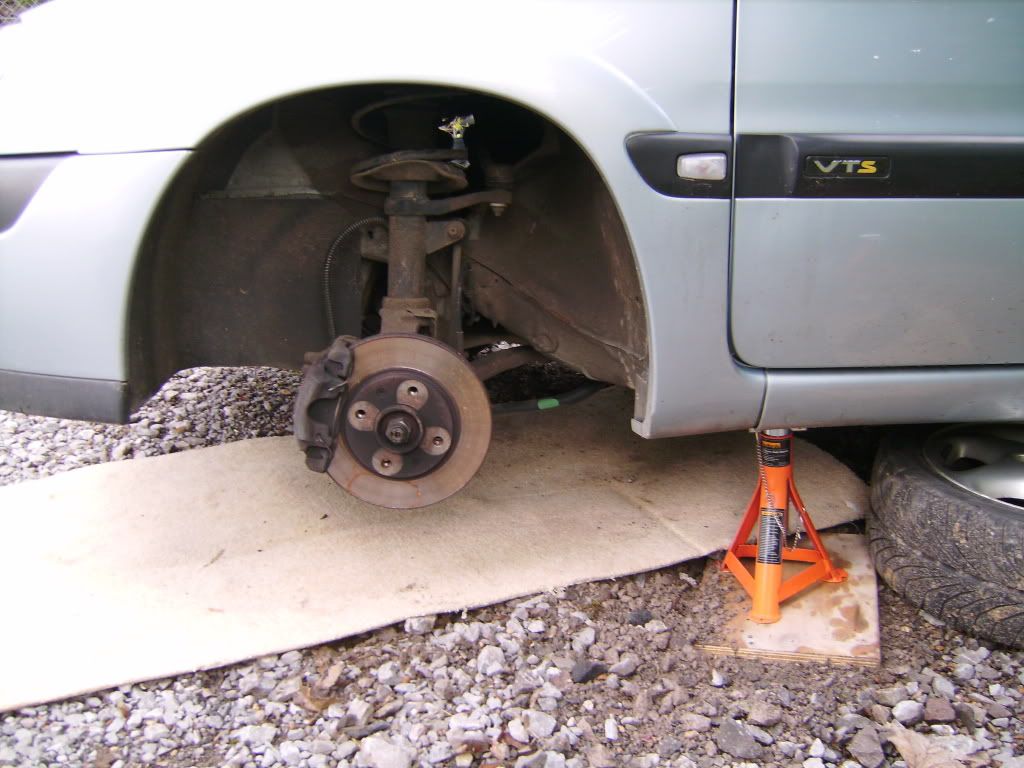 First off you have to loosen the nut where the ball joint is. If you're finding this difficult, spray on some penetrating fluid such as WD-40 and return in 5 or so minutes. 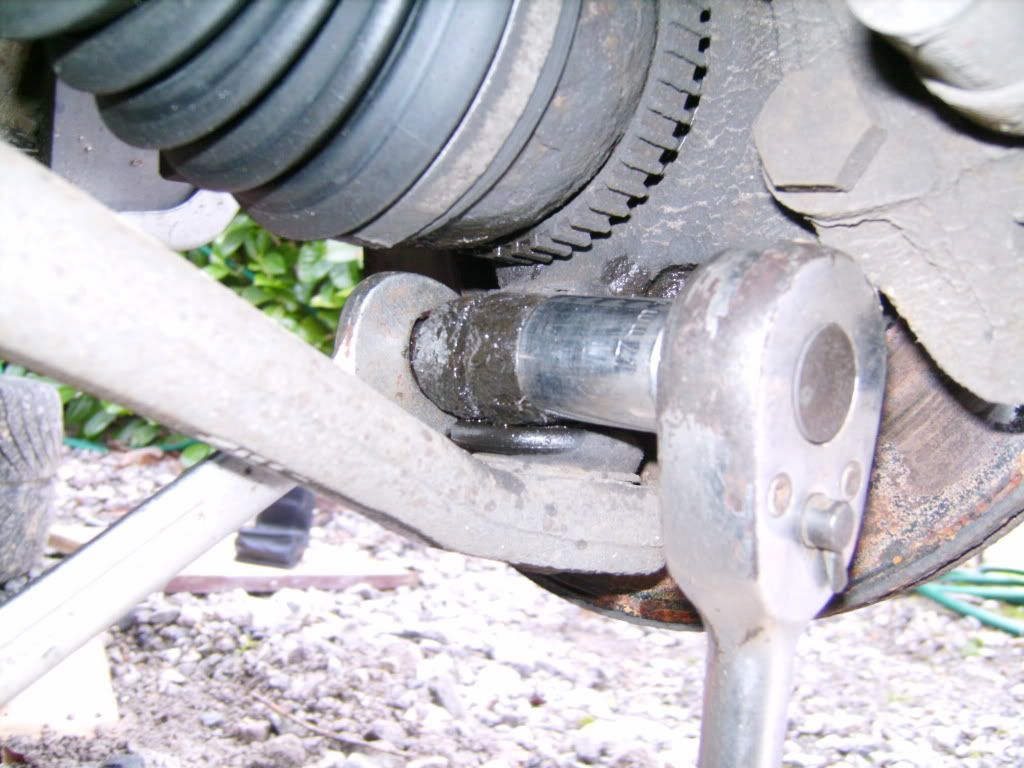 Then locate the bolt that goes through the bush part of the wishbone, and spray on some WD-40 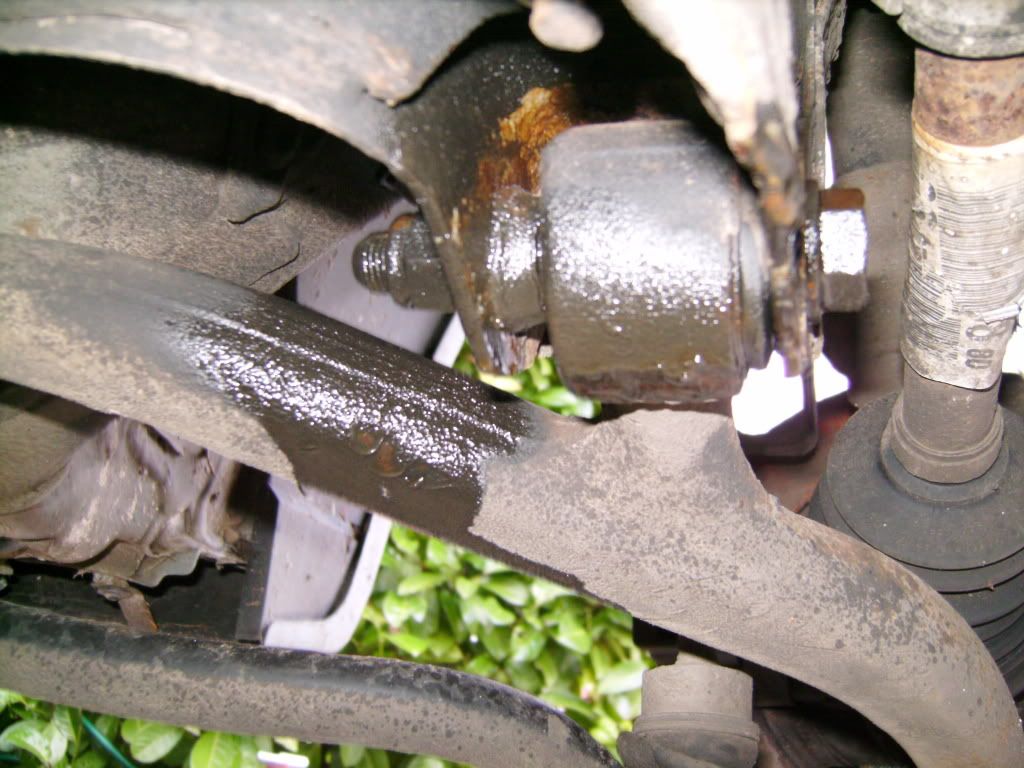 Then proceed to loosen this nut off using a spanner and an 18mm socket. 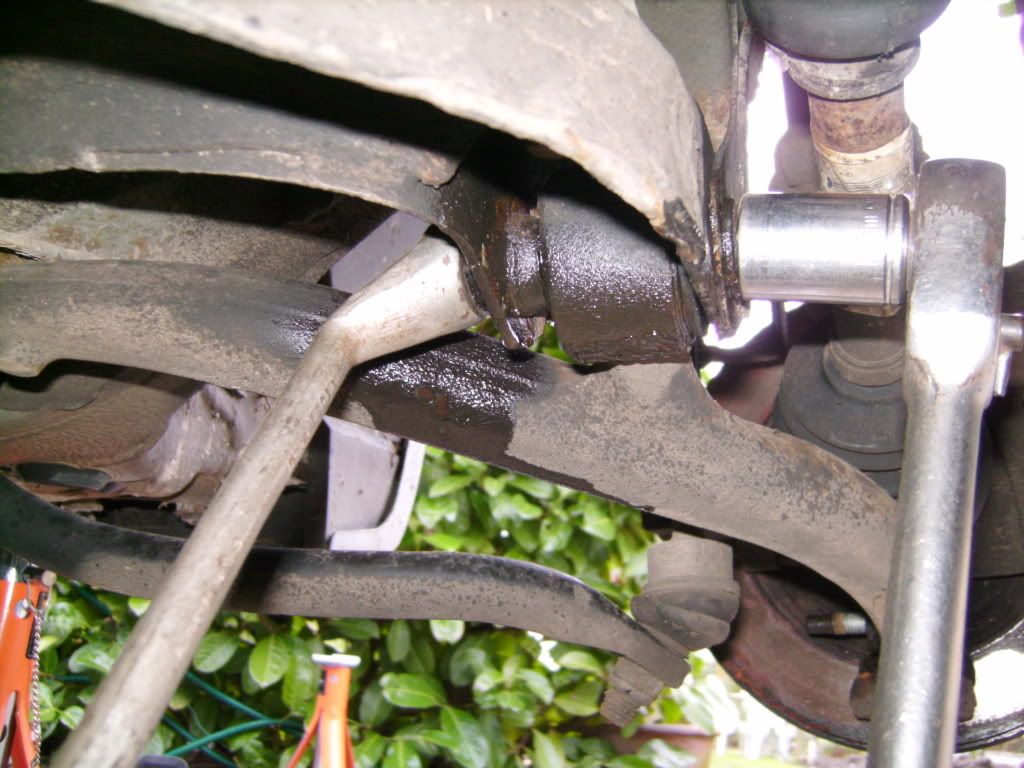 Next you have to access the 2 bolts that are found in the front footwells. First off undo this bolt here 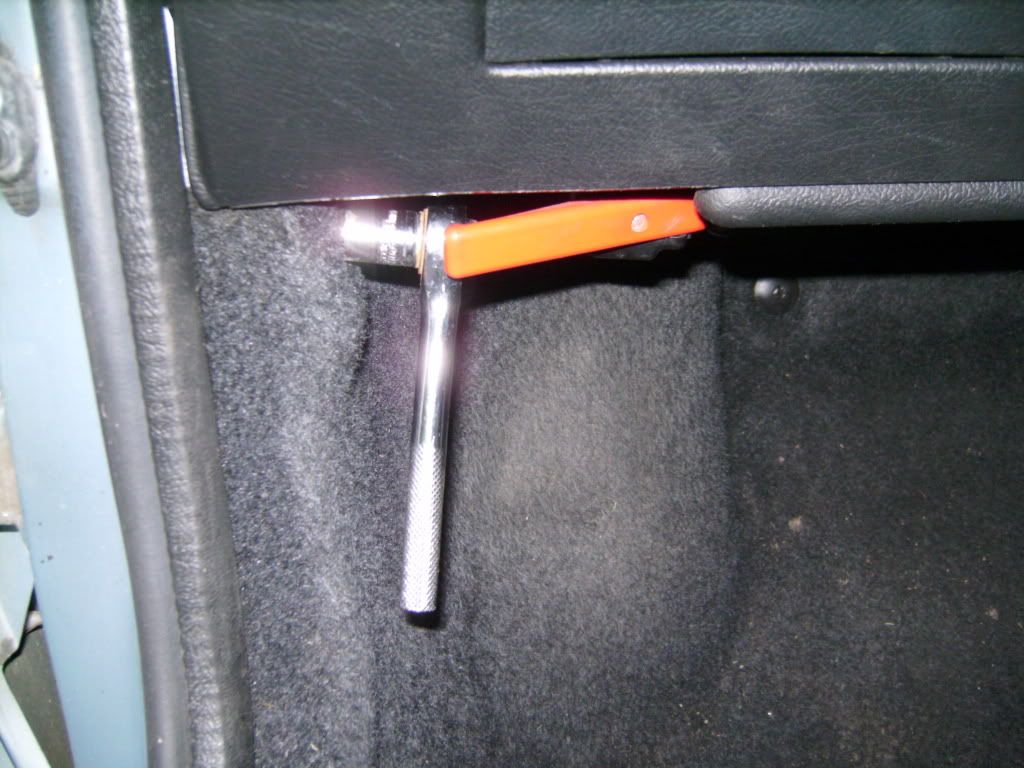 Then remove the rubber seal strip, and loosen the metal clips that hold the carpet in place 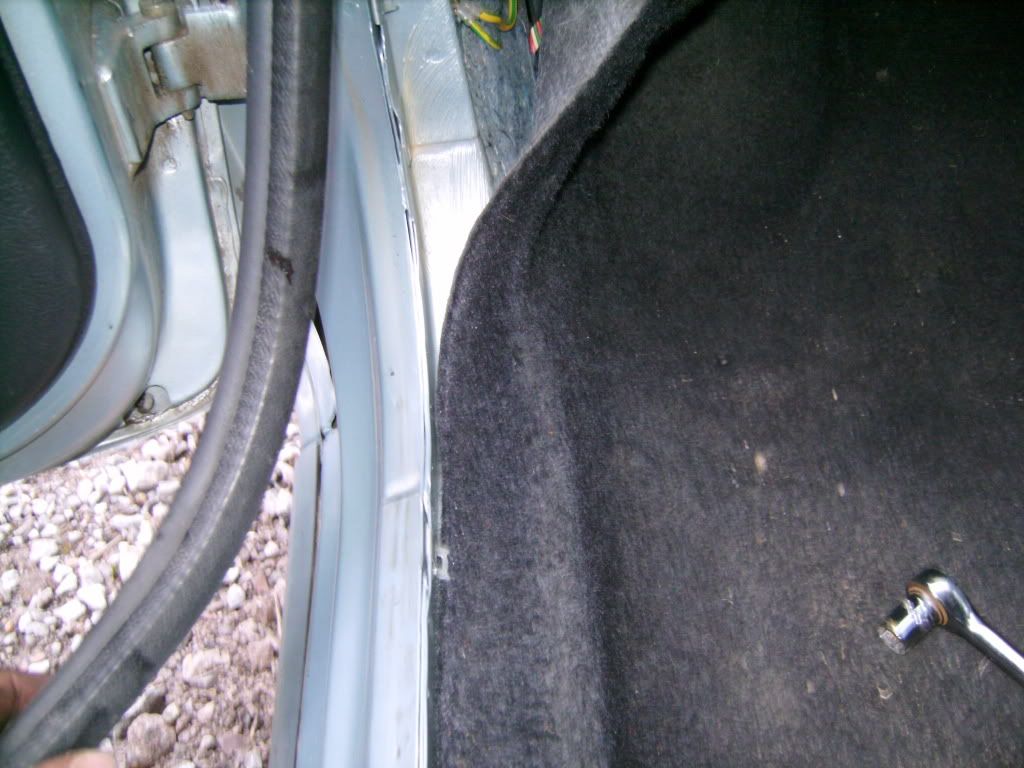 Lift the carpet forward to reveal a black flap and lift this up. Below it you should see some foam that you need to cut through with a stanley knife. If the wishbones have been changed on your car before, this foam will already be cut. 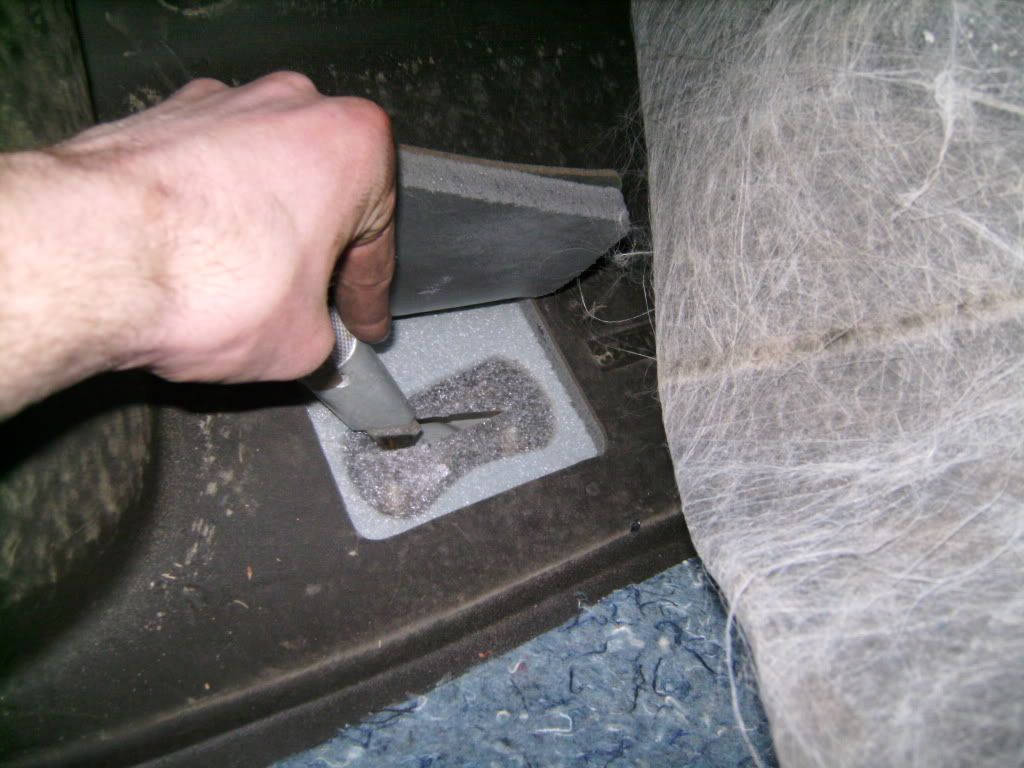 This will reveal 2 nuts, undo these using a 17mm deep set socket. 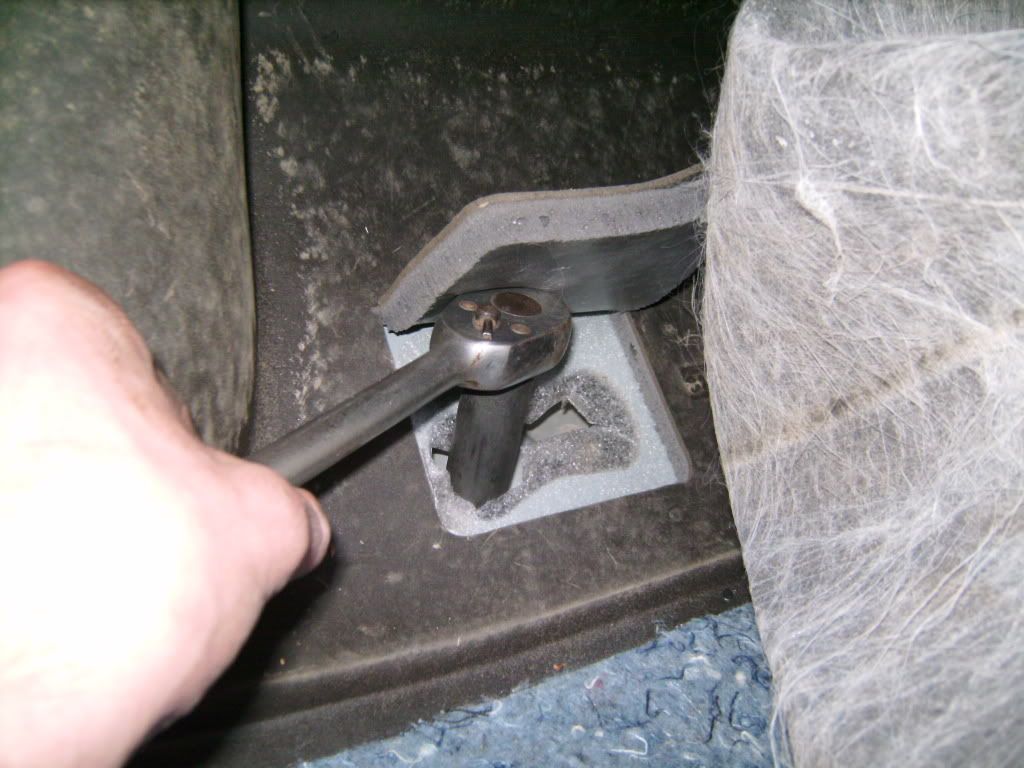 Get back under the car and completely undo and take out the pinch bolt where the balljoint is. 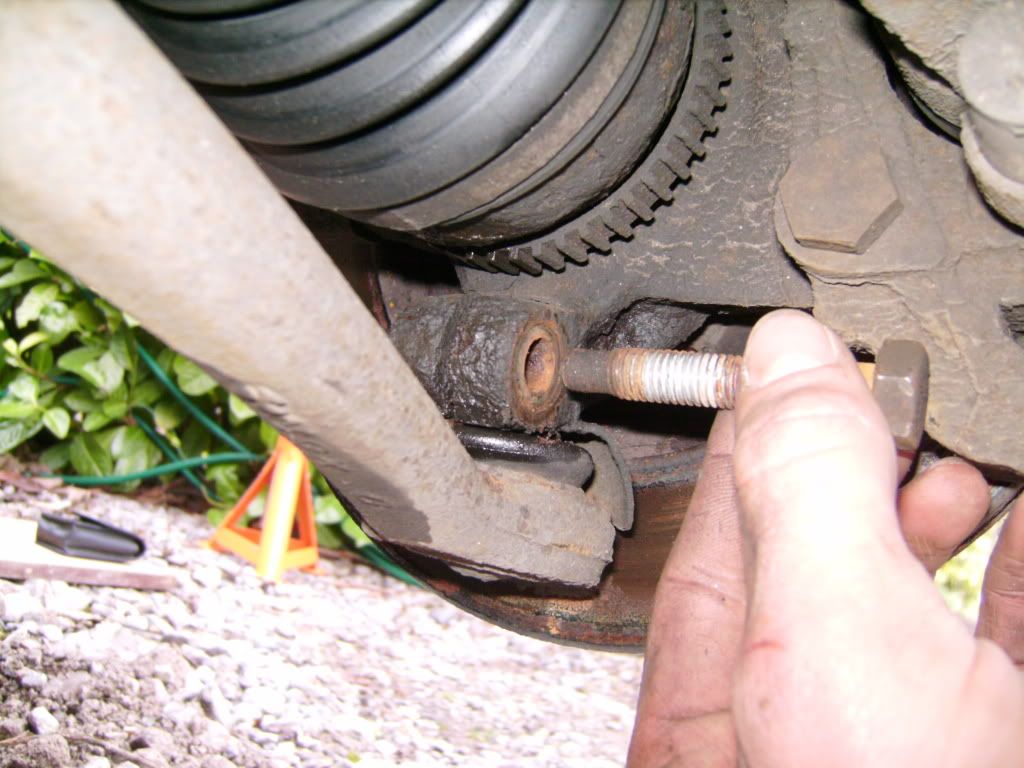 Once this is out, do the same to bolt that goes through the bush. I re-used this bolt so kept all the washers and bits in a safe place. 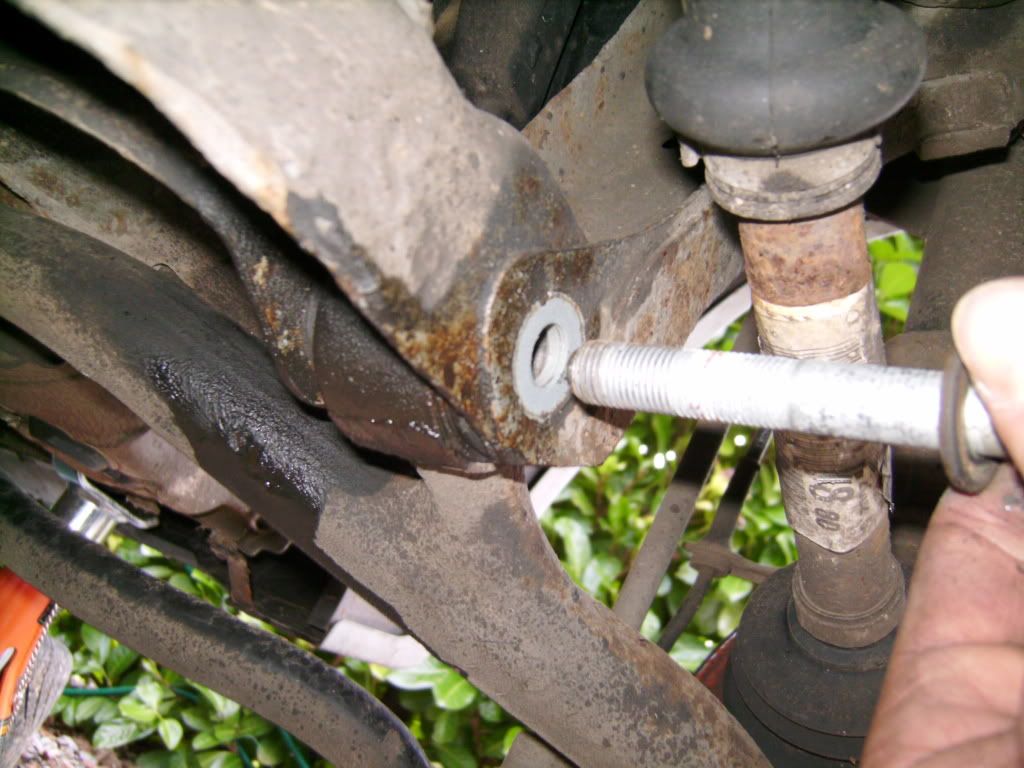 You are now ready to reomve the wishbone. If this proves difficult, use a hammer to aid you and hit the wishbone downwards. This is probably the easiest position to do this from. 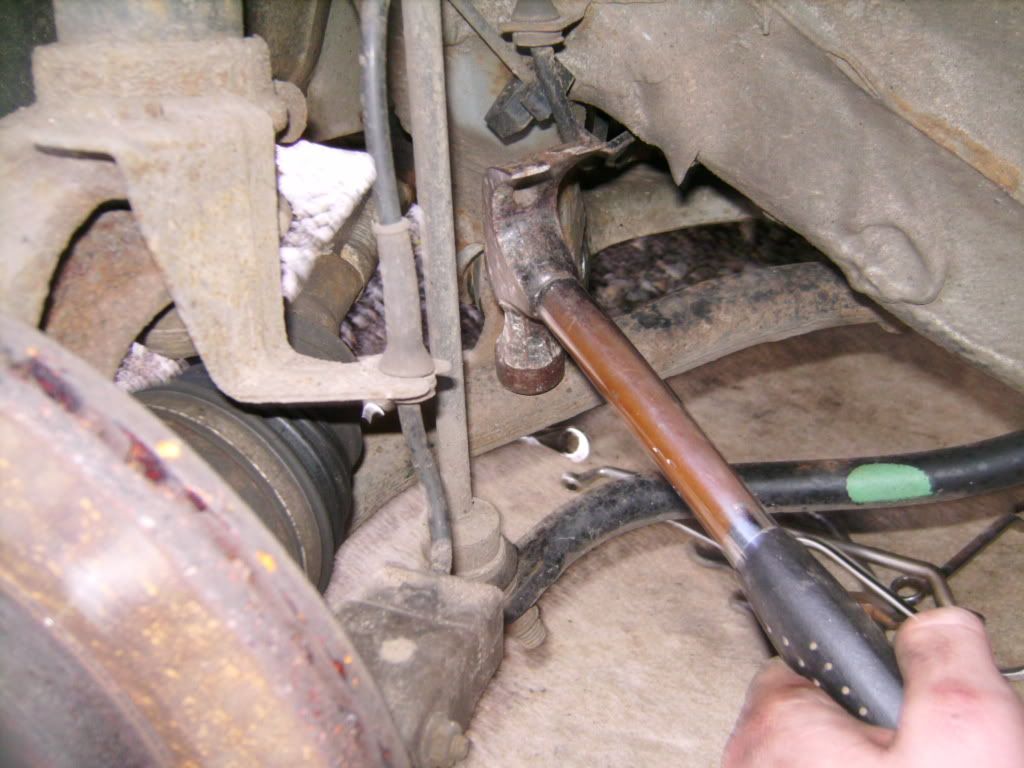 Old vs New 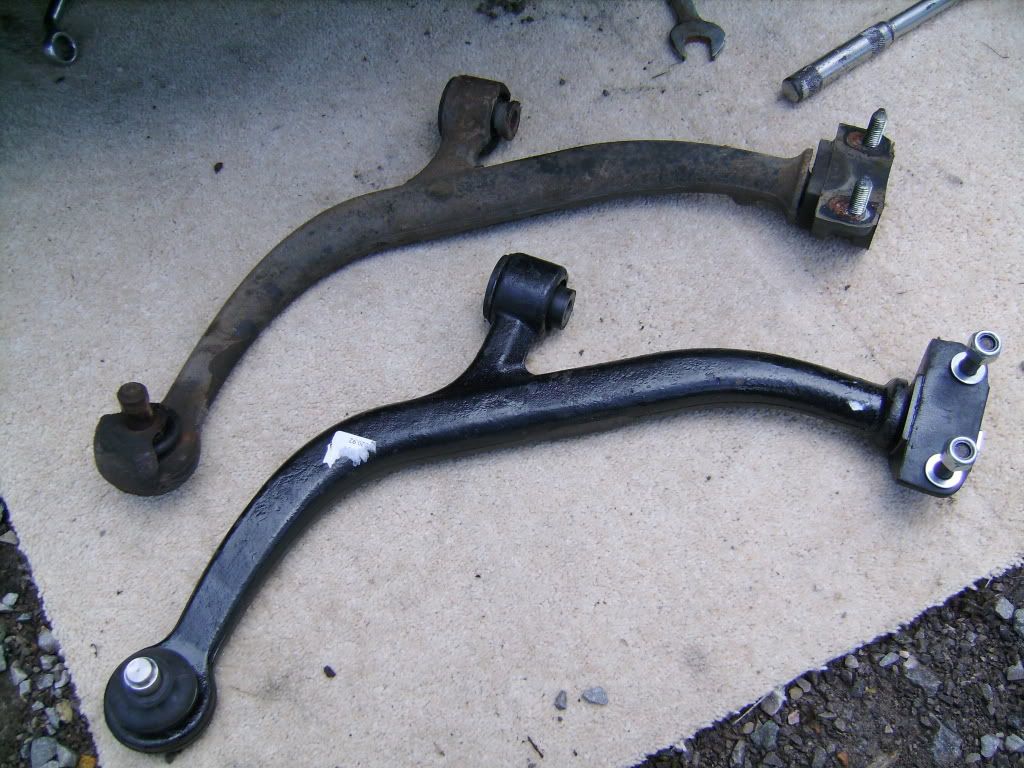 Now you are ready to fit the new wishbone. I found this the most fiddly part but you will get there in the end! Offer the wishbone up, hammer the ball joint end back into the hole where it come out from, and locate the bolts on the other end through the holes in the footwell. I then put the 2 nuts on finger tight in the footwell to stop them falling through. 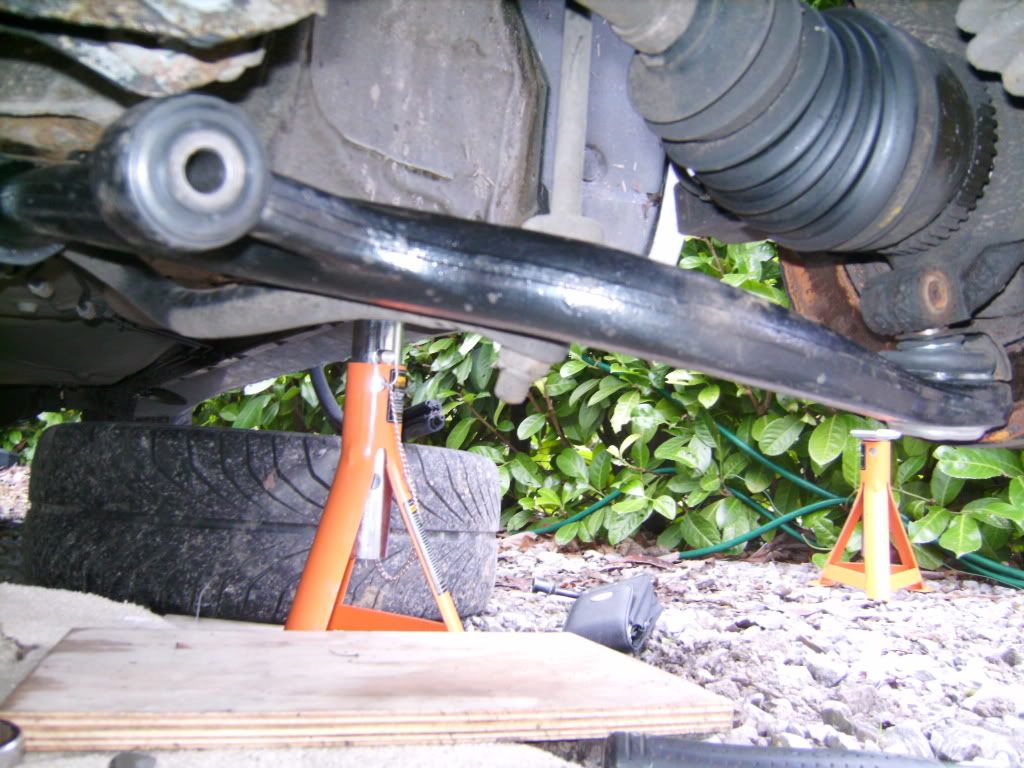 For the next bit you use whatever method takes your fancy, but i decided to use a jack to get the bush part of the wishbone back in place to put the bolt back through. 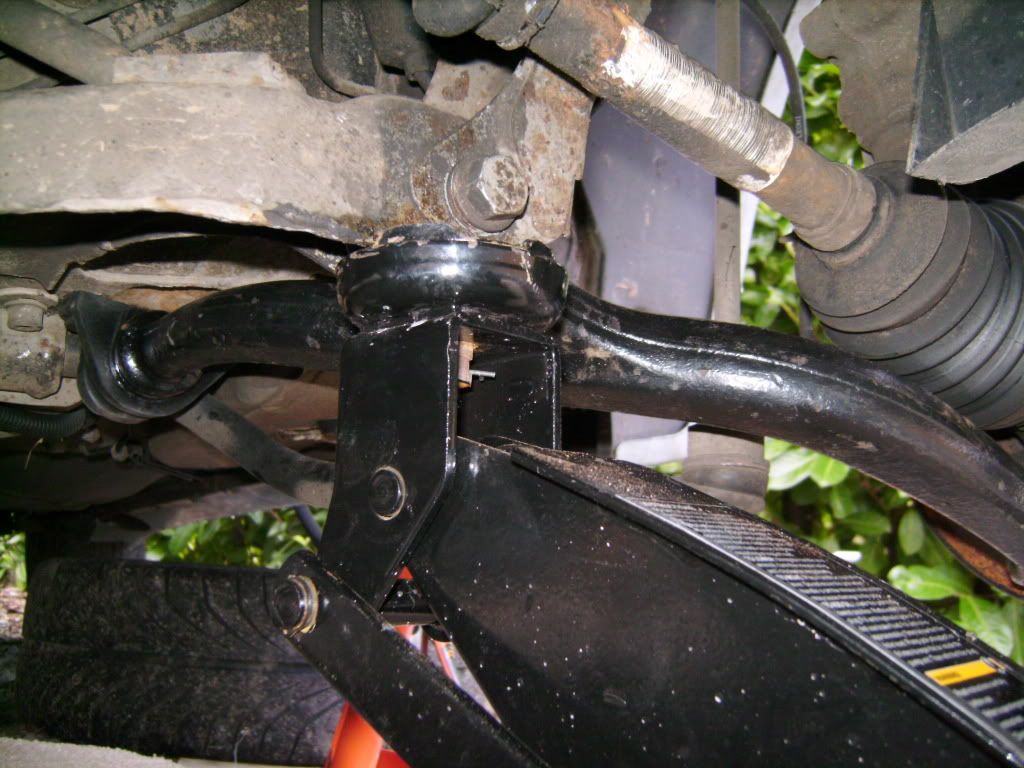 Once this bolt is through, tighten it up and do the same to the 2 bolts in the footwell. Then take your new pinchbolt, as you can see the old ones a touch rusty!  To make sure the ball joint part of the new wish bone is in far enough, use a hammer , so that when you look through the hole it will be perfectly lined up ready for a bolt to go through 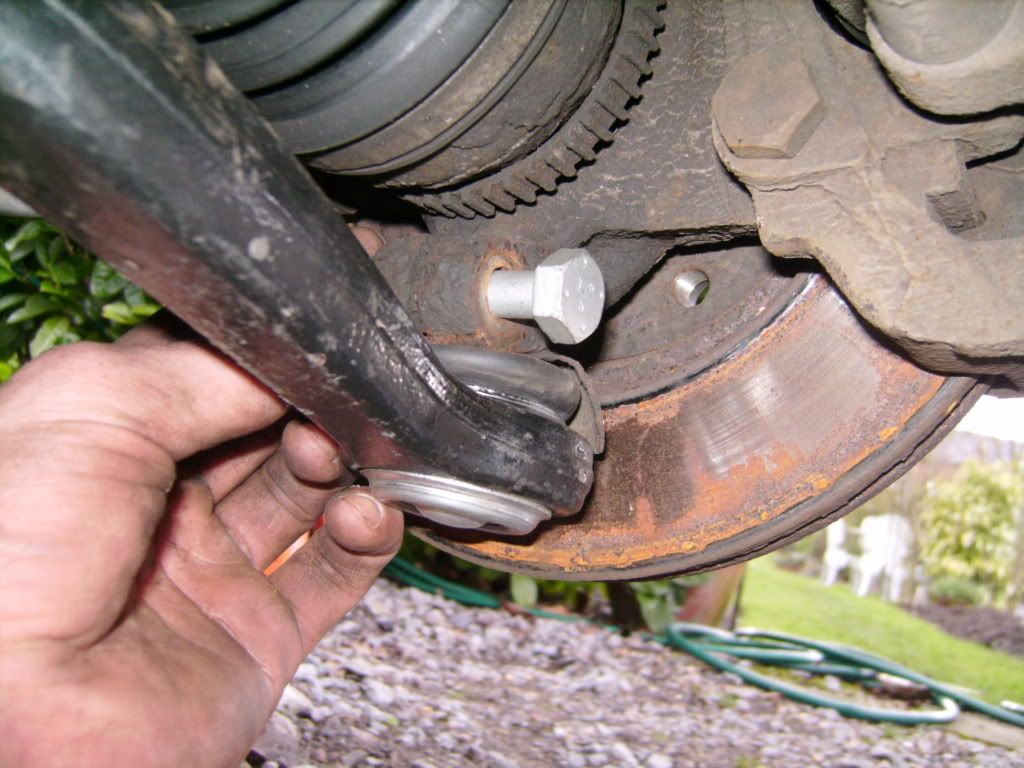 Tighten this bolt up and check the others just to make they are too. And that's it, your new wishbone should then look like this 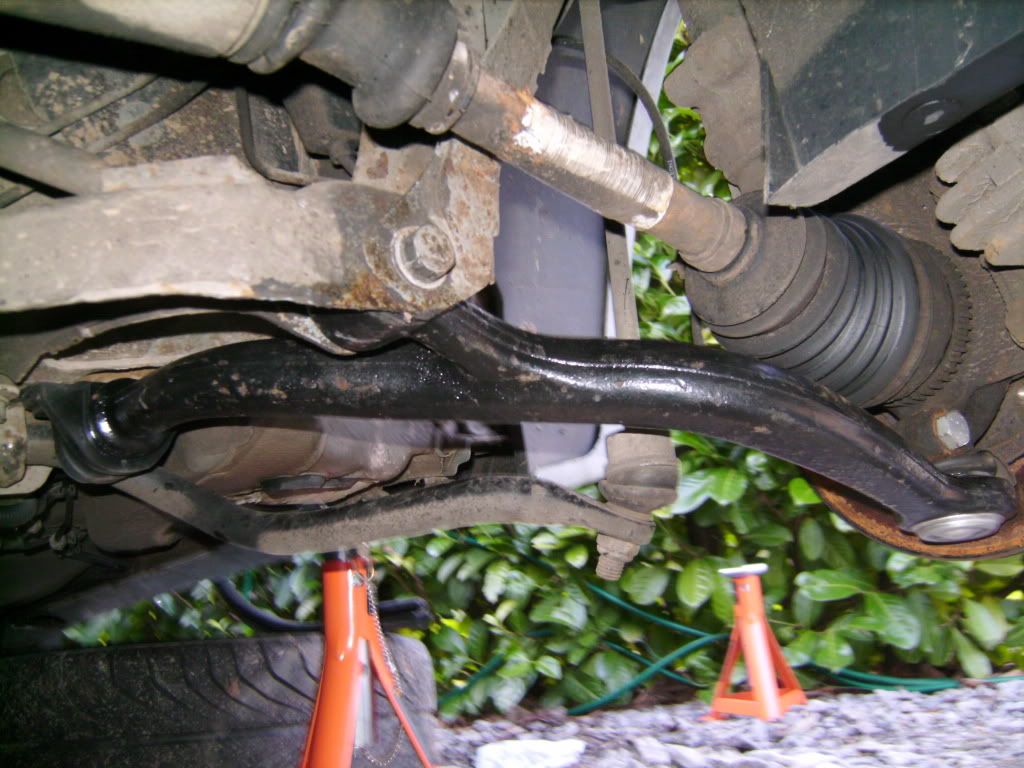 Hope you found it helpfull :y: I will not be held responible for any damage or incidents that occur to the car, yourself or anyone/anything else if this guide is followed. |
thanks good guide doin a friends 106 on friday
|
excellent. What i did when putting the new ones on was slide the balljoint into the strut, then jack the strut up until the 2 bolts slotted in. From there i did them up fingertight, then slid the other one in. Haynes does it some odd way!
Oh, and i reused the pinch bolt and its been fine. But to replace them is a 20 minute job at the most! |
Perfect mate! Thanks. Need to do this myself. Is it best to replace both sides? I know one has definitely perished from pothole damage!
|
No worries mate. Yeah you should do both sides really. And that doesn't surprise me about the potholes there's so many about atm
|
cheers fella! Don't suppose you can post up the part number for the pinchbolt please bud?
|
Nice guide, sexy looking wishbones too ;)
|
If your wishbone is all good and just your balljoint is knocking then you can remove them and get a new balljoint pressed into your wishbone which is about 4 quid or so, works out alot cheaper...
Good clear guide with useful pictures though! |
Quote:
Ball joint pinch bolt: 352243 Self locking nuts: 362230 Came to a total of £3.50 Quote:
Quote:
|
I didn't realise all the thanks things go when you edit that's well out of order!
|
Great Job mate
I replaced mine the other day, thought i might add that hammering in the ball joint bolt caused mine to burr as the ball joint wasnt alligned perfectly. Also i forgot to put the ball joint protector plate back on as i thought it was scrap metal! Its a learning curve lol Great guide |
Great guide will come in very handy to alot of people.
|
Thanks doesn't go when you edit the post
|
yeh i just realised that lol it seemed to dissappear when i first did it now there back again!
|
Excellent guide mate :y:
|
____________
|
Great guide, thanks for taking the time !!!
|
nice 1 m8 did mine today easy to do with that help you put on here thanks again m8
|
i need to replace both of mine the front wheels sit to far back in the arches, are the ebay ones oem or just general shit copys that get your car through a mot
|
Quote:
|
| All times are GMT. The time now is 14:59. |
Powered by vBulletin® Version 3.8.2
Copyright ©2000 - 2024, Jelsoft Enterprises Ltd.