Mobile Devices: Lite Theme Citroën: Citroën Trader | Saxo Trader | C2 Trader Peugeot: Peugeot Trader | 106 Trader Enthusiast: Saxperience


Go Back   Saxperience - Citroen Saxo Forum > Citroen Saxo Related Forums > Saxo Styling & Interior
Register Member Photo AlbumsBlogs FAQ Calendar Experience

Saxo Styling & Interior If you want to know about Saxo interior and exterior styling, take a look inside this forum...

Reply
 
Thread Tools Display Modes
Old 18th May 2009, 22:29   #101
marc_mcquilling
Regular Poster
 
marc_mcquilling's Avatar
 
Join Date: Mar 2008
Location: Middlesbrough
Posts: 278
Car(s): Mk2 Saxo VTR
marc_mcquilling is on a distinguished road
Default

i started on mine on saturday.

ive taken a slightly different route though...

instead of masking everything up, i popped down to kwikfit and got them to take my tyre and valve off.. only cost me £2, then went back down to get it put back on and they never charged me. makes it one hell of a lot easier.

and instead of using elbow grease i went to the local hardware store and got meslef a 'flap wheel' (i think thats what it was called)
its basically a drill bit with loads of flaps of sandpaper glued to it.

tonight i stripped a wheel back to the metal in 15 mins. makes it loads quicker.
marc_mcquilling is offline   Reply With Quote
Old 18th May 2009, 22:32   #102
Lloydie
Established Member
Central South Region Member
 
Lloydie's Avatar
 
Join Date: Mar 2009
Location: Southampton - Dibden
Posts: 1,820
Car(s): Silver MK2 VTR 2000(W)reg.
iTrader Score: 3 (100%)
Lloydie is on a distinguished road
Default

Quote:
Originally Posted by marc_mcquilling View Post
i started on mine on saturday.

ive taken a slightly different route though...

instead of masking everything up, i popped down to kwikfit and got them to take my tyre and valve off.. only cost me £2, then went back down to get it put back on and they never charged me. makes it one hell of a lot easier.

and instead of using elbow grease i went to the local hardware store and got meslef a 'flap wheel' (i think thats what it was called)
its basically a drill bit with loads of flaps of sandpaper glued to it.

tonight i stripped a wheel back to the metal in 15 mins. makes it loads quicker.
Hmmm im guna refurb my front 2 wheels again beacuse i didnt leave the paint long enuf, i may try that 'flap wheel' thingy you speak of mate. Cheers for info.
__________________
SELLING MY VTR IN SOUTHAMPTON: http://www.saxperience.com/forum/sho...95#post4048095
Lloydie is offline   Reply With Quote
Old 18th May 2009, 22:38   #103
marc_mcquilling
Regular Poster
 
marc_mcquilling's Avatar
 
Join Date: Mar 2008
Location: Middlesbrough
Posts: 278
Car(s): Mk2 Saxo VTR
marc_mcquilling is on a distinguished road
Default

no bother mate.

dont go to b&q though.

they were £8 in ther.

i got mine from a little hardware shop for like £2.50
marc_mcquilling is offline   Reply With Quote
Old 19th May 2009, 11:41   #104
liamsaxo91
Newbie
 
Join Date: Mar 2009
Posts: 9
liamsaxo91 is on a distinguished road
Default

What colour did you use for the vts wheel?
liamsaxo91 is offline   Reply With Quote
Old 2nd June 2009, 12:39   #105
DCoulter19
Infrequent Poster
Scotland Region Member
 
Join Date: Mar 2009
Location: Hamilton
Posts: 150
Car(s): Audi A3 1.8T
DCoulter19 is on a distinguished road
Default

great guide m8
DCoulter19 is offline   Reply With Quote
Old 7th June 2009, 07:58   #106
nico_daniels
Infrequent Poster
 
Join Date: May 2009
Location: Sailsbury, Wiltshire
Posts: 117
Car(s): Mk1 (99) Saxo VTR, Silver.
iTrader Score: 1 (100%)
nico_daniels is on a distinguished road
Default

I used the same method on my mate transit steelies, but i used simmons wheel sliver, and they came out wicked!!!


Thank for the guide!
nico_daniels is offline   Reply With Quote
Old 7th June 2009, 11:44   #107
smith92
Regular Poster
 
smith92's Avatar
 
Join Date: Jun 2009
Location: South Wales - Bridgend
Posts: 314
Car(s): posi furio
smith92 is on a distinguished road
Default

cheers for the guide, i fancy doing this over the summer!
smith92 is offline   Reply With Quote
Old 11th June 2009, 11:55   #108
MathewVTR
Infrequent Poster
East Midlands Region Member
 
Join Date: Jun 2009
Location: Chesterfield
Posts: 101
Car(s): Mk2 X Reg VTR (90bhp model)
MathewVTR is on a distinguished road
Default

Nice, I'm totally doing this when I get my vtr next week. Will probably take me a while to do each wheel because im always at work >.>
MathewVTR is offline   Reply With Quote
Old 11th June 2009, 13:18   #109
miamibluebaby
Established Member
Track / Motorsport PrepWest Midlands Region Member
 
miamibluebaby's Avatar
 
Join Date: May 2009
Location: Ellesmere (Shropshire)
Posts: 1,044
Car(s): superchared 106 gti
iTrader Score: 1 (100%)
miamibluebaby is on a distinguished road
Default

good guide
miamibluebaby is offline   Reply With Quote
Old 23rd June 2009, 00:07   #110
hazzer321
Regular Poster
 
Join Date: Jan 2009
Location: Norfolk
Posts: 375
Car(s): Saxo 1.1 LX, Ford Focus 1.8 Collection
iTrader Score: 1 (100%)
hazzer321 is on a distinguished road
Default

i really want to spray my alloys White, mine have kurbing on them pretty much everywhere lol, not execptionally bad but at the end of the day its got 10 years worth of kurbing, i think i can manage the spraying the alloys, but im not sure if i can handle the fillering part, do you have to have a bit of basic knowledge and skill to make it look good while fillering. and just out of interest can anyone let me know roughly how much it will cost to get them done professionally in case i decide i dont wanna try my self

thanks
hazzer321 is offline   Reply With Quote
Old 23rd June 2009, 01:43   #111
marc_mcquilling
Regular Poster
 
marc_mcquilling's Avatar
 
Join Date: Mar 2008
Location: Middlesbrough
Posts: 278
Car(s): Mk2 Saxo VTR
marc_mcquilling is on a distinguished road
Default

finished mine a few weeks ago, look pretty good job tbh.

just wondering anyone else had problems with stone chips?
any ideas how to prevent it?
marc_mcquilling is offline   Reply With Quote
Old 23rd June 2009, 04:04   #112
Millardinho
Infrequent Poster
 
Join Date: May 2009
Location: Antigua, Caribbean
Posts: 154
Car(s): 1.1 Saxo Navy Blue :)
Millardinho is on a distinguished road
Default

Looks sweet!
Great guide
Millardinho is offline   Reply With Quote
Old 23rd June 2009, 20:38   #113
extremepie
Regular Poster
East Anglia Region Member
 
extremepie's Avatar
 
Join Date: Sep 2008
Location: Cambridge
Posts: 372
Car(s): Mini Cooper S Megane 11 Black
iTrader Score: 2 (100%)
extremepie is a jewel in the roughextremepie is a jewel in the roughextremepie is a jewel in the roughextremepie is a jewel in the rough
Default

Hi just done my TSW Heats in Gloss Black, do i need to Laquer them too??
extremepie is offline   Reply With Quote
Old 26th June 2009, 19:59   #114
Millardinho
Infrequent Poster
 
Join Date: May 2009
Location: Antigua, Caribbean
Posts: 154
Car(s): 1.1 Saxo Navy Blue :)
Millardinho is on a distinguished road
Default

Great guide!
Will probably use this once i get myself some wheels and some nice alloys
Millardinho is offline   Reply With Quote
Old 26th June 2009, 20:21   #115
Mark1
Frequent Poster
 
Join Date: Jun 2009
Location: North West
Posts: 593
Mark1 is on a distinguished road
Default

Nice guide, very useful

__________________
My Saxo Mods:
Xenon Headlights - Super White
Xenon Side Lights - Super White
Chrome Snake Eyes Rear Lights
High Intensity Brake Lights
Mark1 is offline   Reply With Quote
Old 26th June 2009, 20:30   #116
Saxoo_VT_Whatt
Established Member
South East Region MemberEast Anglia Region Member
 
Saxoo_VT_Whatt's Avatar
 
Join Date: Feb 2009
Location: Harwich ,Essex
Posts: 1,420
Car(s): Mk2 1.1 | Mk2 Furio | Mk2 Furio | Mk2 VTR
iTrader Score: 2 (100%)
Saxoo_VT_Whatt is on a distinguished road
Default

Really Good guide Shud Be Made A Sticky

Nice Saxos Btw
Saxoo_VT_Whatt is offline   Reply With Quote
Old 24th July 2009, 07:53   #117
twin1985
Regular Poster
South Wales Region Member
 
twin1985's Avatar
 
Join Date: Jul 2009
Location: Bridgend
Posts: 279
Car(s): Mrk1 saxo VTR
twin1985 is on a distinguished road
Default

awsome guide mate cant wait to have a go at mine..
twin1985 is offline   Reply With Quote
Old 25th July 2009, 10:40   #118
Phsyco_Paff
Established Member
South East Region Member
 
Phsyco_Paff's Avatar
 
Join Date: Mar 2009
Location: South East
Posts: 2,015
Car(s): Phase 2 vts
iTrader Score: 2 (100%)
Phsyco_Paff is on a distinguished road
Default

Quote:
Originally Posted by furioAL View Post
First things first... refurbing and spraying alloy wheels is a very long task... do not attempt to do these unless you have a serious amount of time on your hands... and will persevere through boring sanding in order to achieve a good result... it takes roughly 1-2hours to sand paper prepare one wheel with very few curb marks.. it takes roughly 4-6hours to sand prepare one wheel with major curb marks...

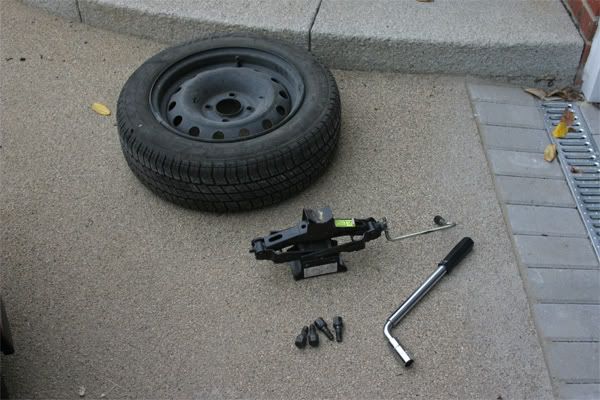
Things you will need:
Rough estimate for materials needed: £50
Spare wheel, jack, bolts, filler (depending on how curbed your wheels are), 3/4 large cans of primer, 3/4 cans of chosen colour paint, 1/2 large cans of CLEAR laquer, a pack of 240 grade wet/dry paper, a pack of 1200 grit wet/dry paper and two large roles of masking tape... if you have some serious curbage or would like to save some time SOME of the preperation work can be done using an orbital sander with fine grade pads...


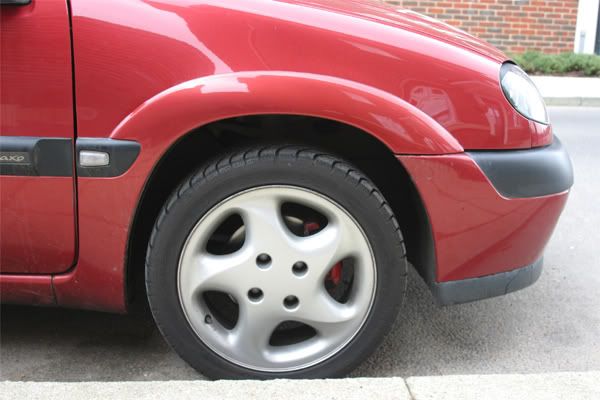
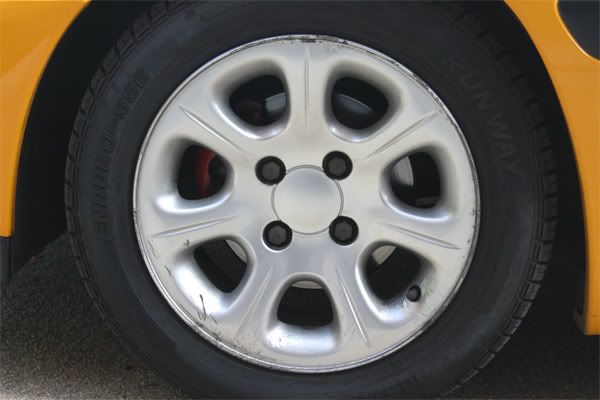
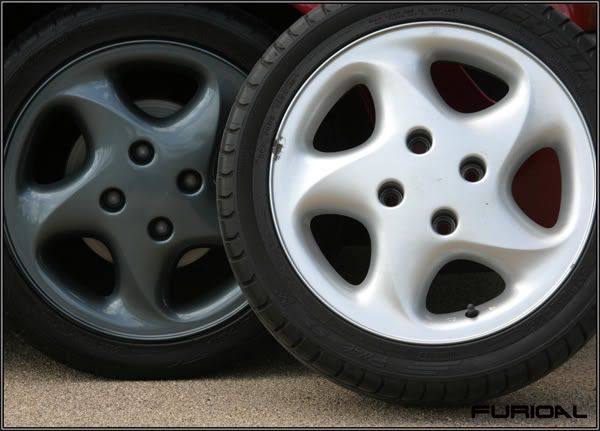
We start of with curbed boring looking alloy wheels:


The guide:

The first stage is removing the wheel from the car, make sure you use the car's jack points to avoid damaging the underside of the car...
(if you are unsure of how to change your wheel - follow the instruction in your saxo owners handbook)

Once the wheel is removed they need to be cleaned front and back... i covered mine in Autoglym tar remover and allowed time for it to soak in before rubbing gently with a wheel brush... this was then rinsed off and dried with kitchen paper....

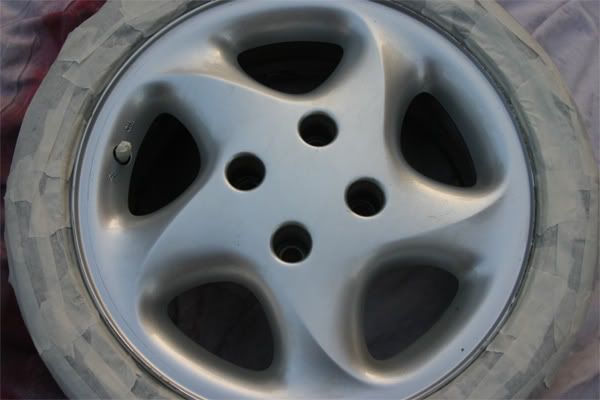
Once dry, deflate the tyre completely, by unscrewing cap and pushing in valve... once flat... bend the tyre wall down (gently) by standing on it.. and tuck masking tape underneath the lip of the rim.. work your way around slowly... if you have a lot of tyre shine on your tyres the tape may not stick.. so work your way out the tread of the tyres as the masking tape will stick well there... you also need to mask around your tyre valve cap. It should look something like this:


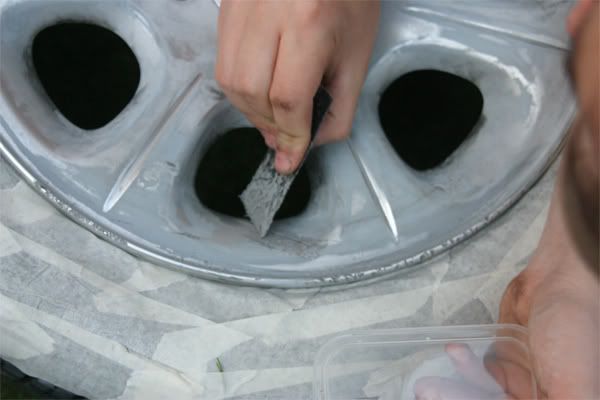
Once masked the sanding can begin (the time consuming bit)...
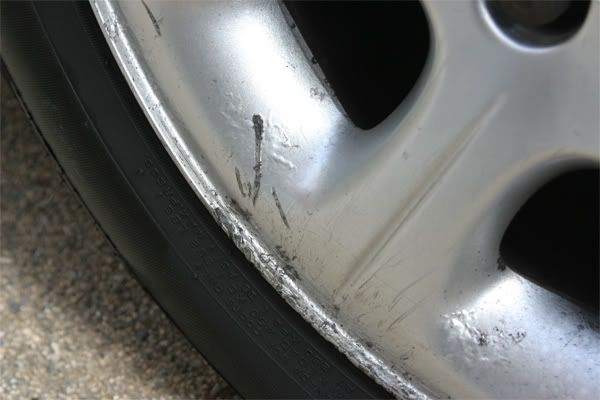
Rub over the entire front face of the wheel... including every single nook and cranny with the 240 grit wet and dry paper. You will notice when and area is 'ready' as the surface will have lost it's clearcoat and will look either like primer grey, or like bare metal (depending on how deap you have to sand to remove marks)..

You do not have to sand the wheel all the way back down to metal.. you need to remove the surface clearcoat... and ensure the whole surface is flat and mark free...

Work around the wheel systematically with the 240 grit paying particular attention to the lip of the wheel... where there is bubbling or curb marks you will need to work on these areas for some time to make the surface flat... an orbital sander could be used at this stage to save some time....
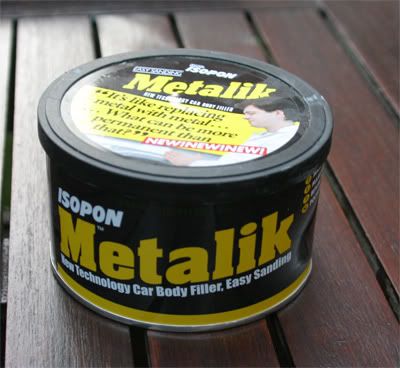
Filler:

This may not be necessary, it depends on the nature of the imperfections on the wheels... my advice would be only use filler were 100% essential... as if used incorrectly can flake off and make the lifespan of your wheel paint job significantly less.... If needed follow the next section:

Mix up some filler with hardener (a golf ball size of filler to a pea size of hardener) like shown:


Once thoroughly mixed you will only have around 5 minutes to apply the filler... apply it sparingly as sanding down excess filler can take a long time...

Carefully fill any deep surface defects in the wheel:


Once filler is used leave for several hours before resanding the areas flat...the exact duration will vary depending on the filler used...

Back to the guide:

Now the wheel should be reasonably smooth, and flat... where bubbling used to be, you should now be able to brush your finger over the surface without feeling any resistance...

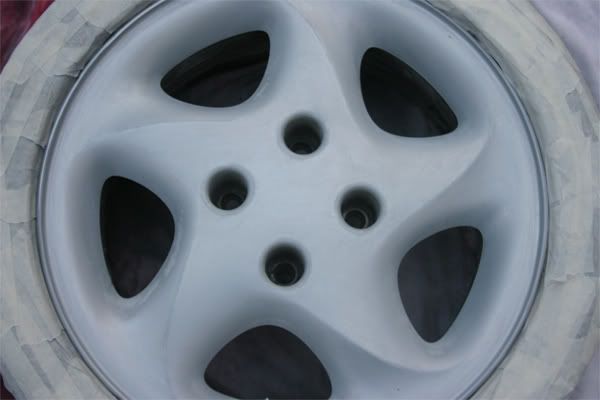
If this is the case proceed with sanding the entire wheel with 1200 grit wet and dry paper... this will make the surface of the wheel entirely smooth...

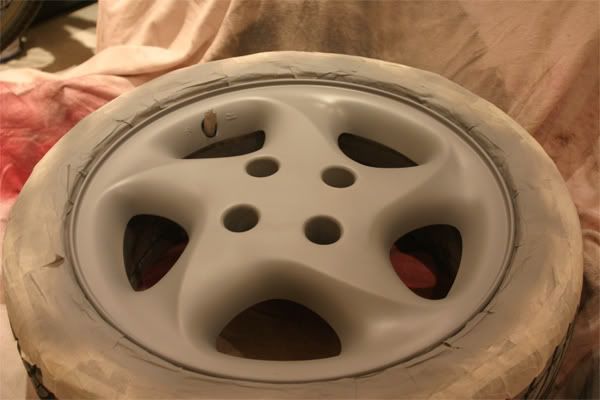
When rubbed down and smooth, it should look something like this:


We are now ready for primer... apply one light coat of primer to the entire wheel... allow 15 minutes for it to become touch dry...

At this stage assess the wheel... if there are any visible imperfections go back to the sanding stage and keep working on it... do not carry on priming and painting.... the imperfections visible at this stage will be magnified by painting and laquering... so it is crucial you go back and filler/sand out the imperfections...

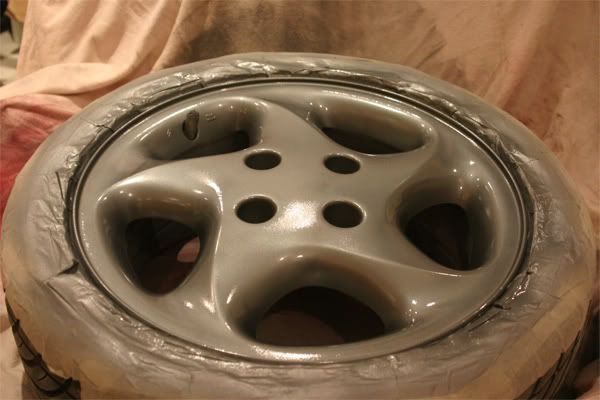
If after the first coat of primer the wheel has no imperfection apply another coat of primer... i recommend applying 3/4 coats of primer leaving 15-30 minutes between coats for it to dry... then leave the primer for 24hours to fully dry... it should look like this:


Once the primer is dry you are ready to apply paint... shake the can well before applying... apply lots of thin coats... as most wheels have lots of corners it is vital you do thin coats as paint can quickly accumulate leaving run lines... I recommend applying around 4-5 good coats of paint leaving 15-30minutes in between coats to dry...


Then leave the paint for 24hours to harden fully... then you are ready to start laquering...

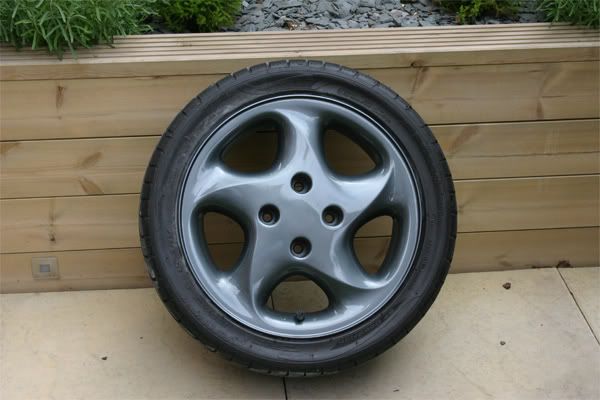
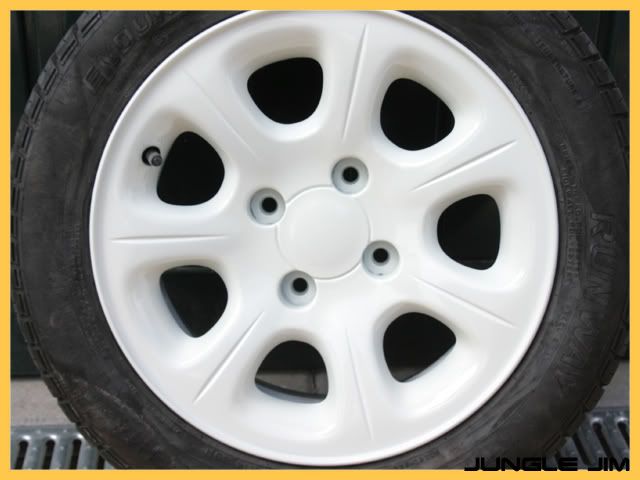
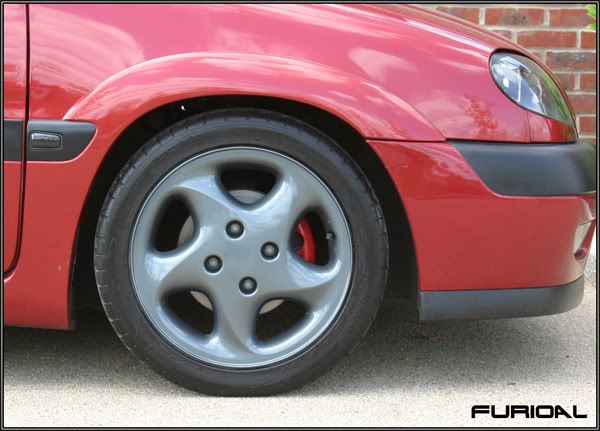
Apply 3-4 good coats of laquer also being careful not to leave run lines... allowing 15-30minutes between coats... once laquered leave the wheel to dry for 24hours.. it is then finished... It should look something like this:


Remove the masking tape from the tyre wall and the valve cap... re-inflate the tyres, then tyre dressing can be applied:


Then the wheel can be refitted to the car... and you can start on the next one... make sure you note the tread pattern direction when refitting the wheels to the car...

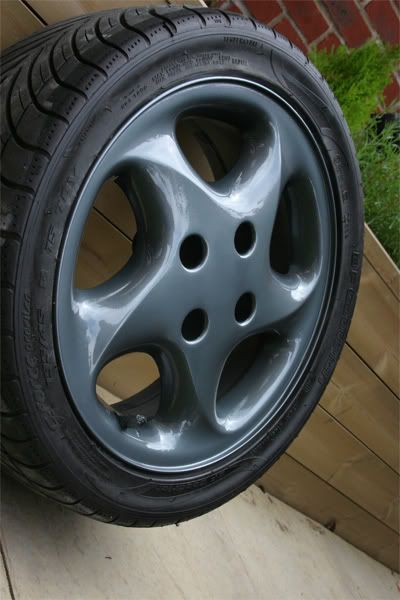
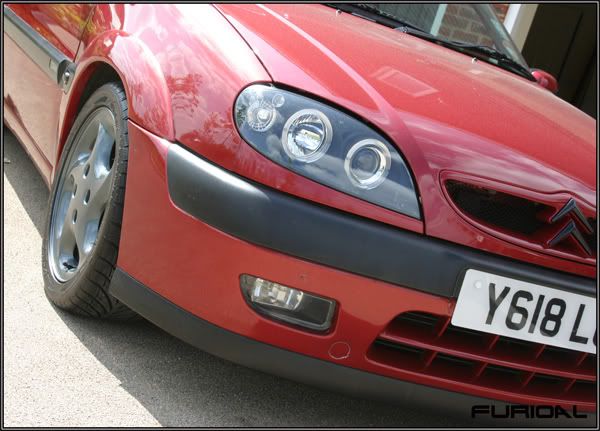
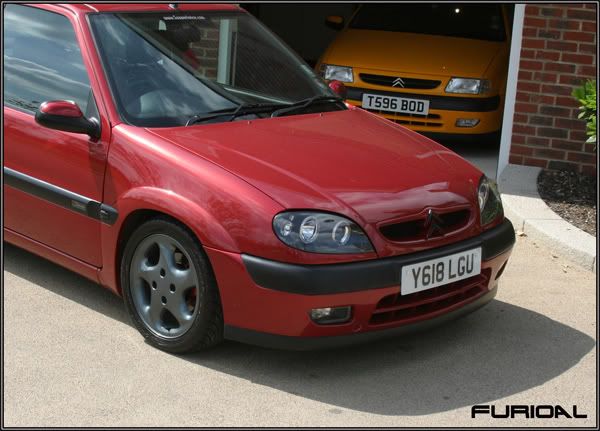
Now stand back and admire all that hard work:


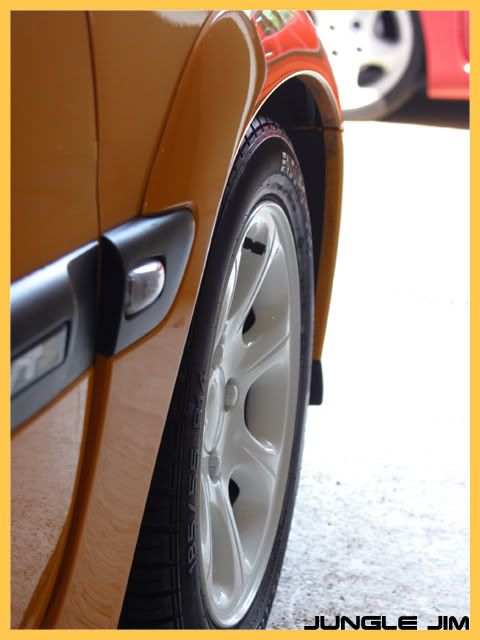
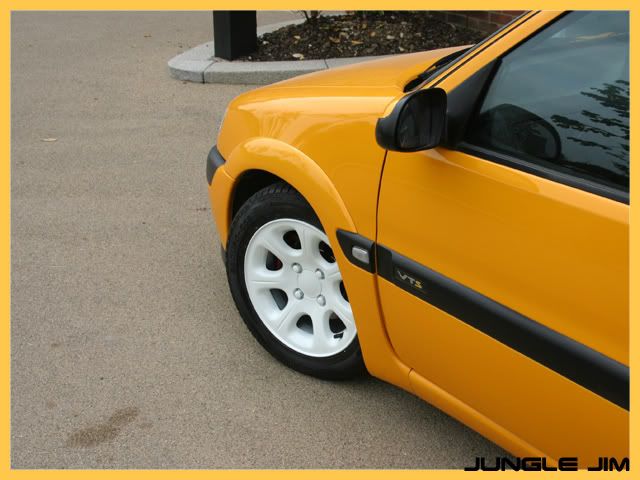
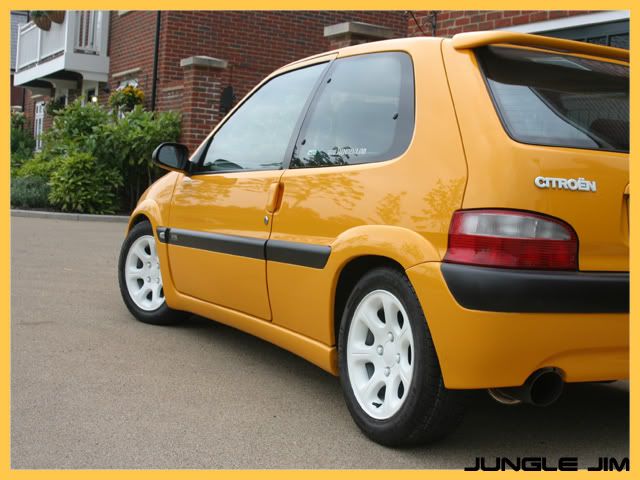
You should notice a massive difference from standard:


Hope that helps a few of you
Alex
where did you get them foglights on the red one?
__________________
VTS VTS VTS VTS VTS

http://www.saxperience.com/forum/sho...=VTS+POSI+BLUE
Phsyco_Paff is offline   Reply With Quote
Old 27th July 2009, 13:35   #119
Killeybh
Frequent Poster
 
Killeybh's Avatar
 
Join Date: Jul 2009
Location: dy14 8rt shropshire
Posts: 580
Car(s): 1.1 desire
iTrader Score: 3 (100%)
Killeybh is on a distinguished road
Default

nice white alloys!
Killeybh is offline   Reply With Quote
Old 21st August 2009, 09:55   #120
Claki
Established Member
Central Counties Region MemberCentral South Region MemberSouth East Region MemberSouth West Region Member
 
Claki's Avatar
 
Join Date: Aug 2009
Location: Horsham
Posts: 1,855
Car(s): Leon Cupra 200 TDI
iTrader Score: 16 (94%)
Claki is on a distinguished road
Default

Deffo great guide. got me thinkin now, colour coded vtr wheels or just colour coded lip?
Claki is offline   Reply With Quote
Reply

Bookmarks


Posting Rules
You may not post new threads
You may not post replies
You may not post attachments
You may not edit your posts

BB code is On
Smilies are On
[IMG] code is On
HTML code is Off

Forum Jump


All times are GMT. The time now is 07:20.