| Non Saxo Photos / Videos / Progress Reports Please share photos/videos of your non saxo in this forum. |
 |
|
 6th July 2014, 15:32
|
#201
|
|
Newbie
Join Date: Feb 2013
Location: Castelo Branco/Portugal
Posts: 1
Car(s): Citroën Ax 1.4D
Citroën Berlingo 2.0 HDi
Toyot
|
It need attention.
|

|

|
|
The Following User Says Thank You to Andre21 For This Useful Post:
|
|
|
7th July 2014, 13:01
|
#202
|
|
West Midlands
Join Date: Nov 2005
Location: Nuneaton (West Mids)
Posts: 13,835
Car(s): '64 Volvo V40 RDesign, '89 Ph1 309 GTi, 97 Mk1 S
|
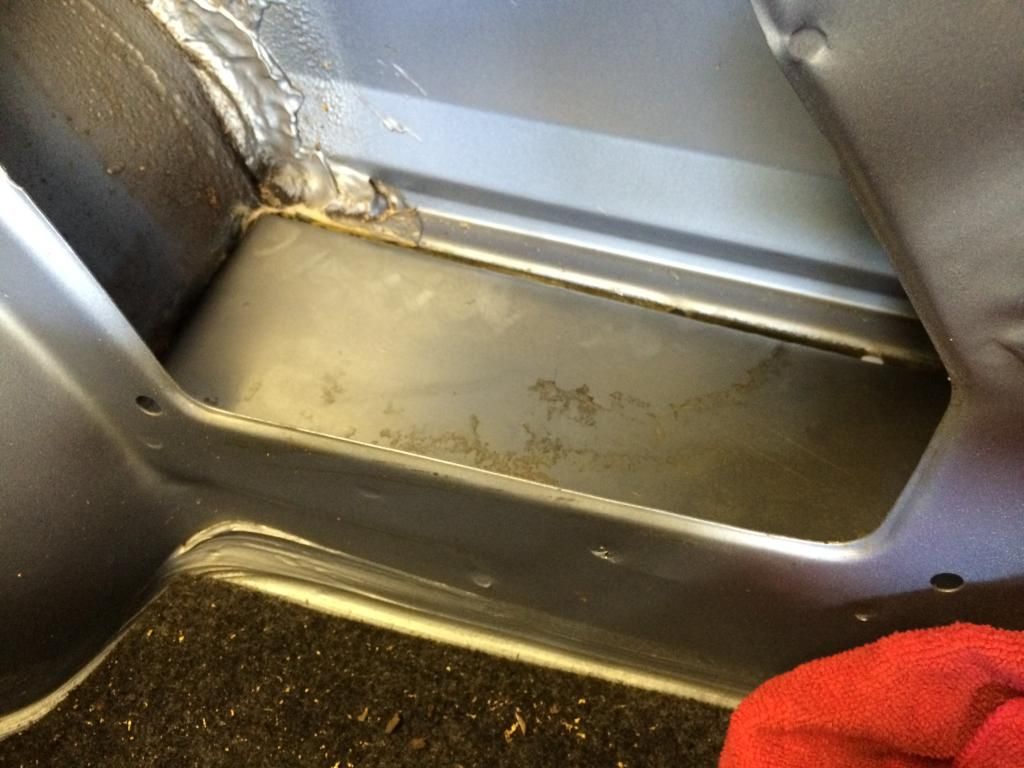
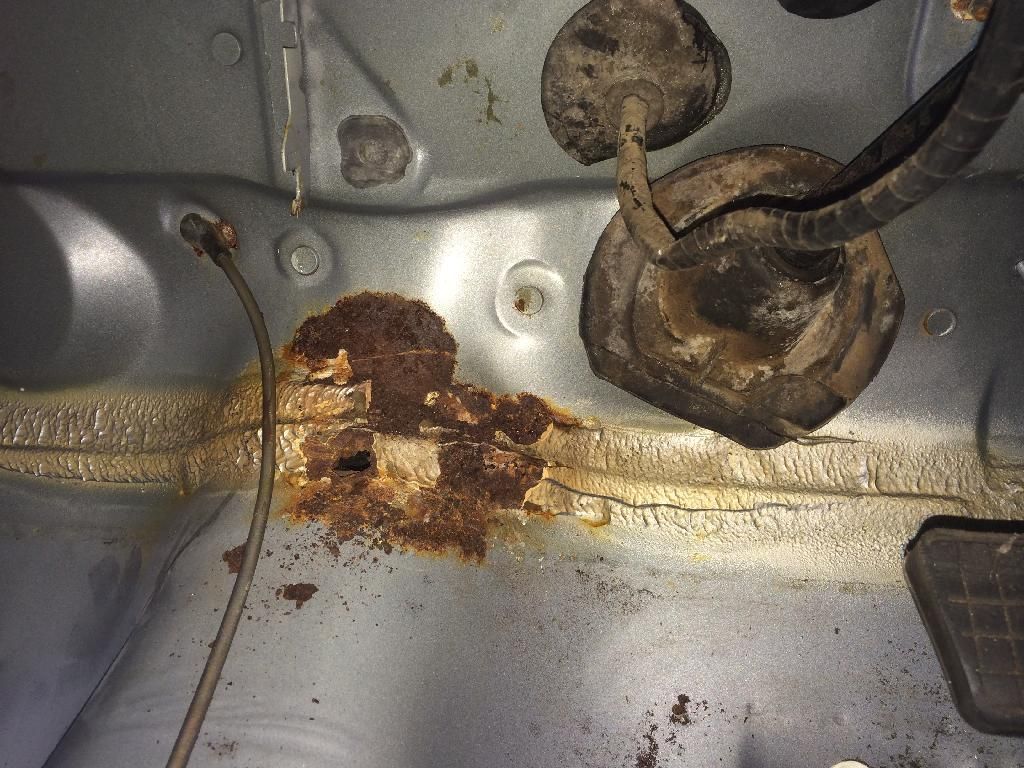
This morning I've spent removing the rest of the stone chip around my rusty bit on the drivers side rear rusty bit, fortunately it doesn't seem to have spread much past the small spot welded in panel
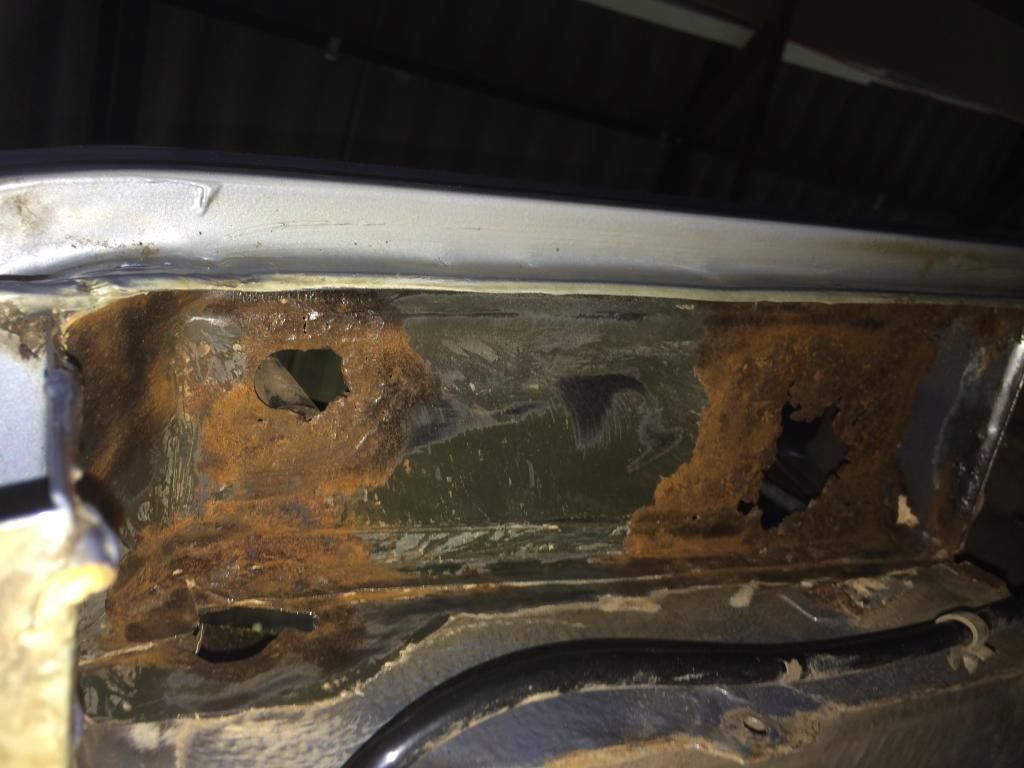
In keeping with wanting to repair it as best as possible I'd rather not simply patch a repair. I'll drill out the spot welds, clean it up and I've made templates for the bits to be replaced

And offered up into place
The task over the next few mornings will be to make the pieces up to be welded in and remove the old rusty piece of panel
|
|
|
|
|
10th July 2014, 18:11
|
#203
|
|
West Midlands
Join Date: Nov 2005
Location: Nuneaton (West Mids)
Posts: 13,835
Car(s): '64 Volvo V40 RDesign, '89 Ph1 309 GTi, 97 Mk1 S
|
|
|
|
|
|
11th July 2014, 11:06
|
#204
|
|
West Midlands
Join Date: Nov 2005
Location: Nuneaton (West Mids)
Posts: 13,835
Car(s): '64 Volvo V40 RDesign, '89 Ph1 309 GTi, 97 Mk1 S
|
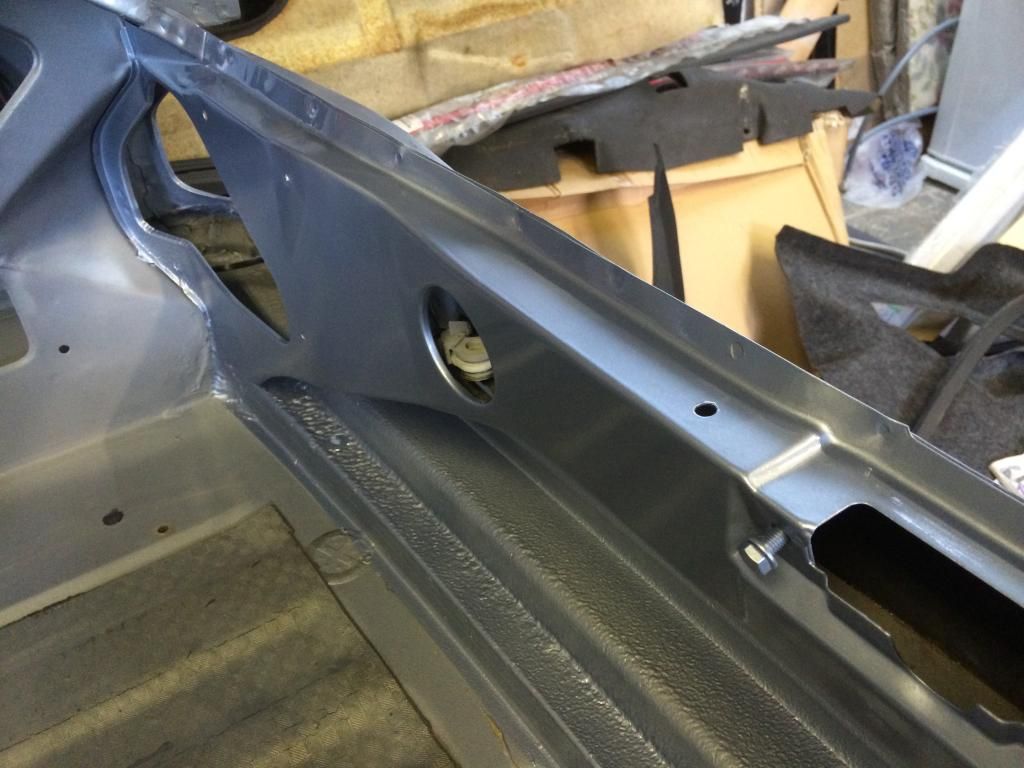
Welding finally in progress :-)
|
|
|
|
|
12th July 2014, 01:06
|
#205
|
|
Saxperience Post Whore
Join Date: Oct 2005
Location: Sydney
Posts: 8,525
Car(s): Mango Westcoast
|
Awesome work mate!
|
|
|
|
|
12th July 2014, 20:36
|
#206
|
|
West Midlands
Join Date: Nov 2005
Location: Nuneaton (West Mids)
Posts: 13,835
Car(s): '64 Volvo V40 RDesign, '89 Ph1 309 GTi, 97 Mk1 S
|
Cheers Josh
The welding that I wanted doing has all been done, it'll allow me to get the interior finished and back together in the coming weeks. Sure I'll find more at some point when I investigate further underneath, we'll see.
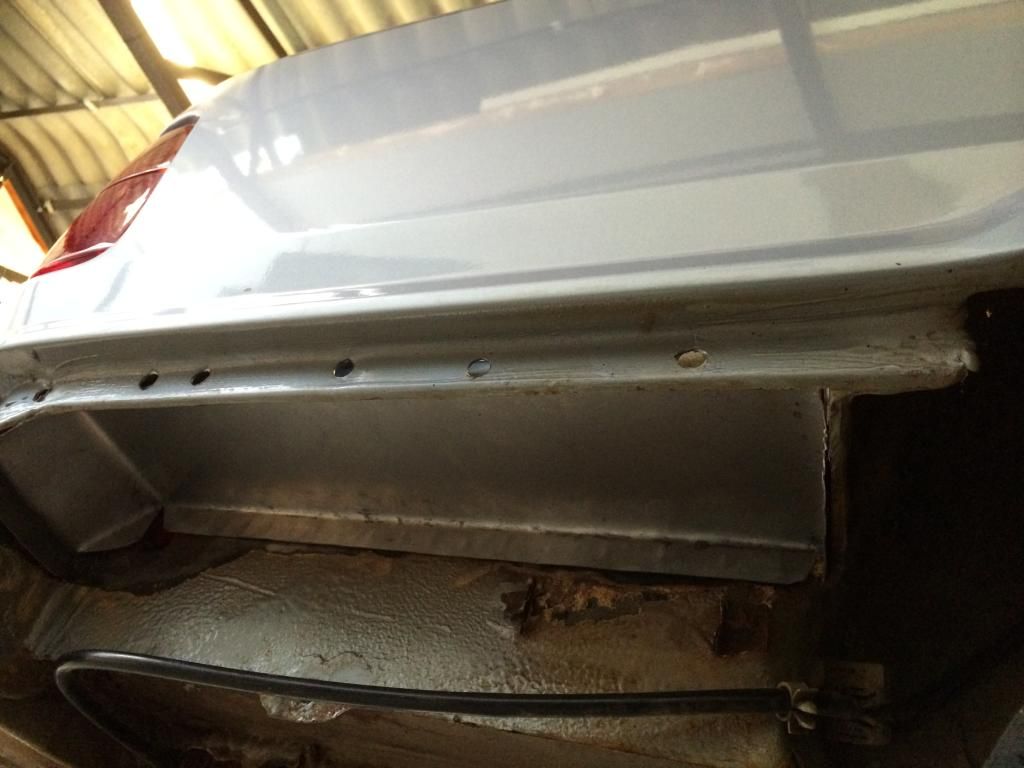
Got the rear bumper bracket all ready for paint today, whizzed over the new metal with a variety of wire drill attachments, went all around the seams with seam sealer (the stuff is evil is all I'll say) then applied some OE stone chip.
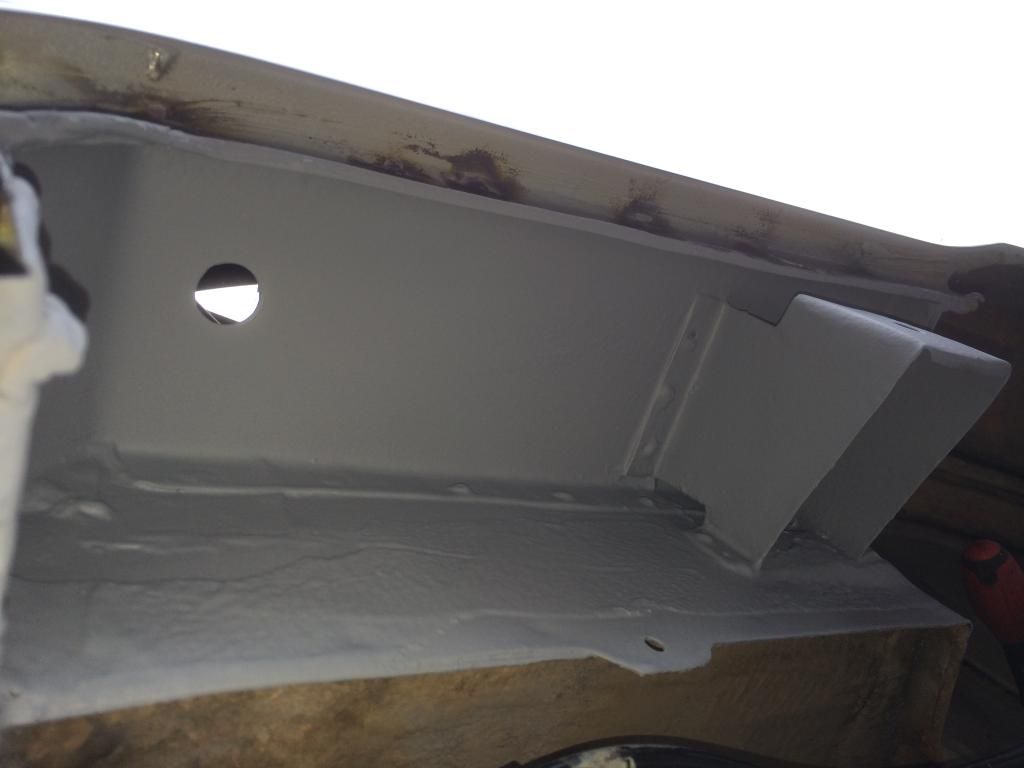
Just need to finish the top spot welds now, they're ground down just needs finishing.

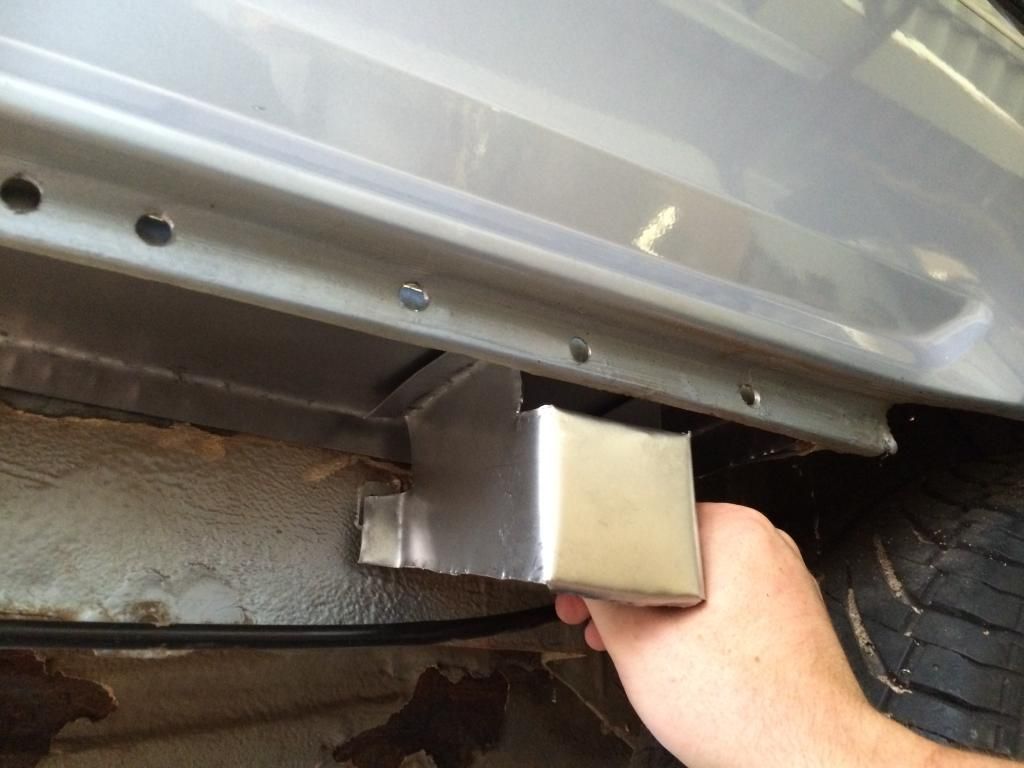
And inside
Front seat mounts next. The original piece that snapped off was clean enough to weld back in then some small plates were welded over each of the drivers seat front mounting points to strengthen it up.

I should be able to fly through the interior prep now before giving it a bit of paint before reassembly :-)
|
|
|
|
|
12th July 2014, 20:39
|
#207
|
|
Saxperience Hardcore!
Join Date: Oct 2008
Location: Birtley
Posts: 22,253
Car(s): VTR Turbo, 106 xsi track slag, Transit recovery, B
|
as always, attention to detail is full of win matt
__________________
Quote:
Originally Posted by Stissy

EDIT: i give up on you.
|
Quote:
Originally Posted by Giraffe
FUCK YES. I won on the internet.
|
|
|
|
|
|
13th July 2014, 21:43
|
#208
|
|
Newbie
Join Date: Feb 2013
Location: Castelo Branco/Portugal
Posts: 1
Car(s): Citroën Ax 1.4D
Citroën Berlingo 2.0 HDi
Toyot
|
Very impressive Work!
That look really nice man!
Keep Going
|
|
|
|
|
13th July 2014, 22:33
|
#209
|
|
Infrequent Poster
Join Date: Aug 2013
Location: Peterborough
Posts: 136
Car(s): Citroen Saxo 1.1 Forte
|
Jesus how do you have the patience, are you some sort of restoration saint?
|
|
|
|
|
14th July 2014, 16:33
|
#210
|
|
West Midlands
Join Date: Nov 2005
Location: Nuneaton (West Mids)
Posts: 13,835
Car(s): '64 Volvo V40 RDesign, '89 Ph1 309 GTi, 97 Mk1 S
|
Aha not quite, but I do have the patience of a Saint. I just need to find some motivation to get the prep work finished on the interior so that I can paint it. Prep work bores me to tears :-(
|
|
|
|
|
14th July 2014, 19:05
|
#211
|
|
Infrequent Poster
Join Date: Aug 2013
Location: Peterborough
Posts: 136
Car(s): Citroen Saxo 1.1 Forte
|
Do it, I'm loving the updates when they come!
I wish I was that much of a perfectionist, when stuff is done right it always looks so much better 
|
|
|
|
|
15th July 2014, 18:54
|
#212
|
|
Infrequent Poster
Join Date: Aug 2013
Location: Peterborough
Posts: 136
Car(s): Citroen Saxo 1.1 Forte
|
I've sent you a PM as well Willsy 
|
|
|
|
|
20th July 2014, 23:13
|
#213
|
|
West Midlands
Join Date: Nov 2005
Location: Nuneaton (West Mids)
Posts: 13,835
Car(s): '64 Volvo V40 RDesign, '89 Ph1 309 GTi, 97 Mk1 S
|

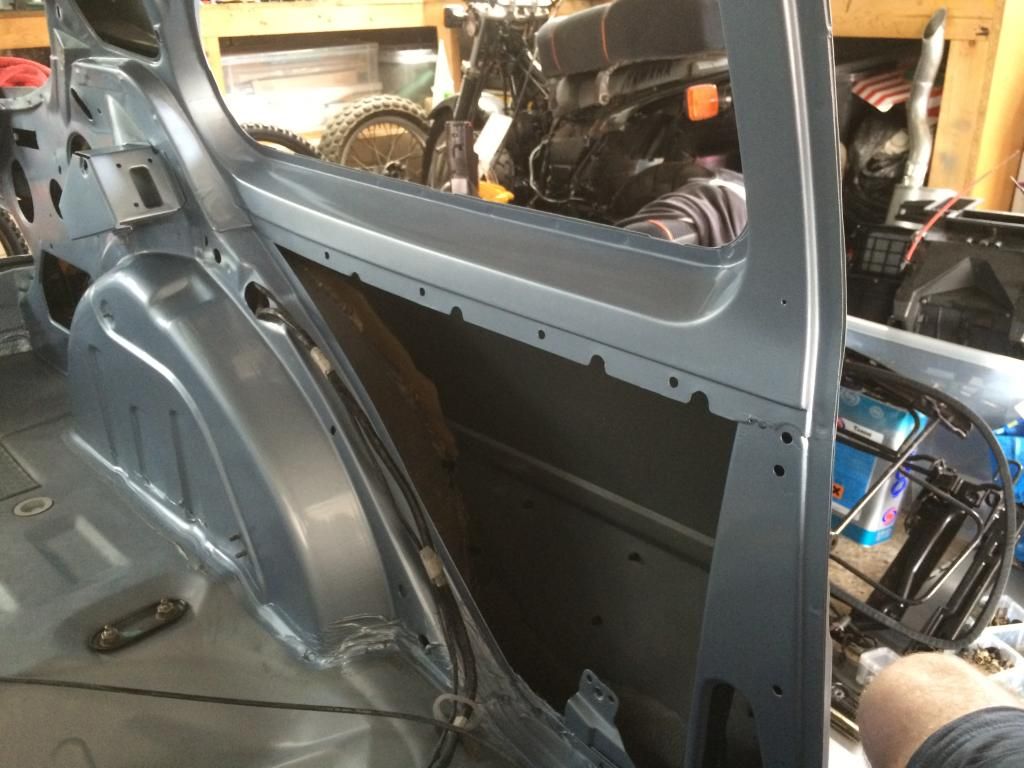
Busy bee again today. Cracked on with the interior prep now that the welding is out the way.
Decided to crack on with bits in segments for the prep stage as it's more manageable and less boring than slaving away for hours without seeing much result.
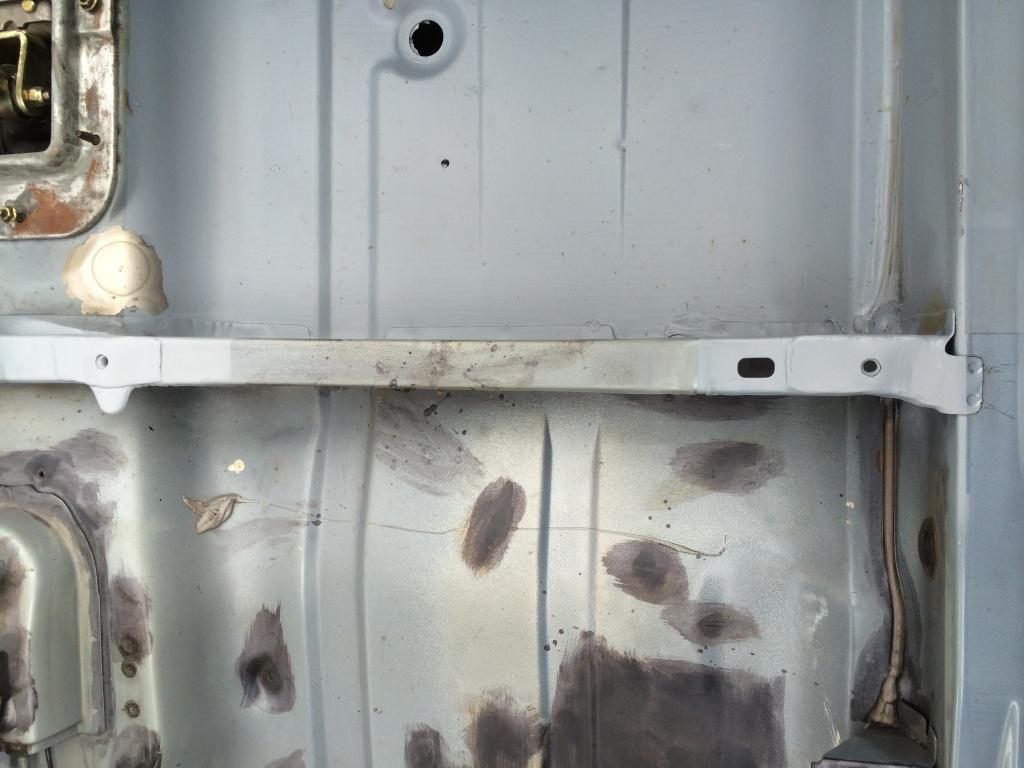
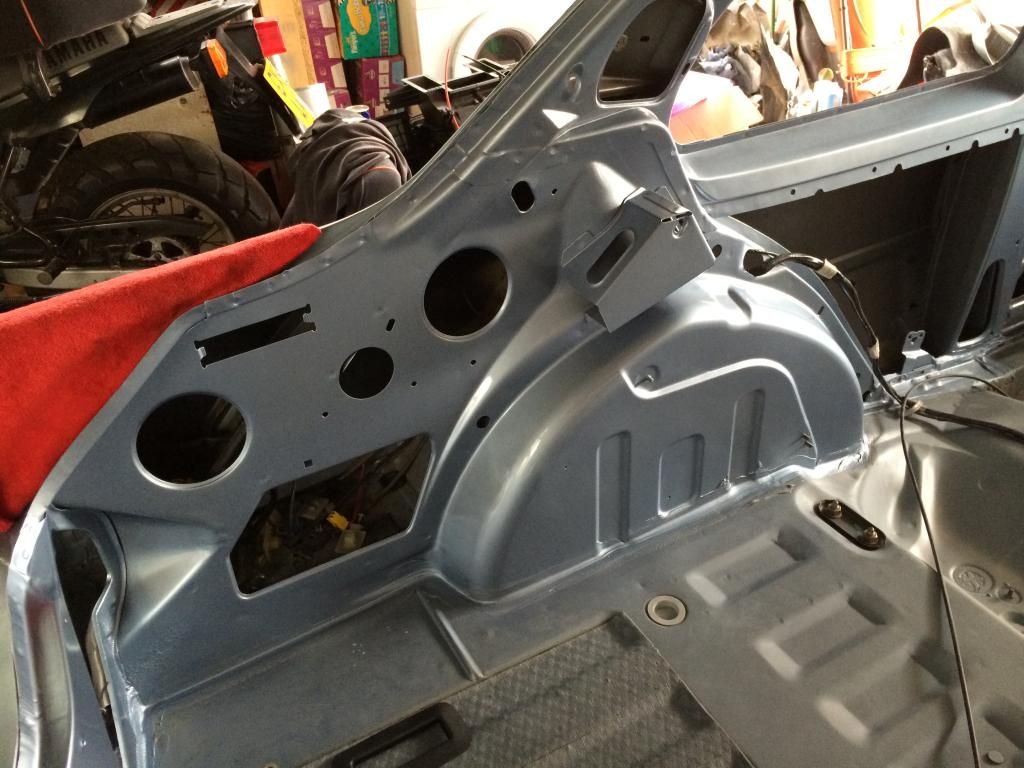
First up I did the rear boot panel, all straight and no dents which was good however loose luggage over the years had scratched and chipped the paint in several areas which had developed slight surface rust. Easily stripped back with a quick skim with the wire drill attachments, treated and primered
The boot floor is near perfect so no lengthy prep required there.
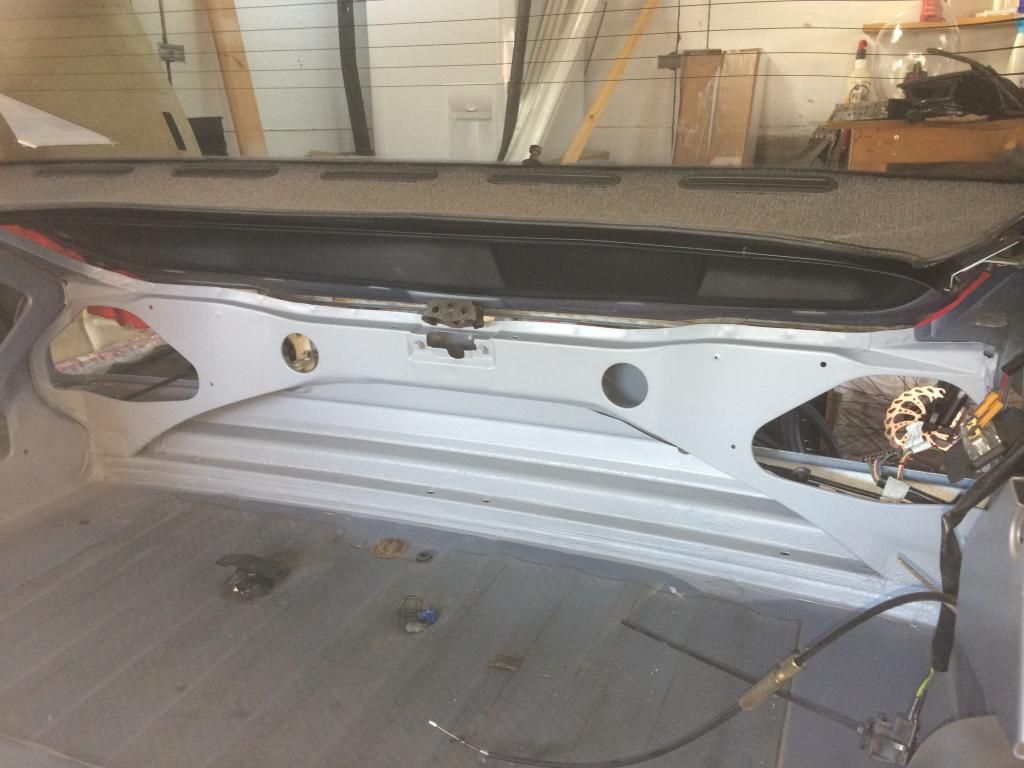
Next up was the rear bench trough. I suspect that his had been wet at some point and the poor paint finish had started to degrade and lift in places with a number of scratches which had developed a thin layer of surface rust again. It didn't look too bad after a general degrease and clean, but having starting to sand away at the scratches the old paint seemed to be very powdery and only took a mere tickle with the sandpaper. I wasn't happy with it so decided to strip that right back to the bare metal in the end, treated again and primered
Much better
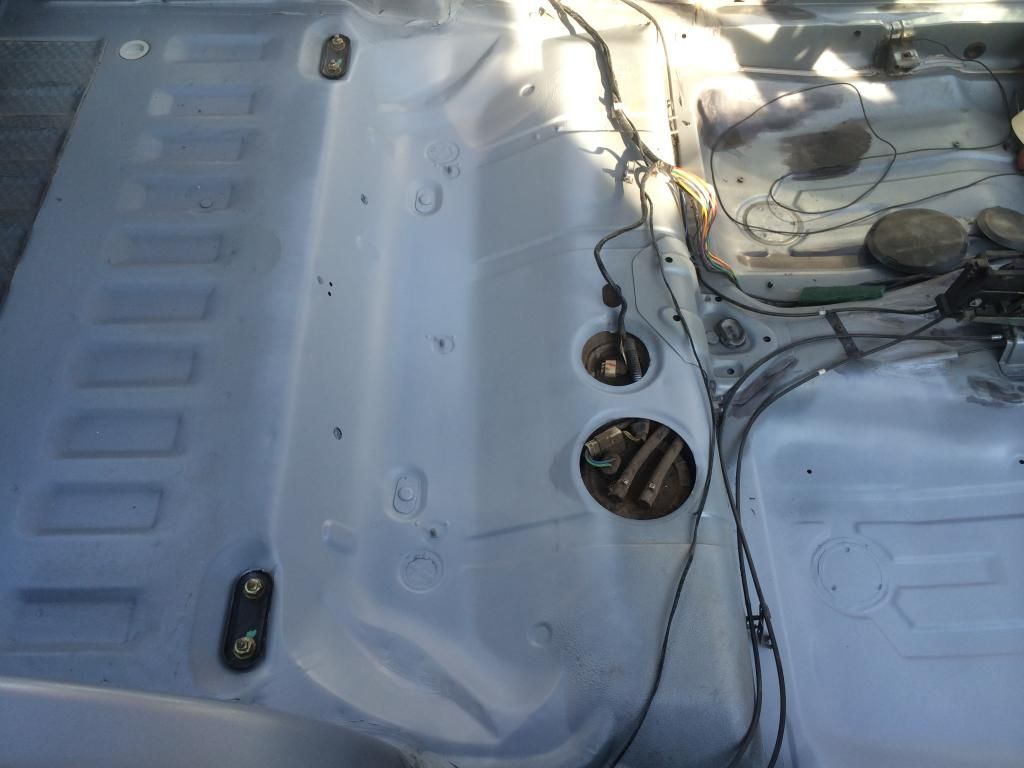
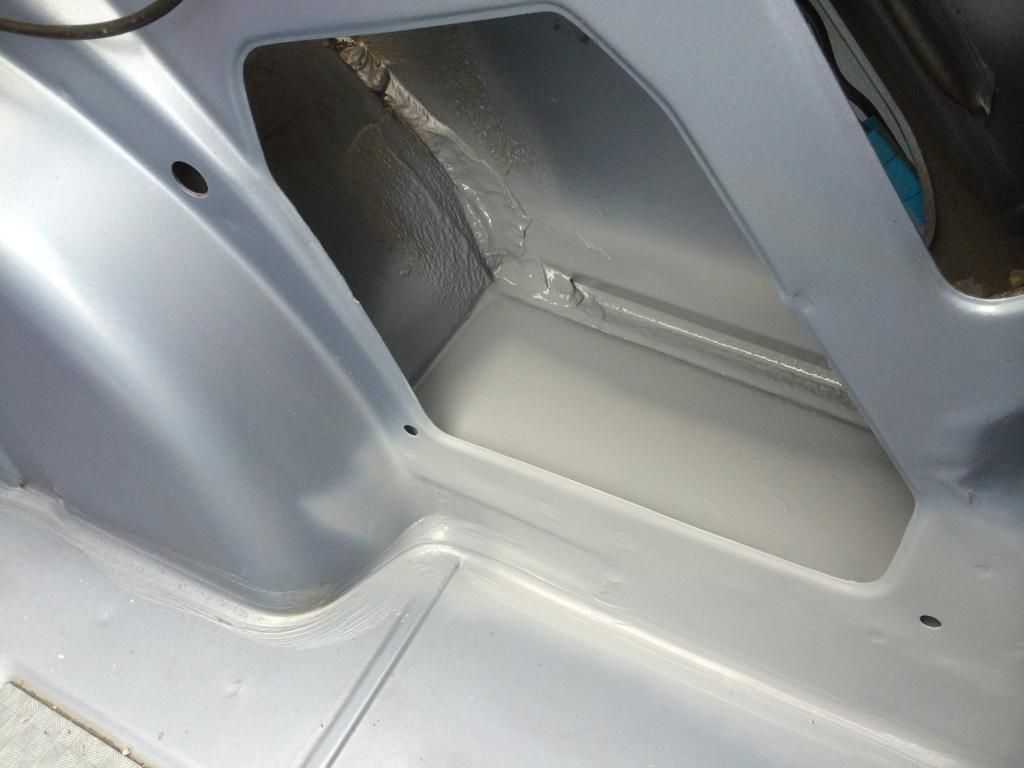
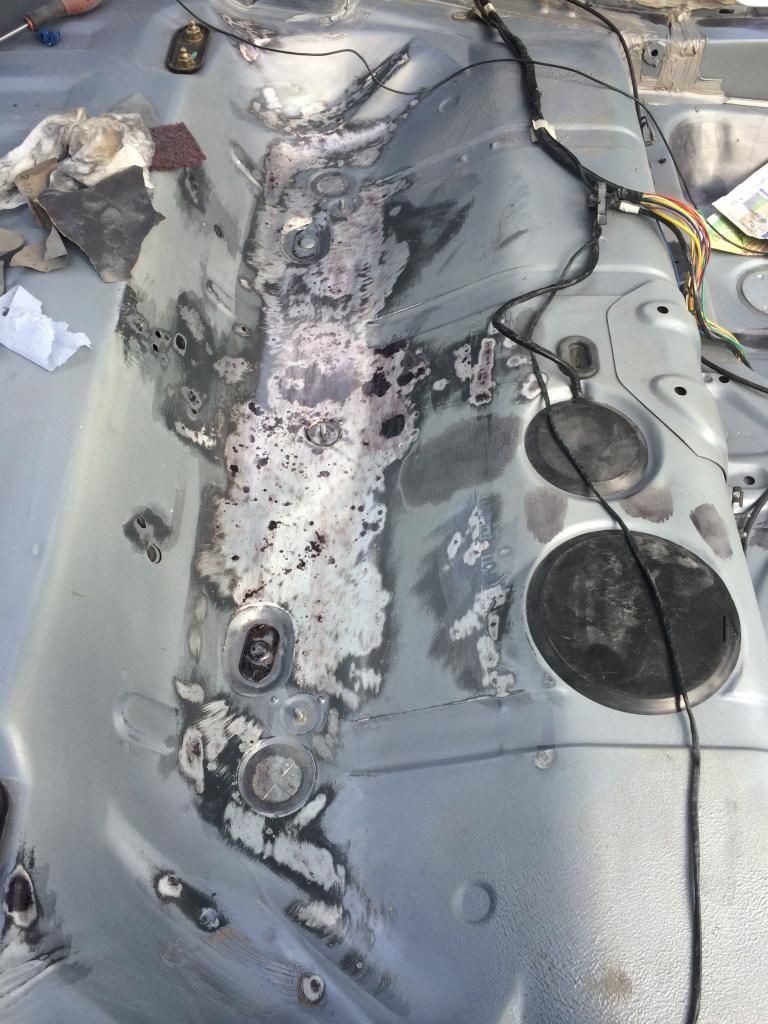
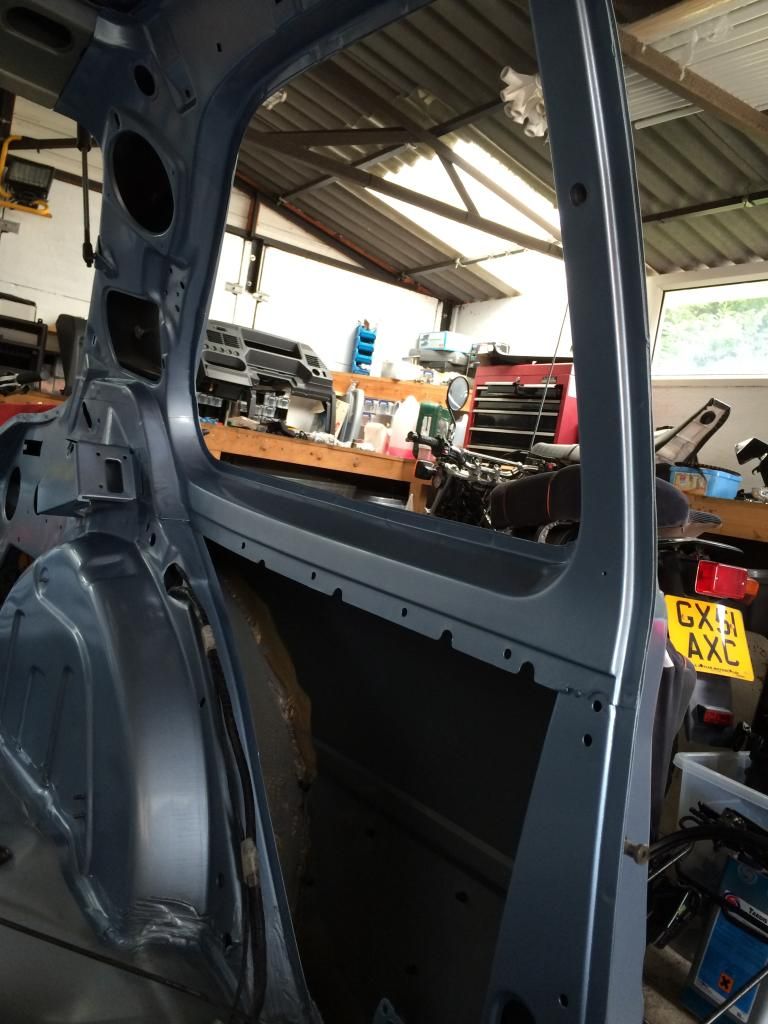
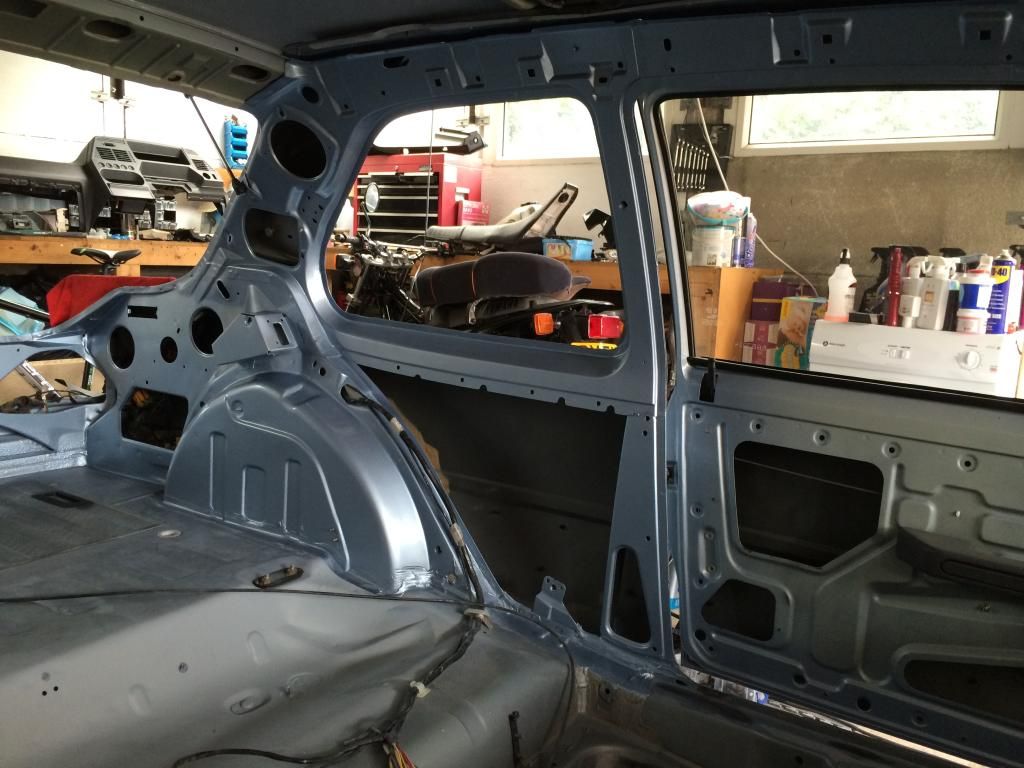
Then onto the drivers rear footwell. Several areas I'd already tended to and treated previously, in the middle of the footwell the OE finish is stone chip texture so I have reapplied some over the bits which I've tidied up before primering to retain as best as I can the OE finish. Here's progress so far

|
|
|
|
|
21st July 2014, 09:18
|
#214
|
|
Saxperience Forum Bum
Join Date: Feb 2007
Posts: 3,068
|
Progress on this looks awesome!!! Really wish I had the patience to tidy up my cars like this!
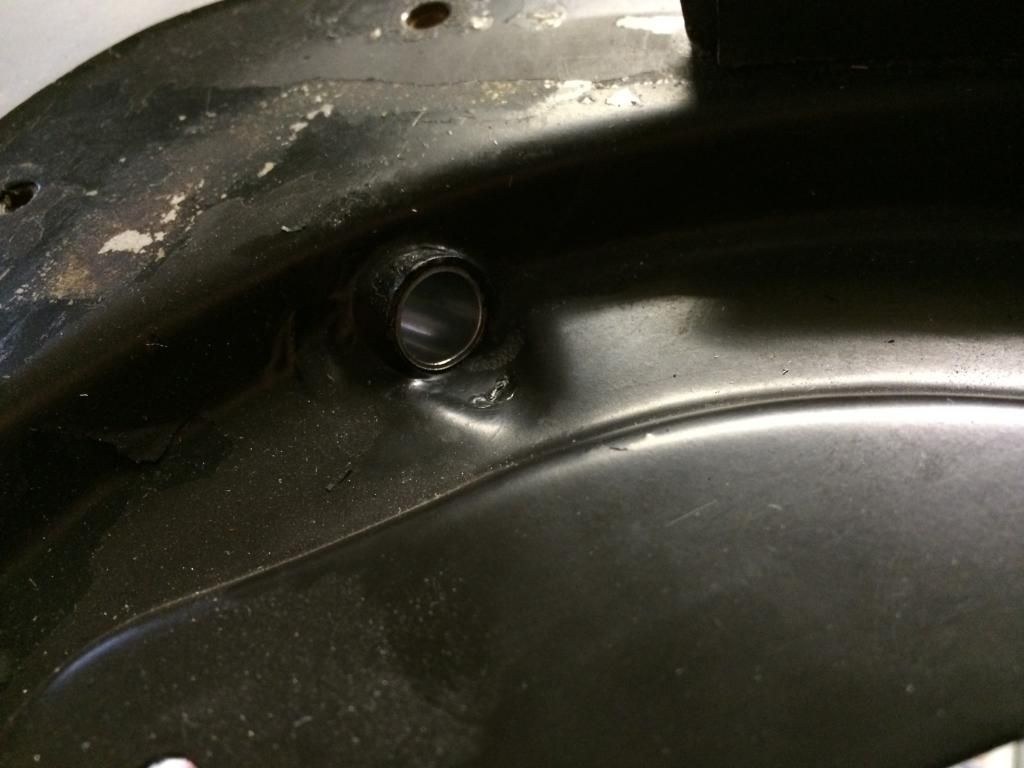
How did this go? Get that patched up?
Quote:
Originally Posted by willsy
|
|
|
|
|
|
21st July 2014, 14:43
|
#215
|
|
West Midlands
Join Date: Nov 2005
Location: Nuneaton (West Mids)
Posts: 13,835
Car(s): '64 Volvo V40 RDesign, '89 Ph1 309 GTi, 97 Mk1 S
|
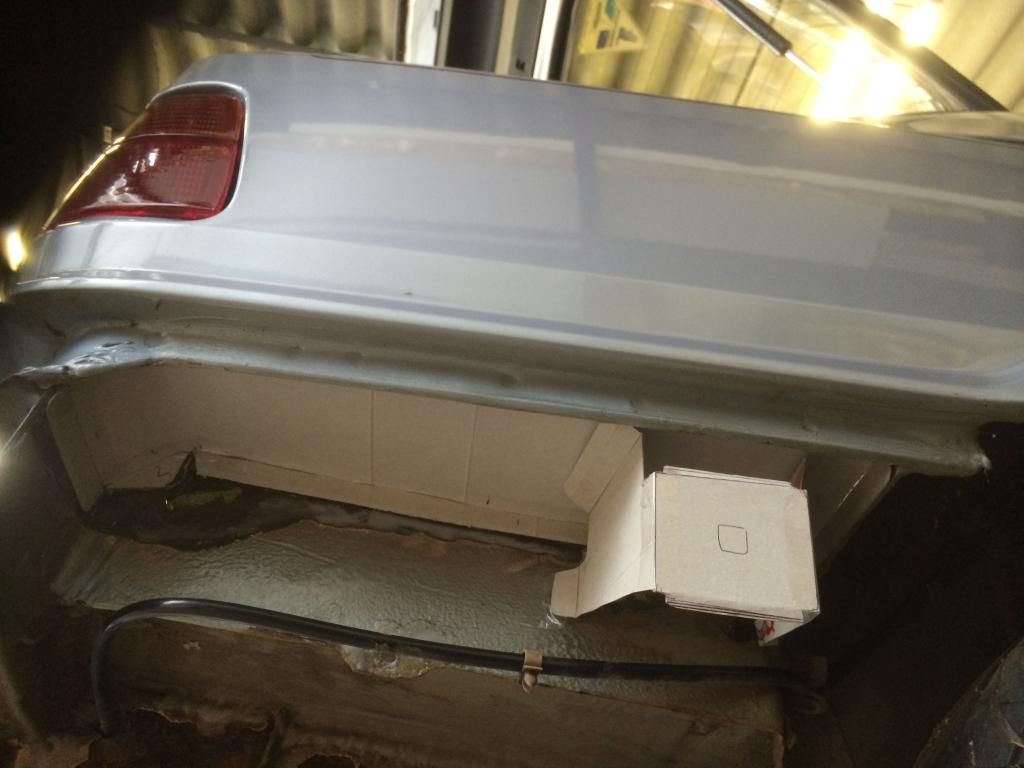
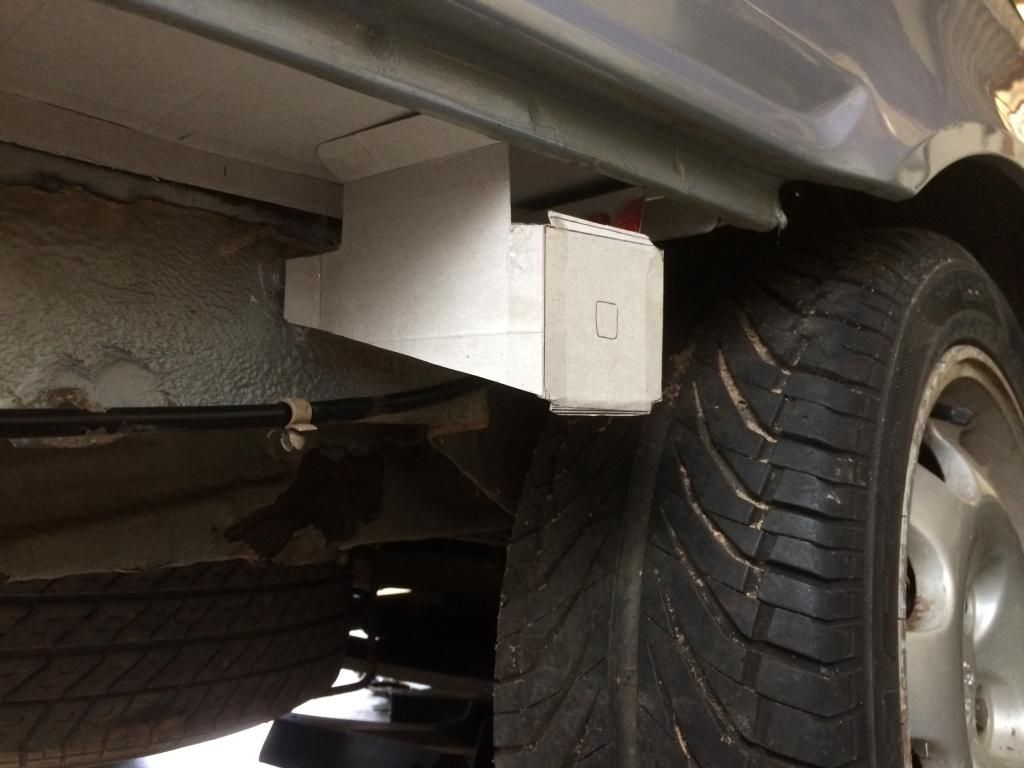
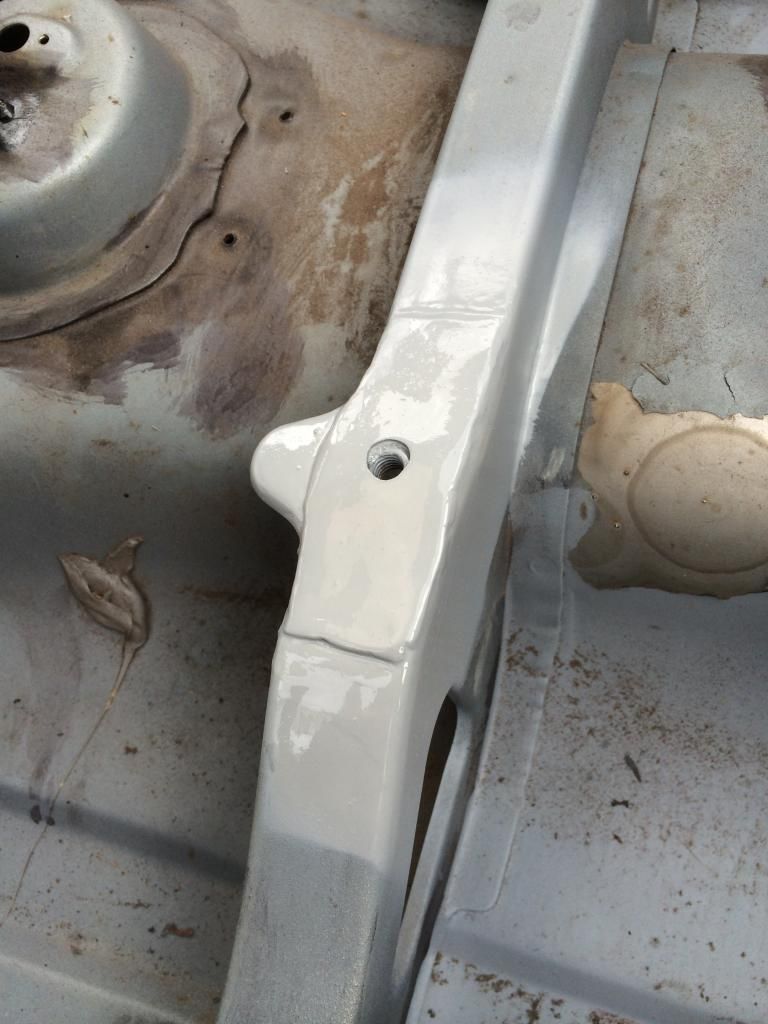
Yes mate, that little issue was sorted too. I'd ground it down and the majority of it around the hole was just surface rust but took the wise decision to cut it all out and replace the lot, I'll grab a pic next time I'm in the garage.
|
|
|
|
|
28th July 2014, 17:55
|
#216
|
|
West Midlands
Join Date: Nov 2005
Location: Nuneaton (West Mids)
Posts: 13,835
Car(s): '64 Volvo V40 RDesign, '89 Ph1 309 GTi, 97 Mk1 S
|
|
|
|
|
|
The Following User Says Thank You to willsy For This Useful Post:
|
|
|
31st July 2014, 21:39
|
#217
|
|
West Midlands
Join Date: Nov 2005
Location: Nuneaton (West Mids)
Posts: 13,835
Car(s): '64 Volvo V40 RDesign, '89 Ph1 309 GTi, 97 Mk1 S
|
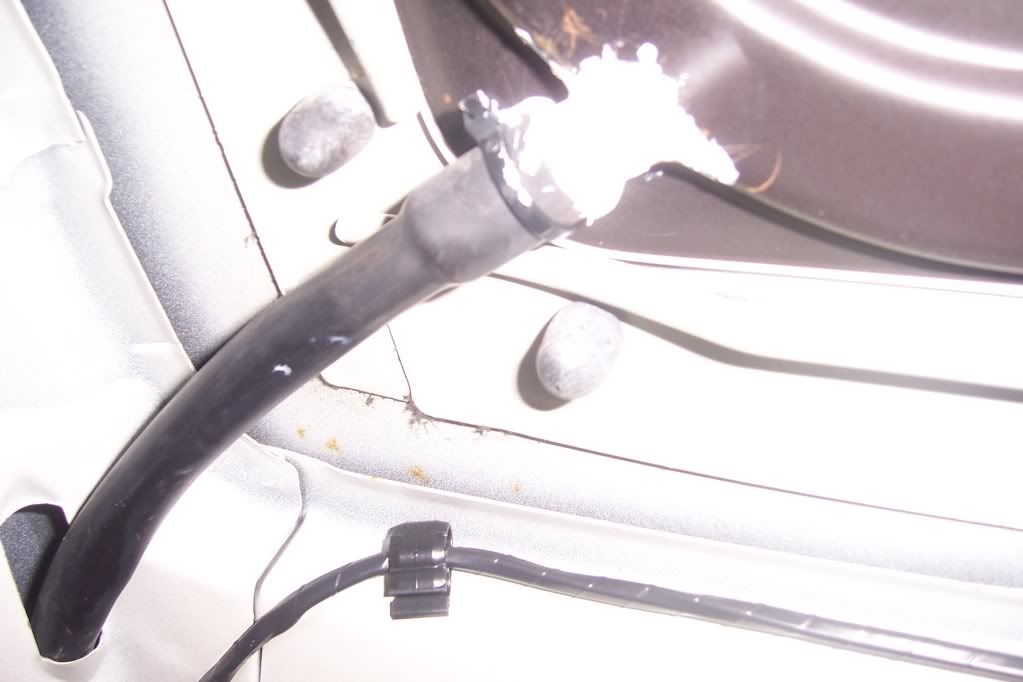
Started to tackle one of the 309's rust related Achilles heels this evening. This being the 4 sunroof drain tubes which suffer if the tubes become blocked. The rears in particular seem to be an issue as when fully assembled the sunroof blind housing pinches the drain tube to half it's natural diameter.
Anyway all 4 of mine were needing attention. This being one of the better condition front ones
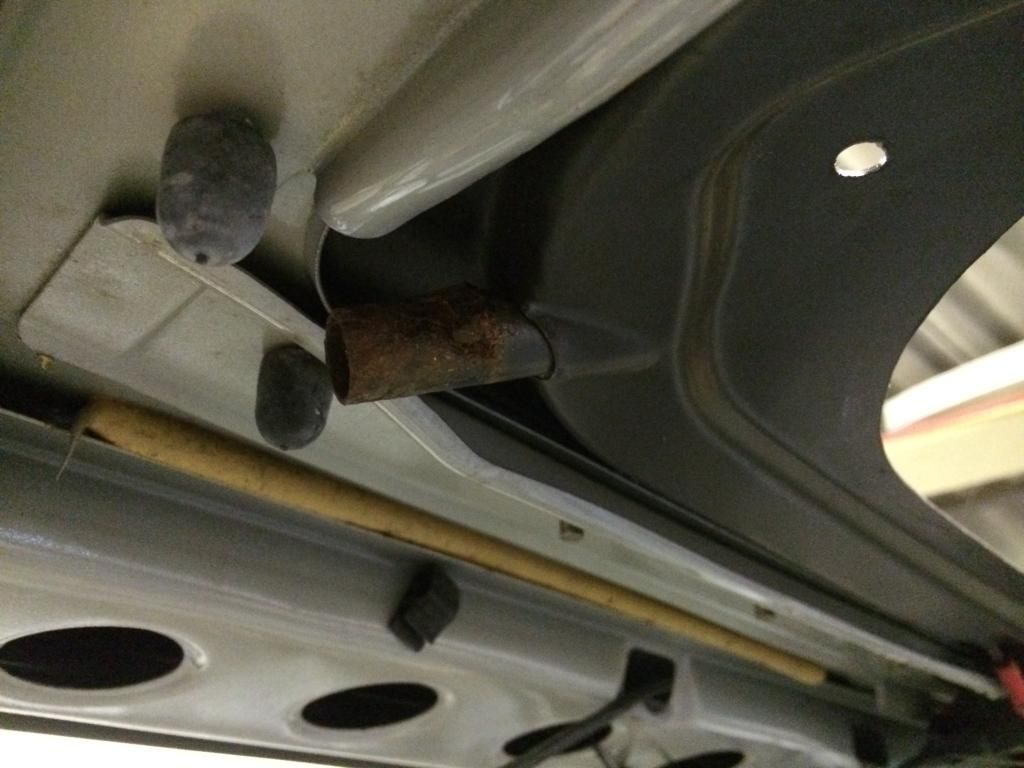
A basic guide on 309 owners suggests trimming the tubes then bonding in a suitable length of of 10mm plumbing pipe..... Here's the pics from the guide
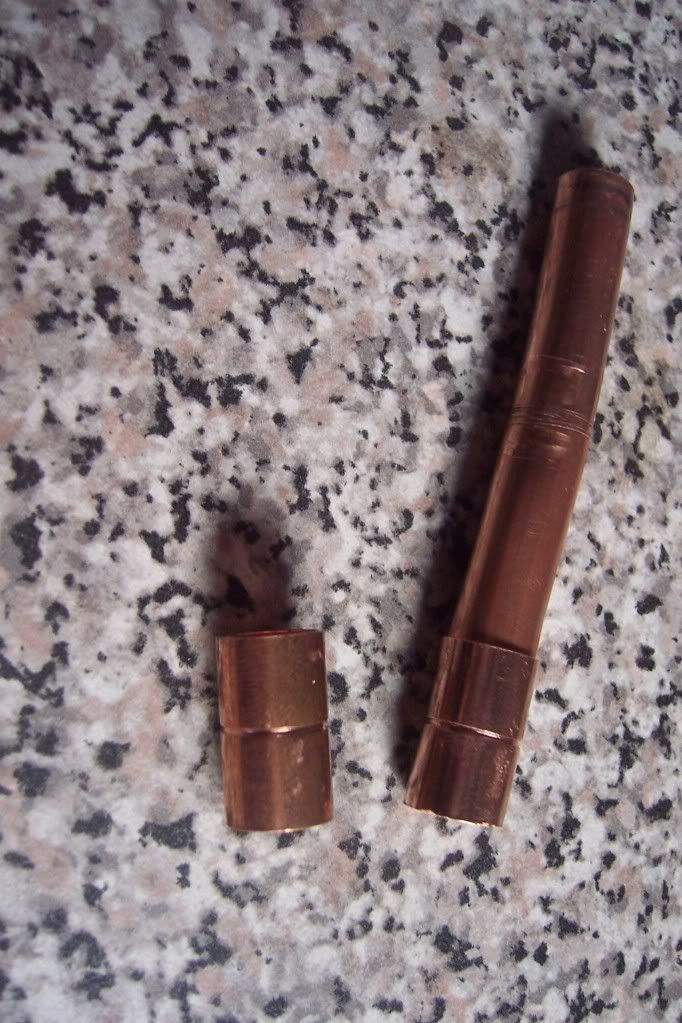
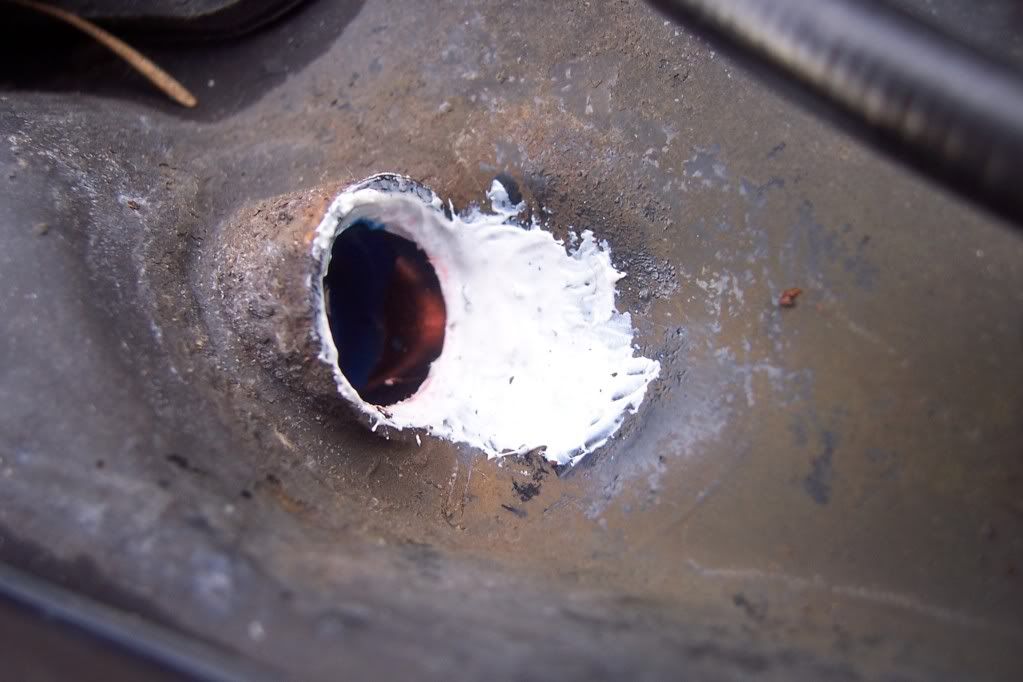
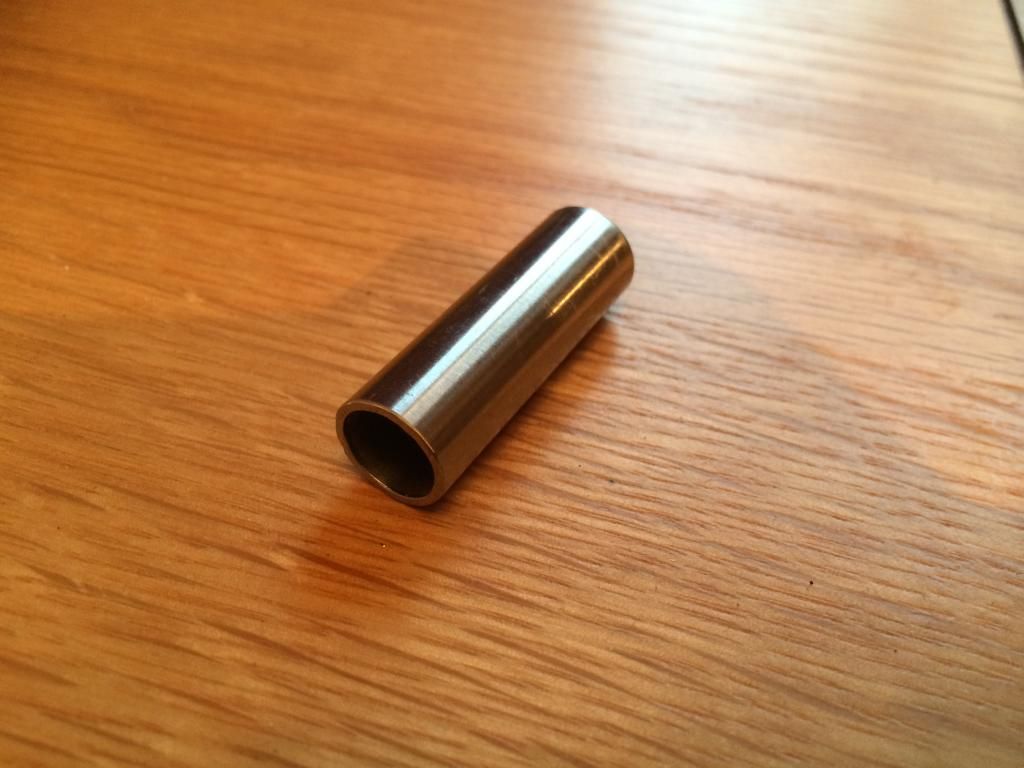
I figured that I could better that a little more accurately and with a 10mm OD the new 8mm ID just looked too small. The hole in the existing tube is 12mm diameter, It'll be regularly maintained and won't see much wet so I've bought some 12mm diameter (10mm ID) 316 marine grade stainless tube. This'll act as a perfect insert rather than completely removing the old tube too, so still similar to the guide. Only the ends were knackered so 15mm length of the existing tube remains.
New stainless cut to length
The insert then fits into the old tube with some gentle persuasion. A light smear of metal araldite was applied to bond it permanently. And voila
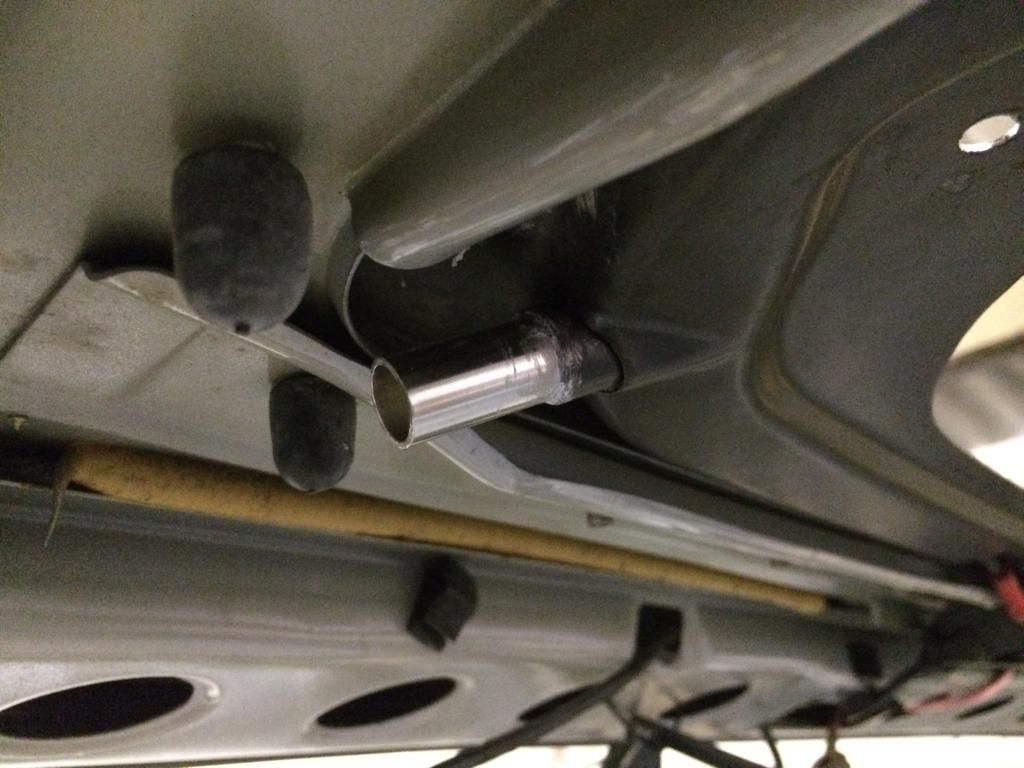
Nice and snug from the top too
All in all very happy and that's another job ticked off the list
|
|
|
|
|
The Following 2 Users Say Thank You to willsy For This Useful Post:
|
|
|
31st July 2014, 23:05
|
#218
|
|
Forum Section Moderator
Join Date: Aug 2006
Location: Westgate on Sea/Bexley
Posts: 17,223
Car(s): Series 1 Rallye
|
The attention to detail on this car is ridiculous, most people would have sorted the outside look wise and tidied the inside a little but never have gone to the detail you have.
Have you set a budget to get the complete project finished? I know your probably not considering selling it anytime soon but what do these go for in pristine condition?
__________________
Quote:
Originally Posted by AlexB
You know me
In balls deep and worry about the consiquences after
|
|
|
|
|
|
1st August 2014, 19:43
|
#219
|
|
West Midlands
Join Date: Nov 2005
Location: Nuneaton (West Mids)
Posts: 13,835
Car(s): '64 Volvo V40 RDesign, '89 Ph1 309 GTi, 97 Mk1 S
|
Cheers Dan, I'm certainly enjoying the challenge. Budget wise there isn't one, it'll take as much as it takes to do it to what I hope will be a high standard.
I've seen a few so far be advertised between 4-5k they've been in good original condition visibly. There's only one I know of that's been fully restored to a very high spec, that's not likely to be for sale again anytime soon though and I'm not sure how much he paid for it off the bloke who did the original resto, I'd imagine it was a hefty fee though
|
|
|
|
|
1st August 2014, 20:35
|
#220
|
|
Regular Poster
Join Date: Nov 2008
Location: Alnwick/Northumberland
Posts: 258
Car(s): Cobalt Blue 106
|
Are you using rattle cans for the painting?
|
|
|
|
 Posting Rules
|
You may not post new threads
You may not post replies
You may not post attachments
You may not edit your posts
HTML code is Off
|
|
|
All times are GMT. The time now is 11:22.
|


 Linear Mode
