| Non Saxo Photos / Videos / Progress Reports Please share photos/videos of your non saxo in this forum. |
 |
|
 5th January 2016, 22:11
|
#461
|
|
West Midlands
Join Date: Nov 2005
Location: Nuneaton (West Mids)
Posts: 13,835
Car(s): '64 Volvo V40 RDesign, '89 Ph1 309 GTi, 97 Mk1 S
|

Evening all,
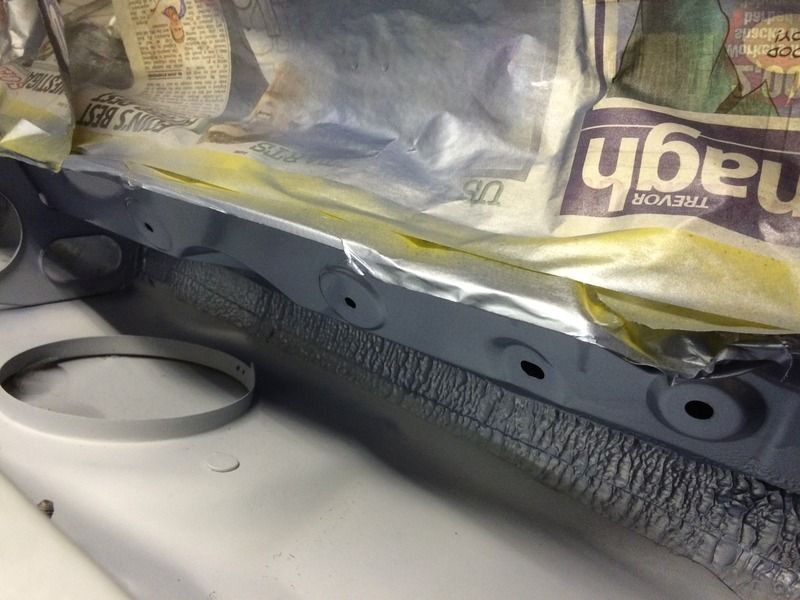
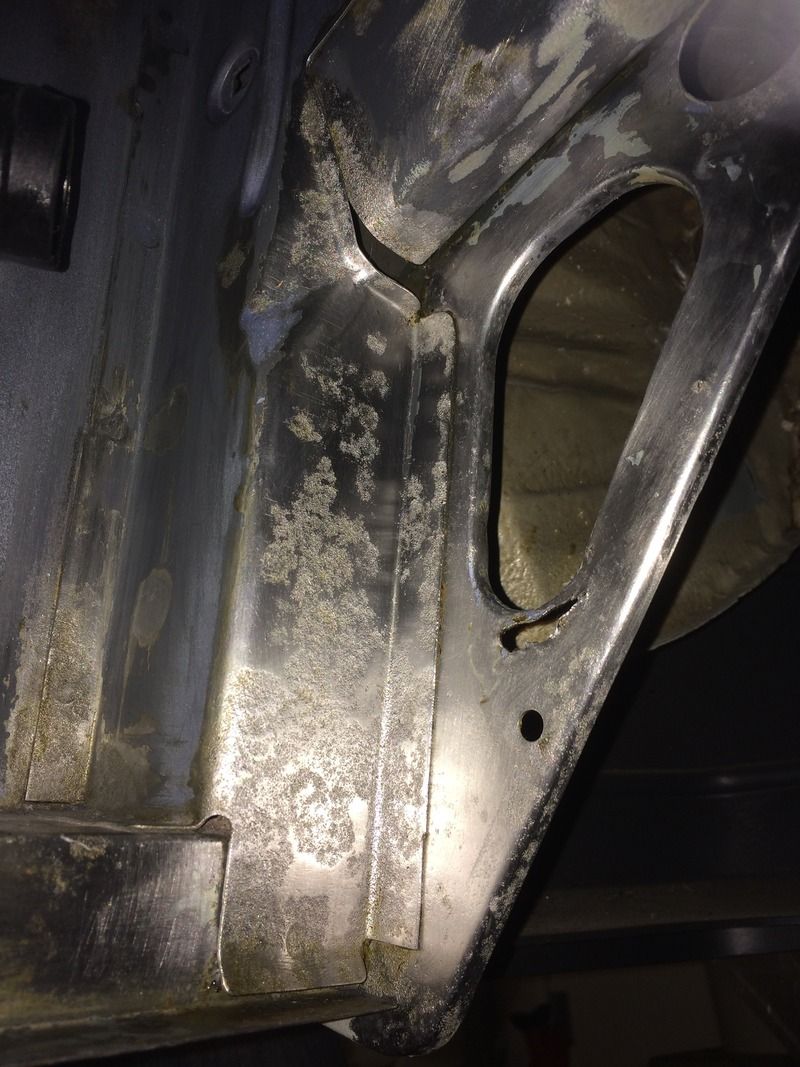
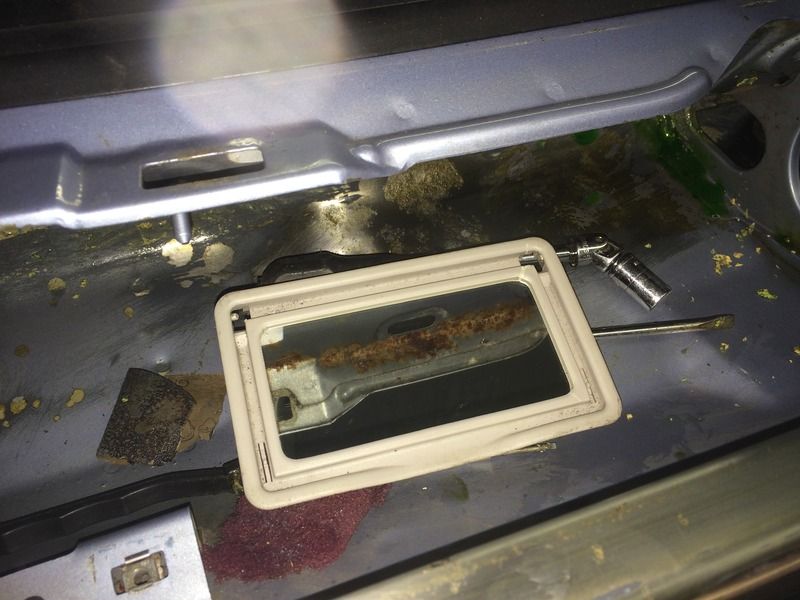
After a long hard slog, almost a weeks worth of cleaning up the scuttle area (which I might add is a damn awkward job that requires a contortionist to help with looking in all the nooks and crannies) I'm finally happy that it's rust free.
My earlier update covered some rust that was evident in the passenger side. A similar scenario awaited on the drivers side. Again praying that nothing had developed into a hole
As you'll recall from earlier in the thread the scuttle was full of rotting conifer debris and had therefore been wet constantly for god knows how long. A worry as it was deep enough for the rust to have started creeping under the seam sealant which spreads about 20mm either side of the seam.
I've reduced the seam sealant spread to 10mm or so and fortunately no rust extended that far up.
As a starting point the rest of the drivers side wasn't too bad

The factory paintwork here is pretty crap anyway, there was never much of a key given to the surface for the paint to stick too and small bits had begun to flake loose. I really spent ages going to town on it all over with the harshest (red) scotch pad. Anything loose was easily shifted.
Then came several applications of rust removal gel. I'd ran out of the Bilt Hamber Deox Gel so I've been using the Hammerite alternative. It still works well but I've found that it needs longer to do the job and I've got through it much quicker.
Anyway all done...?
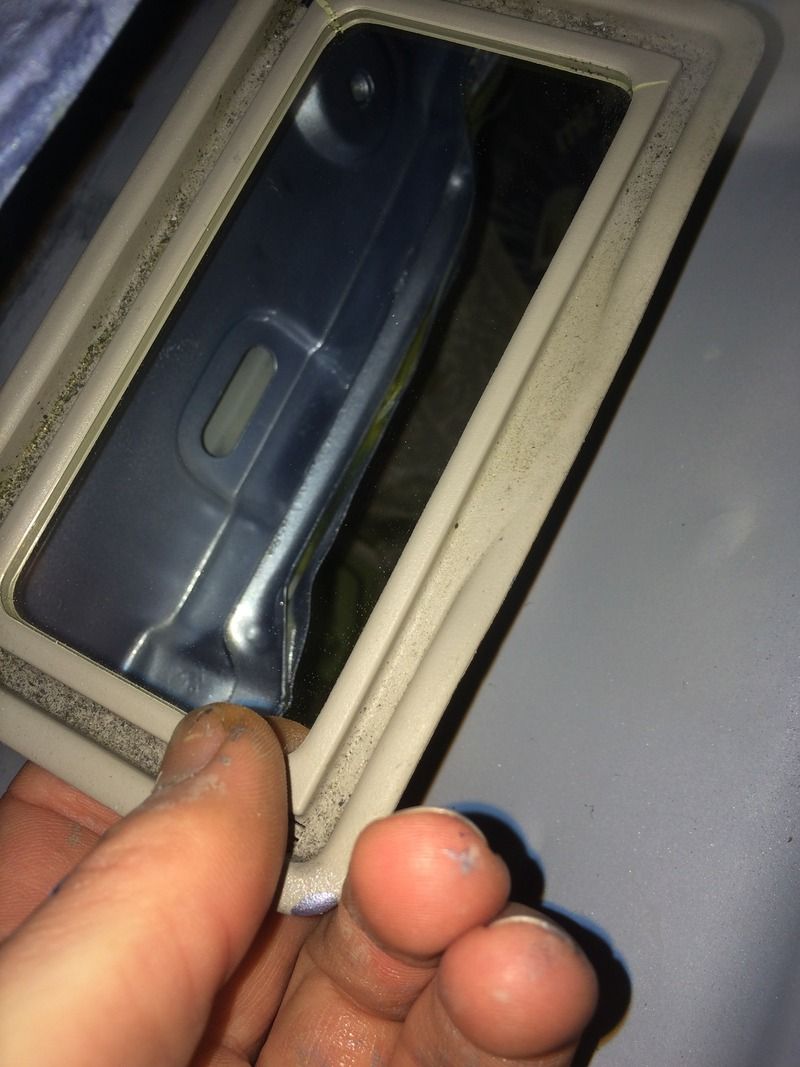
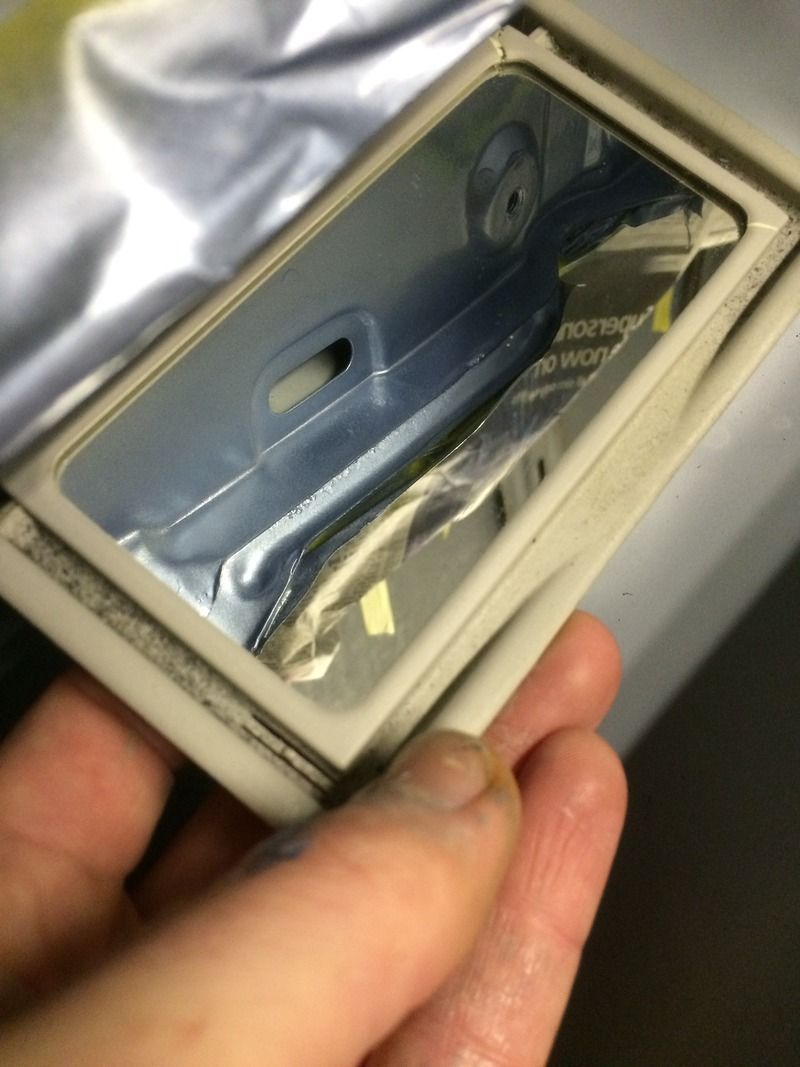
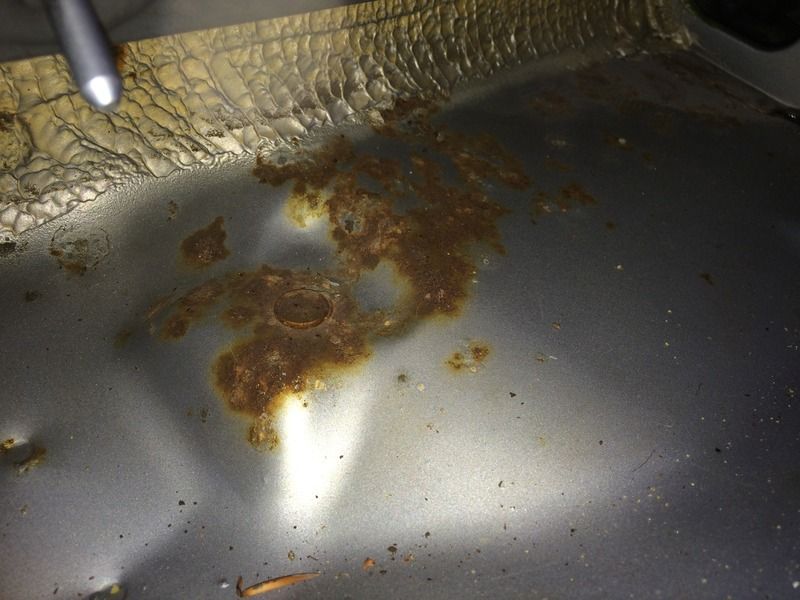
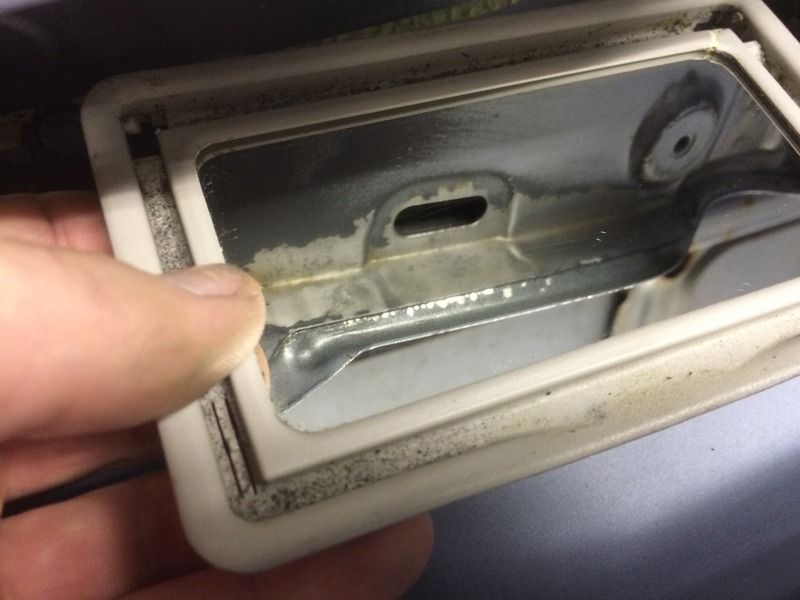
....wishful thinking! Ever the one to be thorough I grabbed the trusty mirror (old sun visor mirrors are very handy) and had a look at the underside of the lip.
Sinking feeling, many more hours of work needed
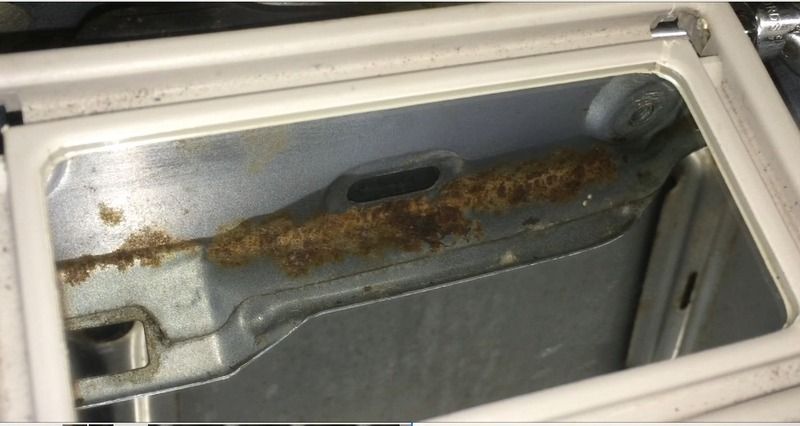
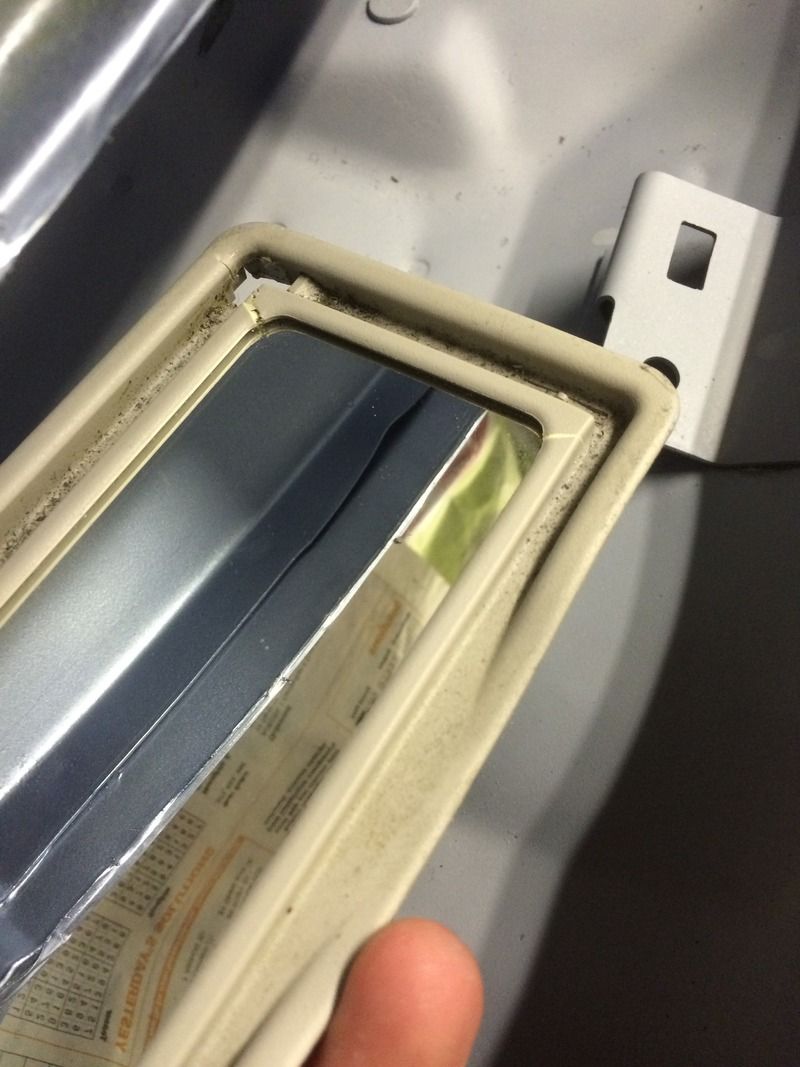
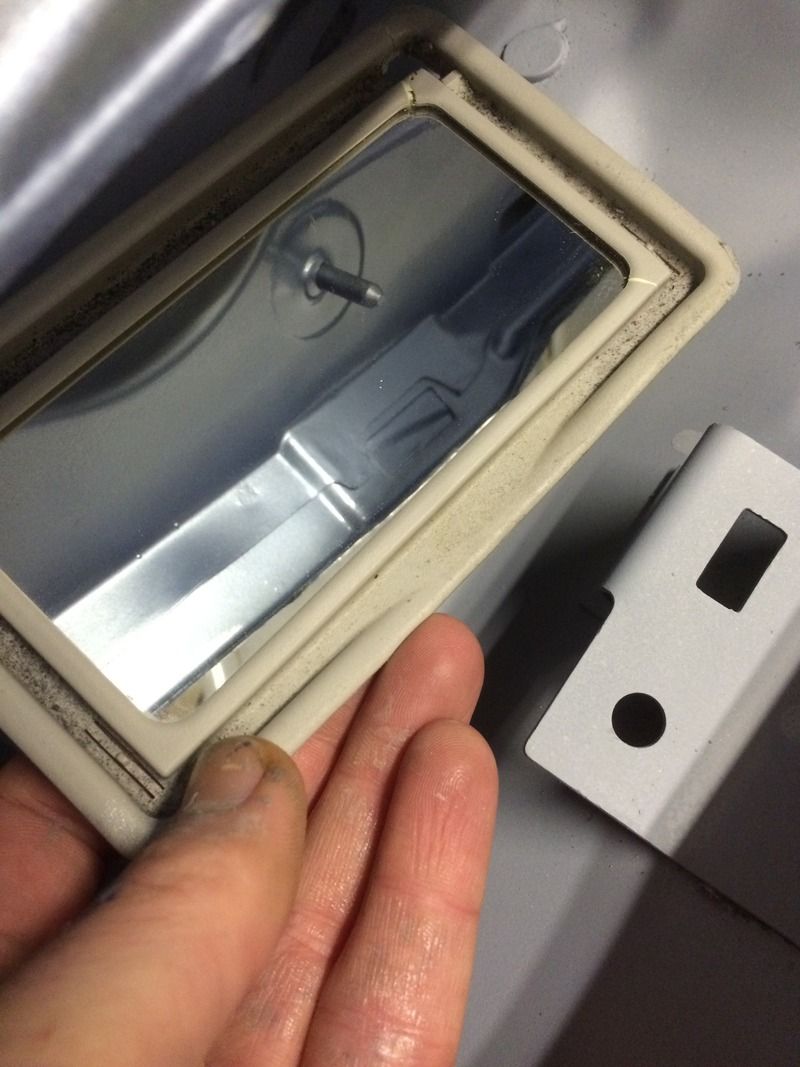
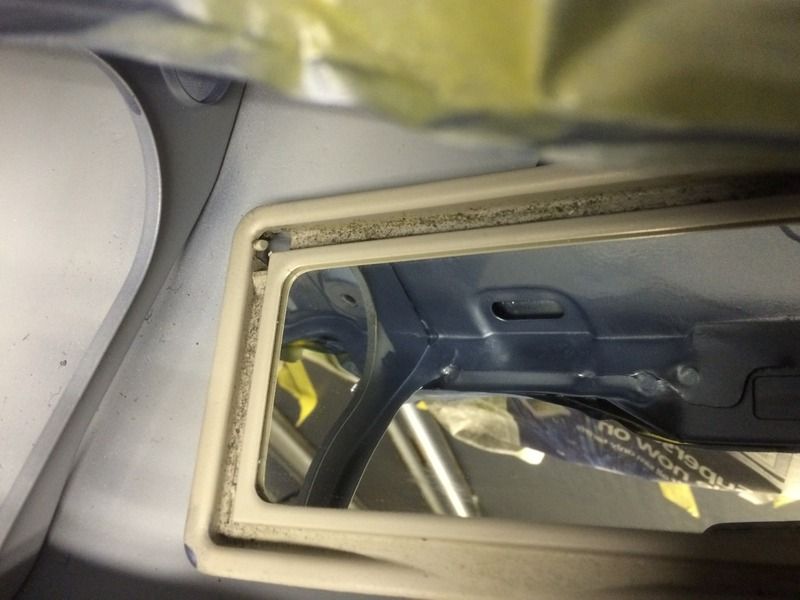
Same the other side
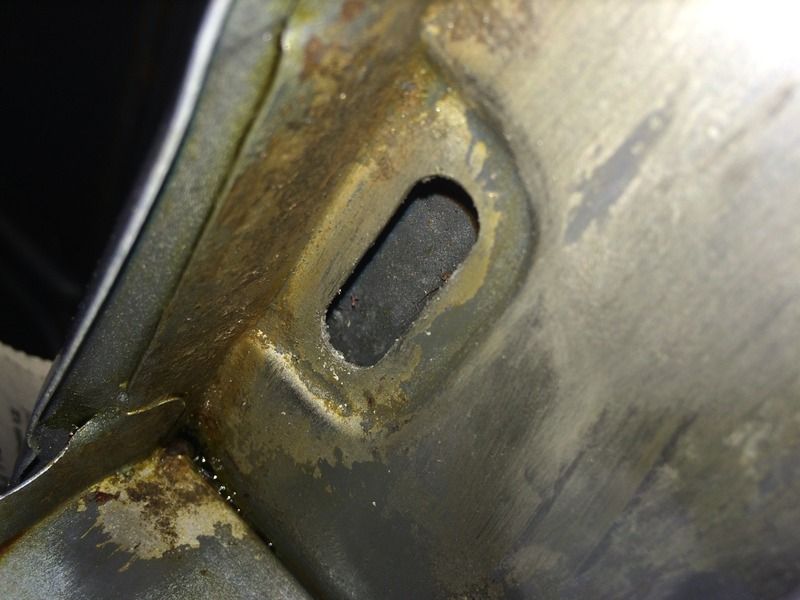
And more rust beginning on the underside of the other ledge just above the seam sealant.
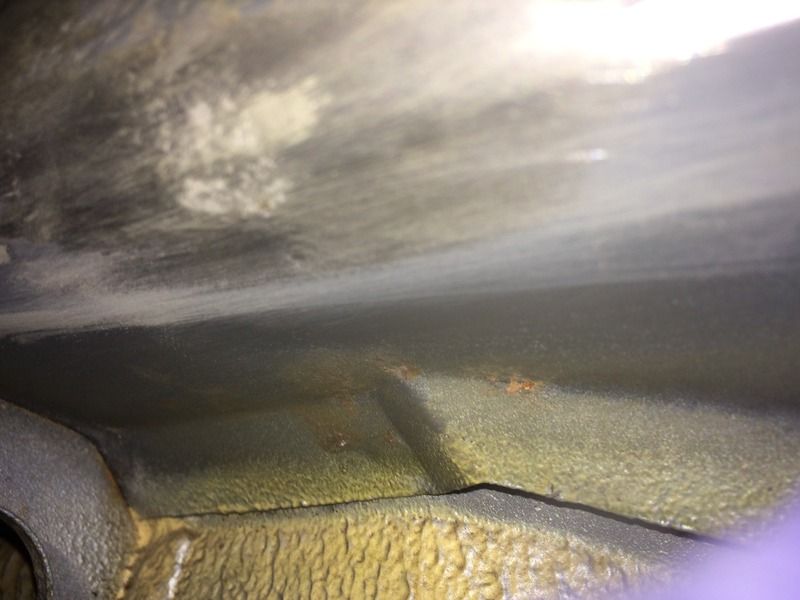
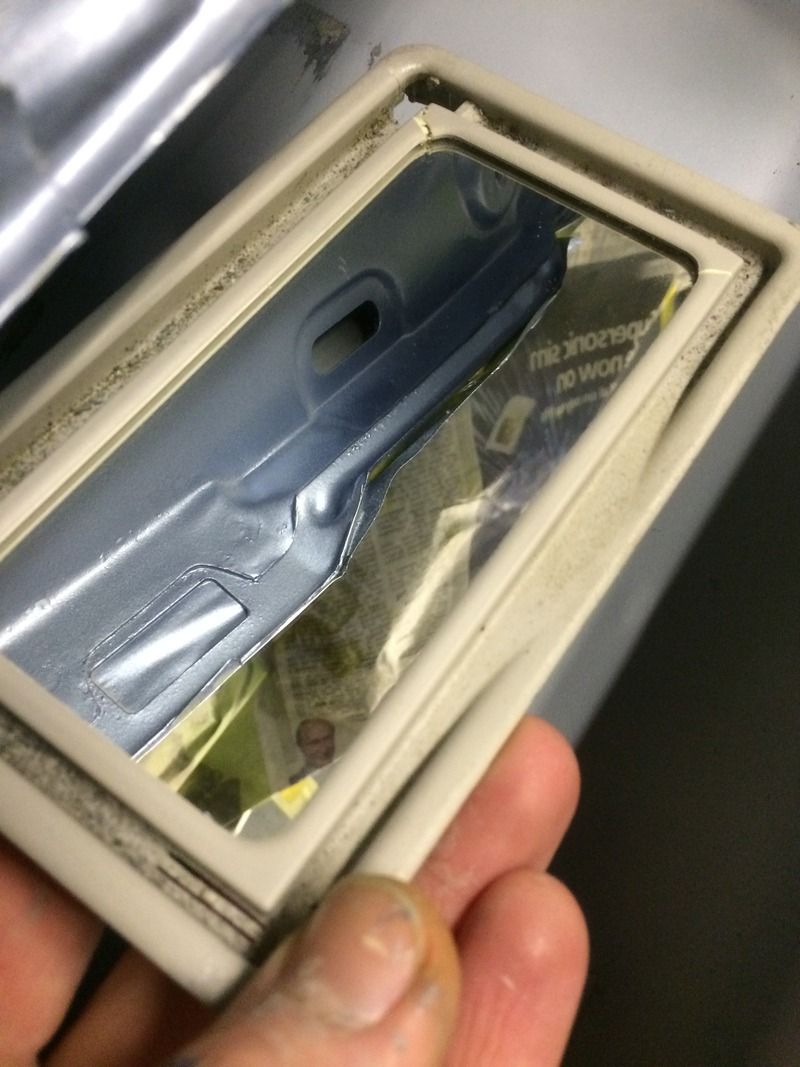
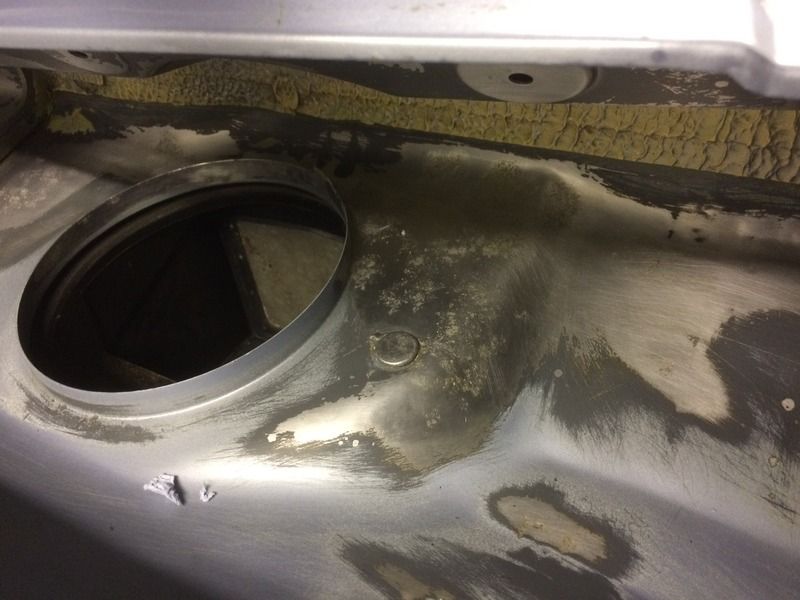
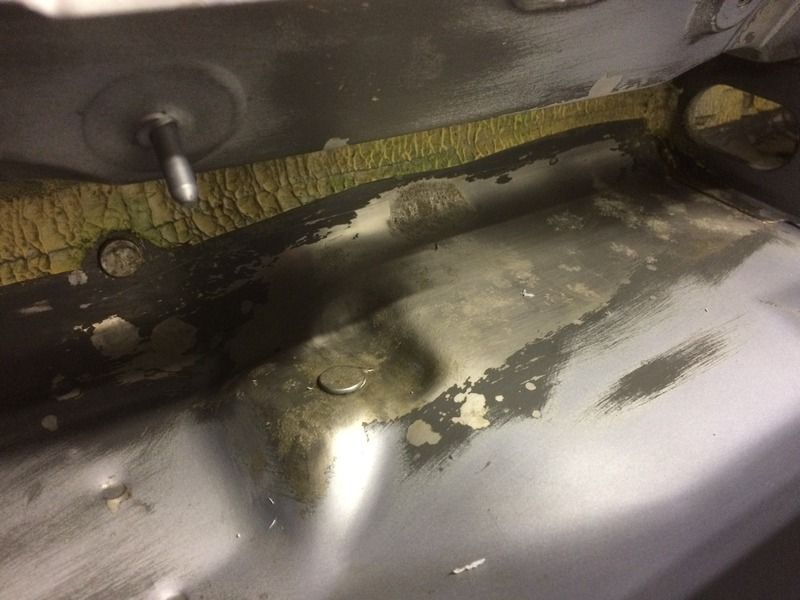
Oh well best to catch it early. After several more hours of graft I've defeated it
So to be 100% sure I hadn't missed anything I got the scotch pads out again and gave it one final blitz, followed by some very thorough panel degreasing to clean all traces of the rust removal gel.
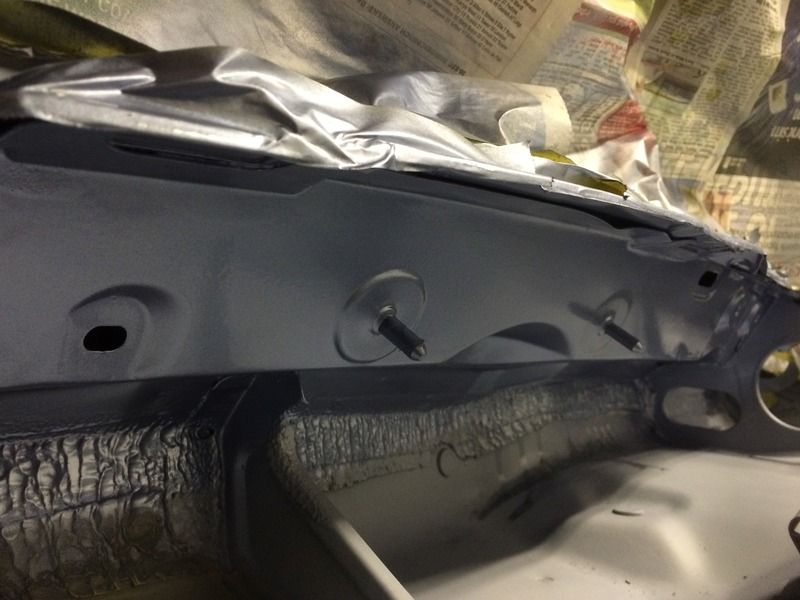
Two thick coats of Bilt Hamber Electrox (95% zinc primer) that they claim offers better protection than the original galvanised factory coating (I hope so!)
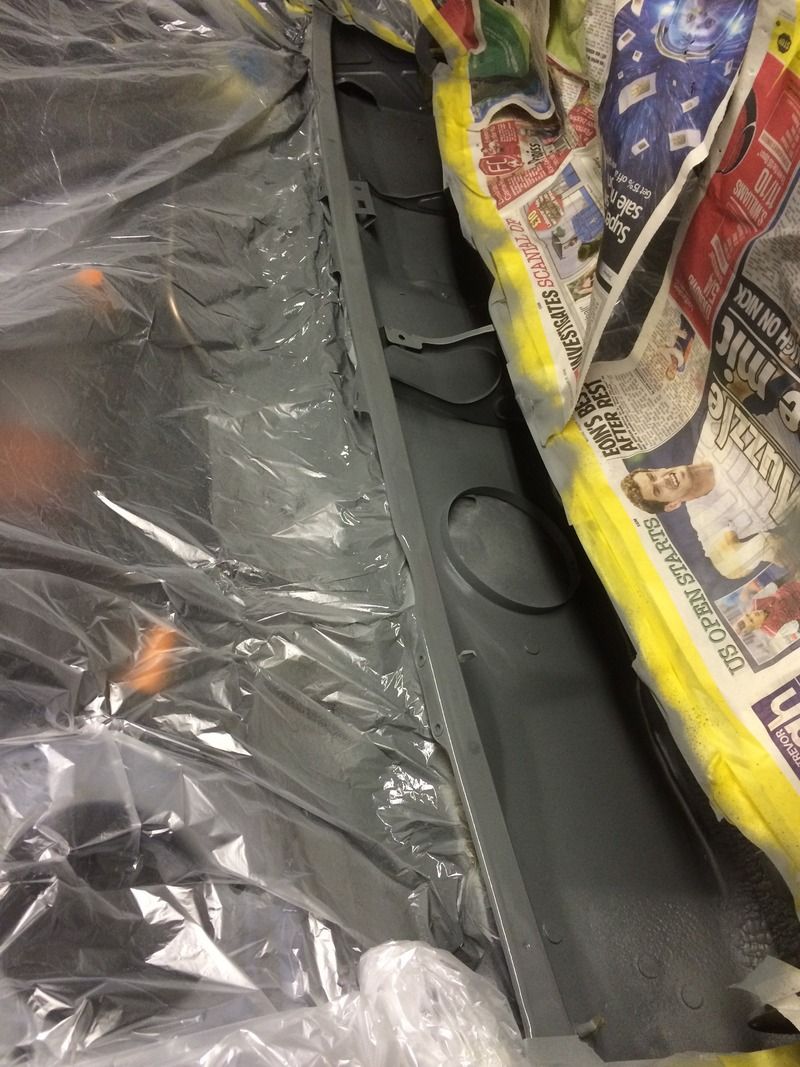
And that's that stage finished

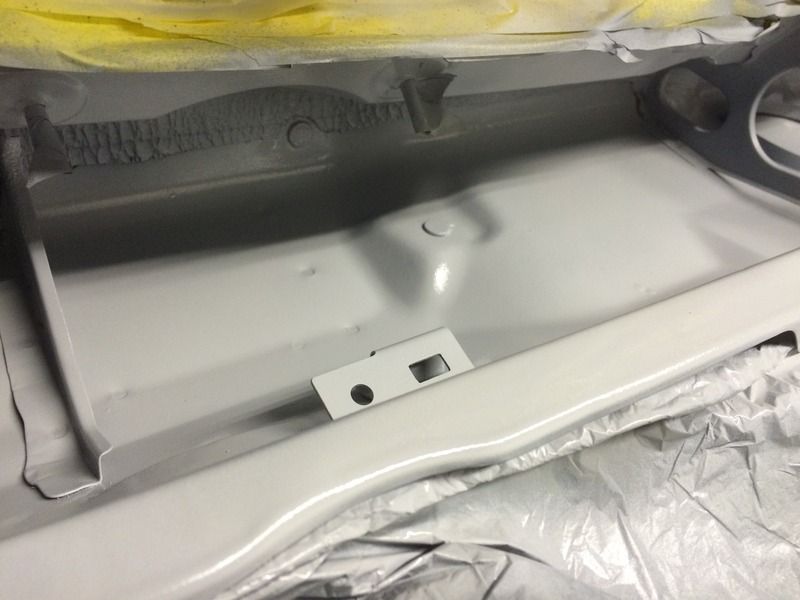
The electrox is very thick stuff and does seem to fill the majority of the pitting left by the surface rust.
I'm going to leave it for a few days now to dry fully. Temperature isn't exactly ideal.
Painting I'm going to have to do in two parts, I'll do the hidden underside first as it's tricky spraying with the can inverted, I'm bound to knock the visible parts a few times in the process so I'll do the visible bit as a second stage when I'm not having to lean over at obscure angles.
That concludes the fun and games for a few days now.
|

|

|
|
5th January 2016, 22:49
|
#462
|
|
Established Member
Join Date: Nov 2011
Location: Newcastle
Posts: 1,698
Car(s): Range Rover Sport
|
Brilliant work as always, where do you get your bilt hamber stuff from?
|
|
|
|
|
5th January 2016, 22:53
|
#463
|
|
West Midlands
Join Date: Nov 2005
Location: Nuneaton (West Mids)
Posts: 13,835
Car(s): '64 Volvo V40 RDesign, '89 Ph1 309 GTi, 97 Mk1 S
|
Quote:
Originally Posted by deano_123

Brilliant work as always, where do you get your bilt hamber stuff from?
|
Opie Oils (Saxp affiliate) sells it, I've ordered from them the last few times, found it cheaper to buy from them via their eBay listings than off their website though strangely.
|
|
|
|
|
6th January 2016, 06:19
|
#464
|
|
Established Member
Join Date: Nov 2011
Location: Newcastle
Posts: 1,698
Car(s): Range Rover Sport
|
Quick delivery?
|
|
|
|
|
6th January 2016, 07:36
|
#465
|
|
West Midlands
Join Date: Nov 2005
Location: Nuneaton (West Mids)
Posts: 13,835
Car(s): '64 Volvo V40 RDesign, '89 Ph1 309 GTi, 97 Mk1 S
|
The first lot I ordered came next day, but this time round I've been waiting nearly a week! Christmas backlog or extended closing hours over new year perhaps?
|
|
|
|
|
6th January 2016, 16:53
|
#466
|
|
Infrequent Poster
Join Date: Aug 2008
Location: North East
Posts: 194
Car(s): VTS
|

WOW!!!! WOW!!! WOW!!!
That is amazing! I cant believe ive only just came across this thread.
Subscribed!
|
|
|
|
|
7th January 2016, 23:42
|
#467
|
|
West Midlands
Join Date: Nov 2005
Location: Nuneaton (West Mids)
Posts: 13,835
Car(s): '64 Volvo V40 RDesign, '89 Ph1 309 GTi, 97 Mk1 S
|
Last edited by willsy; 8th January 2016 at 00:04.
|
|
|
|
|
10th January 2016, 00:22
|
#468
|
|
West Midlands
Join Date: Nov 2005
Location: Nuneaton (West Mids)
Posts: 13,835
Car(s): '64 Volvo V40 RDesign, '89 Ph1 309 GTi, 97 Mk1 S
|
|
|
|
|
|
The Following 2 Users Say Thank You to willsy For This Useful Post:
|
|
|
12th January 2016, 19:53
|
#469
|
|
North West
Join Date: Apr 2009
Location: Warrington, Cheshire
Posts: 5,733
Car(s): PH2 Peugeot 106 "race" car - Currently in pieces
|
How do you get such a professional finish on all your stuff!? I try to take my time and let layers dry properly but it always look like I let the kids at it with a box of crayons!
|
|
|
|
|
12th January 2016, 20:26
|
#470
|
|
Infrequent Poster
Join Date: Aug 2008
Location: North East
Posts: 194
Car(s): VTS
|
Quote:
Originally Posted by Alanapone
How do you get such a professional finish on all your stuff!? I try to take my time and let layers dry properly but it always look like I let the kids at it with a box of crayons!
|
2nd this!!!
|
|
|
|
|
13th January 2016, 09:11
|
#471
|
|
Infrequent Poster
Join Date: Nov 2009
Posts: 122
|
All I can say is WOW!!
The attention to detail on this build is simply breathtaking and the commitment to cleaning/fixing what bits you have is unreal!
This has to be hands down on of the greatest project threads I have read.
I really hope this hits the toad this year as I'd love to see it in the flesh at a show. Keep up the fantastic work and I look forward to many more updates
|
|
|
|
|
23rd January 2016, 22:47
|
#472
|
|
West Midlands
Join Date: Nov 2005
Location: Nuneaton (West Mids)
Posts: 13,835
Car(s): '64 Volvo V40 RDesign, '89 Ph1 309 GTi, 97 Mk1 S
|
Evening all, feels like I've been slacking on the updates this week, however I have been very busy on the old GTi. Thanks very much again for the really positive comments in the meantime.
I have now started to reassemble the front end, there's still plenty that I want to do and still more that I want to clean up as I go but I'm trying not to get too hung up on it- I do want to get the thing on the road again by the summer so further non essential deep cleaning can continue when I eventually whip the engine out to respray the rest of the engine bay. Makes more sense.
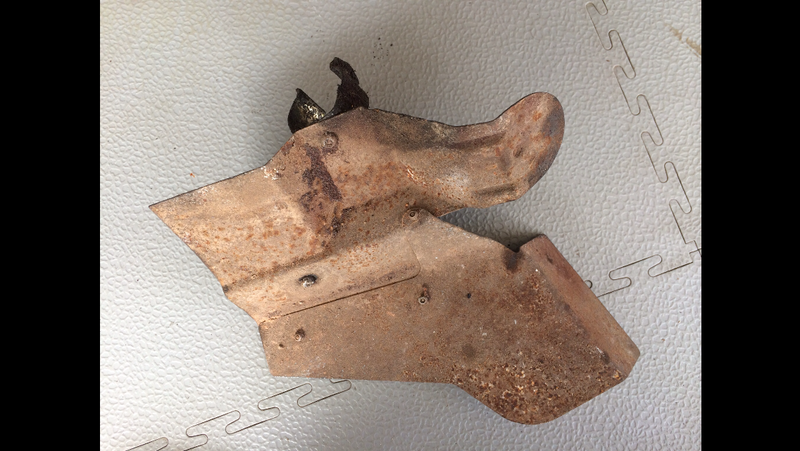
First up was replacing the old engine mounts. I think you'll all agree that these are well past their best

These uppers were replaced with new Genuine Peugeot ones. All nuts/bolts/washers were bought from the dealers aswel. The lower as mentioned previously was replaced with a 'group N' stiffer grade rubber bush from BakerBM. The original standard one had a lot of potential for excess movement, I feel the positives of fitting this mount will far outweigh the minor negative of slight increased vibration. Should be minimal with retaining OE upper mounts.
Next up I dismantled the struts again in order to repaint the top mounts in satin black. They are brand new but in being loose in the bag with the other metal parts they were littered with scratches and chips in the coating. Best to keep thrm well protected, plus these are visible in the engine bay

Reassembled the strut, fitted it and mated it with the hub assembly for the first time

Next up I removed the new master cylinder again. The main body of it is electroplated, however the machines surface at the end, and the faces where the brake lines fit are bare metal, they'd started to develop some surface rust. So I cleaned the surfaces back and clear coated them.

Dug out a new fluid reservoir

That'll be refitted along with the Brake lines once I've finished painting the bracket from the drivers side. Passenger side de-rusted and painted

Front calipers arrived back from Bigg Red in Worcester. Blasted and re-coated in the same gold electroplated finish that they would have left the factory with all those years ago.


Next up, manifold refitted with new gaskets, studs and nuts.

Then at long last I had some willing assistants to brave the cold with me aswel to get the subframe bolted up into place. Got as far as nipping things into place. Just going through the Haynes manual now to get all the correct torque settings. Shall nip thr bolts up and give everything a clean and carry on with the rebuild. Pics in the meantime....


Full credit to my friendly parts Genie who managed to locate a full set of new Genuine gear linkages from various locations across Europe

And to end this update I managed to get hold of a new water outlet (the secondary one, not the one that bolts to the back of the engine block) the existing one looked ok but given the difficulty getting hold of an original type metal one for the block, I bought this new one anyway.

In swapping them over, the 'SAD' Supplementary Air Device mounts onto the bottom of the outlet. It's well known to be a potential problem point for the idle of 205 and 309's however generally with some routing cleaning to maintain it the problems are often solved. Ideal than to test it whilst oh was off the car. Hooked up a supply to it and was pleased to see that it works perfectly fine

So it had a thorough clean. Also cleaned and polished up the sensor from the water outlet. I do have a new one but will refit this one for now as it's perfectly good

Last edited by willsy; 24th January 2016 at 00:17.
|
|
|
|
|
24th January 2016, 00:13
|
#473
|
|
Saxperience Post Whore
Join Date: Aug 2008
Location: The wrong carpark
Posts: 5,152
Car(s): Xantia 1.9TD
|
This thread makes me wet. Loving it lad. Definately need to see this in person one day
|
|
|
|
|
26th January 2016, 00:28
|
#474
|
|
West Midlands
Join Date: Nov 2005
Location: Nuneaton (West Mids)
Posts: 13,835
Car(s): '64 Volvo V40 RDesign, '89 Ph1 309 GTi, 97 Mk1 S
|
Aha cheers mate, glad you're enjoying the read :-) I'll keep the updates coming. Shall have another one to post up in a mo
|
|
|
|
|
26th January 2016, 00:33
|
#475
|
|
West Midlands
Join Date: Nov 2005
Location: Nuneaton (West Mids)
Posts: 13,835
Car(s): '64 Volvo V40 RDesign, '89 Ph1 309 GTi, 97 Mk1 S
|
This morning I've managed to squeeze a couple of hours of progress in.
My tub of Deox C has arrived, after seeing results that a bloke over on Detailing World had with it on his calipers, and after spending a ridiculous amount of time doing the first hub assembly. I've lobbed the second one in a bucket and we'll see how it gets on over the next 24 hours, and how much time it saves me having to clean it up manually.
I then moved onto the driveshafts again. They are the original genuine Peugeot driveshafts, however only one of the original CV boots remain as original type. The cars done 90k miles and the shafts still feel good. There is life in them yet, despite the incredibly grubby appearance.
I forgot to take a pic of the smaller passenger one before I started, however here's a pic of the longer drivers side one


I hadn't realised how easy these driveshafts are to dismantle until I read the Haynes Manual. So, before I'd got around to reading it I had already begun cleaning up the smaller passenger driveshaft with the intention of painting the exposed metal bits. I've also bought a full set of genuine boots.
I'd got this far before reading the Haynes Manual

Essentially once the boot ties are loosened and the boots are pulled away the outer part of the shaft has a small circlip in the end groove (can be seen at the base of the next pic) Giving the end piece a soft tap it slides off. The inner joint simply pulls clear of the housing.
This'll make it easier to finish cleaning and painting the exposed metal. Thinking I'll stick with a satin black finish as I'd already finished on the outer joint, although I have been tempted with silver with the original appearance just being exposed metal

|
|
|
|
|
26th January 2016, 19:08
|
#476
|
|
West Midlands
Join Date: Nov 2005
Location: Nuneaton (West Mids)
Posts: 13,835
Car(s): '64 Volvo V40 RDesign, '89 Ph1 309 GTi, 97 Mk1 S
|
Finally got around to starting to clean up the drivers side hub assembly today.
I wouldn't usually bother doing this update as I've already posted up pics etc after spending hours and hours slaving away on the passenger side one.
However, this time I took on board recommendations to try Bilt Hamber Deox C, a rust remover that you simply mix with water and leave in a bucket with the part and let it work its magic. Again it's made to only remove rust and won't harm plastic or rubber etc.
So I mixed some up to the lowest suggested ratio (19:1 for 5% strength) I've had to do absolutely nothing other than give it a rinse off and rub over it with a scotch pad to shift the built up residue. I left it at room temperature for 24 hours so far. Process can be sped up rapidly by heating the solution a bit and/or increasing the strength of the mixture.
Here's the front/rear before pics of each piece


And after 24 hours


I really wish I'd started using this stuff before I spent hours doing the other hub!
They still need a little more work so I'm just going to leave them for another 24 hours (may aswel) then I can get them finished, coated and reassembled with the new bearing towards the end of the week
|
|
|
|
|
29th February 2016, 11:16
|
#477
|
|
West Midlands
Join Date: Nov 2005
Location: Nuneaton (West Mids)
Posts: 13,835
Car(s): '64 Volvo V40 RDesign, '89 Ph1 309 GTi, 97 Mk1 S
|
Morning all,
Been a while since I updated this. I have still been plodding along with it. The last month has had its fair share of frustrations with several things delaying the progress.
I ended the last update having started to strip down the driveshafts, they are original Peugeot ones and still seem to be fully functional despite looking horrendous.
My aim was to strip them down, paint the visible metal after getting rid of the surface rust and muck, and fit new genuine CV boots along with the fresh grease that comes with them.
Started with this

This is where the frustrations started. I'd already bought the new CV boots. The outer ones were the correct ones, however the inner ones were incorrect. Peugeot listed two part numbers on service box for the XU engine'd models. There's no mention in difference in sizes or age/year of manufacture, so as Sod's law goes I'd bought the wrong one which had a smaller diameter on the largest end which after further digging suits the very early Phase 1's pre 1989 build date. Mine still being a phase 1 with April 1989 build date uses the larger CV joint. So delays there waiting for the correct ones to arrive.
Eventually, I finished refurbishing the first driveshaft

I'm still finishing the longer drivers side driveshaft.
I've also refitted this water outlet with a new sensor & Supplenentary Air Device. All new genuine Peugeot hoses used at either end.

Next up with parts being refitted left right and centre now there was original bits which just let the side down with their appearance. So I've dug out my Electroplating kit (sourced from GaterosPlating) and set about redoing the plating on some parts. The following were in various states from original plating just starting to weather, to rusty.
I used electrolysis using a battery charger, two pieces of sacrificial scrap metal and a solution of water and sodium carbonate. Here's how they looked after electrolysis which was about an hour fizzing away

And all finished. I have had better results in the past but I think the solution and zinc may be getting a bit tired now. Still, they're vastly improved and will last a fair while longer.


Before
Almost after, just got to put the mounting clips back on.


I've also tweaked the front brake lines which I made up, new clips also arrived from Austria.
(Yes I did get bored a while back and did a tester piece polishing up the cam cover)

And a couple of pics of the front suspension. I've got all the bits now to refit the calipers etc too so it really shouldn't be long now before its back on all 4 wheels


That'll do for now, back out to the garage to continue the work.
|
|
|
|
|
29th February 2016, 14:28
|
#478
|
|
Saxperience Forum Bum
Join Date: Mar 2009
Location: Stoke-on-trent
Posts: 2,640
Car(s): Mk5 Golf GTTDI
Mk2 VTR Project
|
I love reading through your progress threads, always great work, the open top scandal was probably my favourite but all awesome 
|
|
|
|
|
29th February 2016, 20:59
|
#479
|
|
Established Member
Join Date: Aug 2009
Location: King's lynn
Posts: 2,073
Car(s): Turbocharged vtr
|
Your efforts always amaze me! hats off to you
|
|
|
|
|
1st March 2016, 16:25
|
#480
|
|
Established Member
Join Date: Aug 2012
Posts: 2,009
Car(s): Saxò VTS 16v
|
Amazing work as always,can I ask what tool did you use to flare the brake pipes? All the cheap ones are quite crap,I got a PowerHand one and it works quite well,there's always the "professional" one but it's over a hundred,really don't feel like it's worth my money for now
|
|
|
|
| Thread Tools |
|
|
| Display Modes |
 Linear Mode Linear Mode
|
 Posting Rules
|
You may not post new threads
You may not post replies
You may not post attachments
You may not edit your posts
HTML code is Off
|
|
|
All times are GMT. The time now is 23:37.
|