Mobile Devices: Lite Theme Citroën: Citroën Trader | Saxo Trader | C2 Trader Peugeot: Peugeot Trader | 106 Trader Enthusiast: Saxperience


Go Back   Saxperience - Citroen Saxo Forum > Citroen Saxo Related Forums > Your Saxo Photos / Videos / Progress Reports
Register Member Photo AlbumsBlogs FAQ Calendar Experience

Your Saxo Photos / Videos / Progress Reports Please share photos/videos of your saxo in this forum.

Reply
 
Thread Tools Display Modes
Old 6th September 2015, 19:59   #21
lincolndanny
Newbie
 
Join Date: Jun 2013
Posts: 26
lincolndanny is on a distinguished road
Default

Not too much to report this week but thought it best to keep things up to speed.

Managed to get the door shut cleaned, de tarred, clayed, polished and sealed.. Rubbers got a good clean and treatment.


Moved on to the door itself..


All cleaned up/polished etc then put back with new door hinge pins. Left my new check strap at work like a prat!


Then moved onto the outside of the door.

Popped the VT kit off and then onto the carbon sticker rubbish. Will there be a scratch underneath.....


NOPE!


Then gave the door the usual compound, polish etc


Hope to finish the door off soon but one final picture. Wonder how long ago it was since it last wore this badge with pride

lincolndanny is offline   Reply With Quote
Old 6th September 2015, 20:07   #22
Jigs2895
Established Member
Central South Region Member
 
Jigs2895's Avatar
 
Join Date: Jan 2013
Location: Portsmouth
Posts: 1,335
Car(s): 1997 Mk1 VTS
iTrader Score: 3 (100%)
Jigs2895 is on a distinguished road
Default

This colour really responds well to a good polish, nice work mate!
Jigs2895 is offline   Reply With Quote
Old 6th September 2015, 22:20   #23
willsy
West Midlands
Track / Motorsport PrepWest Midlands Region Member
 
willsy's Avatar
 
Join Date: Nov 2005
Location: Nuneaton (West Mids)
Posts: 13,835
Blog Entries: 4
Car(s): '64 Volvo V40 R’Design, '89 Ph1 309 GTi, ‘97 Mk1 S
iTrader Score: 125 (100%)
willsy is absolutely fabulous!willsy is absolutely fabulous!willsy is absolutely fabulous!willsy is absolutely fabulous!willsy is absolutely fabulous!willsy is absolutely fabulous!willsy is absolutely fabulous!willsy is absolutely fabulous!willsy is absolutely fabulous!willsy is absolutely fabulous!willsy is absolutely fabulous!
Default

Good work there, amazing how much time can be spent on one part of the car isn't it. Very rewarding though when you look back at the 'before' pics
willsy is offline   Reply With Quote
Old 13th September 2015, 07:30   #24
Dan-Subtlem
Forum Section Moderator
Track / Motorsport PrepCentral South Region MemberSouth East Region Member
 
Dan-Subtle's Avatar
 
Join Date: Aug 2006
Location: Westgate on Sea/Bexley
Posts: 17,223
Car(s): Series 1 Rallye
iTrader Score: 151 (99%)
Dan-Subtle is a well respected team memberDan-Subtle is a well respected team memberDan-Subtle is a well respected team memberDan-Subtle is a well respected team memberDan-Subtle is a well respected team memberDan-Subtle is a well respected team memberDan-Subtle is a well respected team memberDan-Subtle is a well respected team memberDan-Subtle is a well respected team memberDan-Subtle is a well respected team memberDan-Subtle is a well respected team member
Default

Great work with this Danny, looks slot different already to when it was collected.

Any more updates?

Ps I still have the mirror caps from this, they are wrapped in carbon fibre, want me to peel it back and see if it's Mercury grey underneath?
__________________
Quote:
Originally Posted by AlexB View Post
You know me
In balls deep and worry about the consiquences after
Dan-Subtle is offline   Reply With Quote
Old 16th September 2015, 22:13   #25
lincolndanny
Newbie
 
Join Date: Jun 2013
Posts: 26
lincolndanny is on a distinguished road
Default

Quote:
Originally Posted by Dan-Subtle View Post
Great work with this Danny, looks slot different already to when it was collected.

Any more updates?

Ps I still have the mirror caps from this, they are wrapped in carbon fibre, want me to peel it back and see if it's Mercury grey underneath?
Hi mate, no new updates at this moment as I'm finishing off stripping the donor car to get it out the way. Should be back on it this week.

If you could check the mirror caps out mate that would be awesome
lincolndanny is offline   Reply With Quote
Old 27th September 2015, 21:16   #26
lincolndanny
Newbie
 
Join Date: Jun 2013
Posts: 26
lincolndanny is on a distinguished road
Default

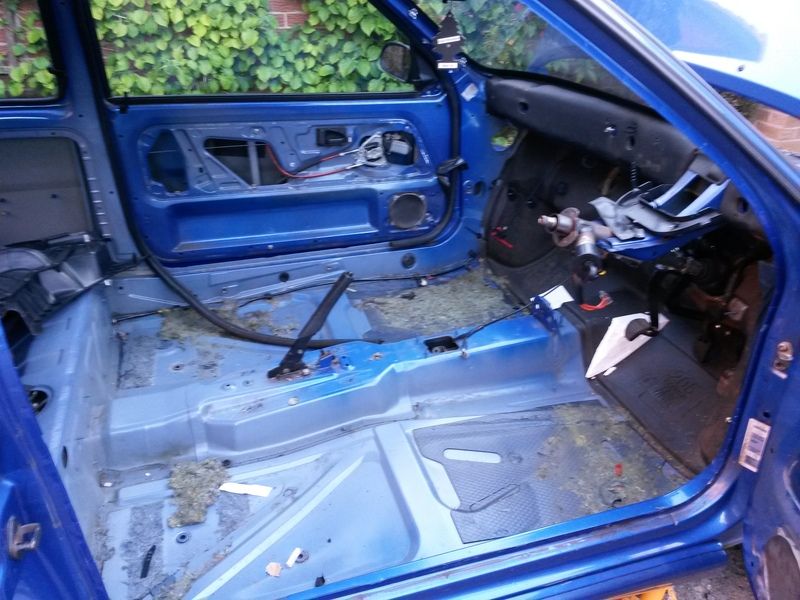
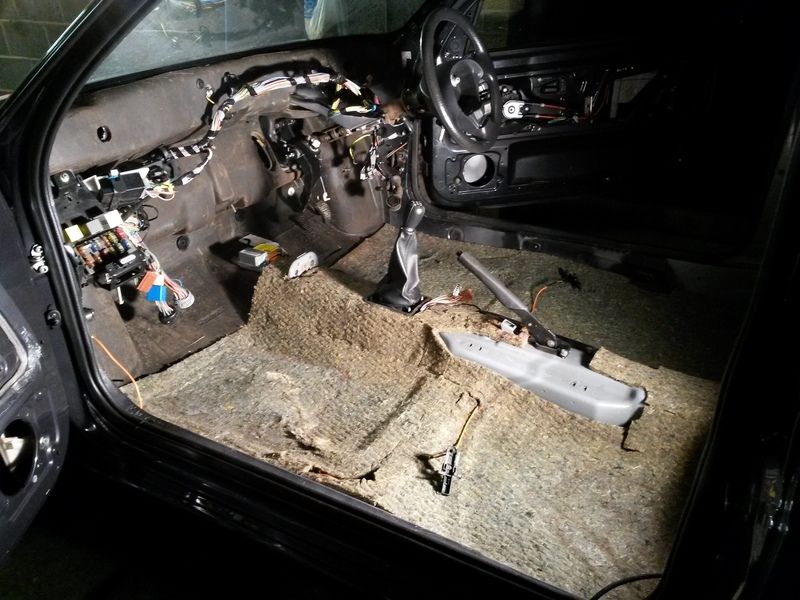
Finally got the donor car stripped and disposed of. Can't believe how long its taken but I had to save every clip, grommet, fitting etc as I needed it all!

A general idea of how bare it ended up!(that sound deadening was the very last bit removed!)


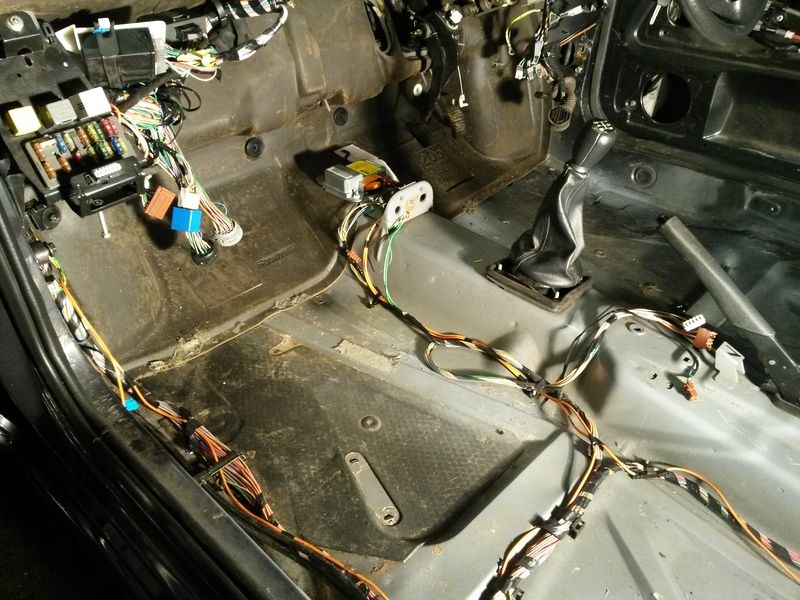
Complete wiring loom removed without a single cut to any wire-I will need a lot of this as the previous track day warrior owner was snip happy with the loom!


I swear to god this must be the very first bit fitted when the cars were built new. Literally everything has to be removed the get this out the car in one piece!


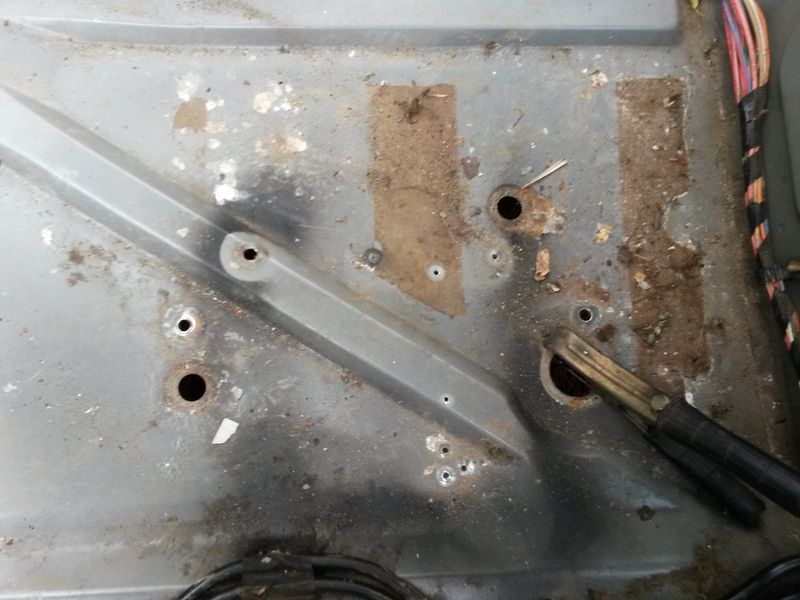
Anyway, that then left me with far too many bits piled up in my garage so I needed to make a start on moving this little VTS forward. Had loads of holes in the floor to weld up where batteries etc had been bolted down.


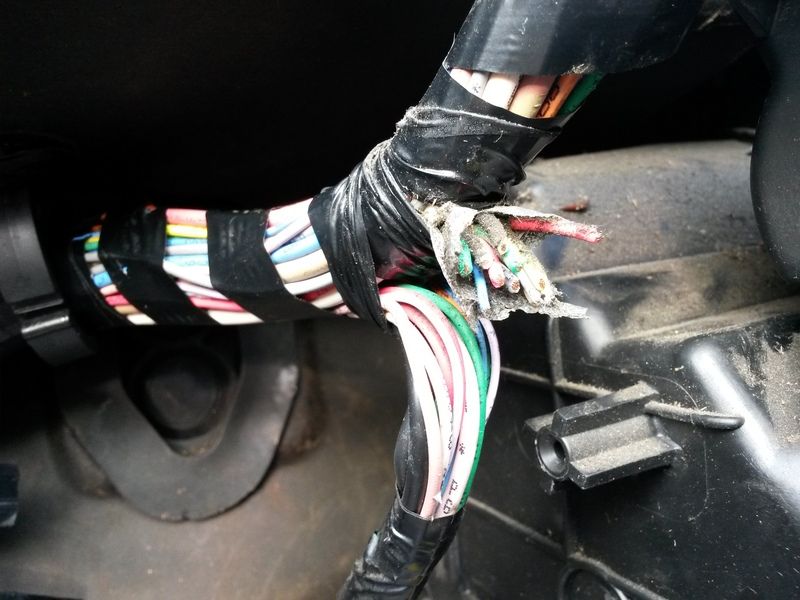
Spent a whole morning splicing in new loom sections. Chopped wires everywhere!!!


All that was left of the stereo wiring!


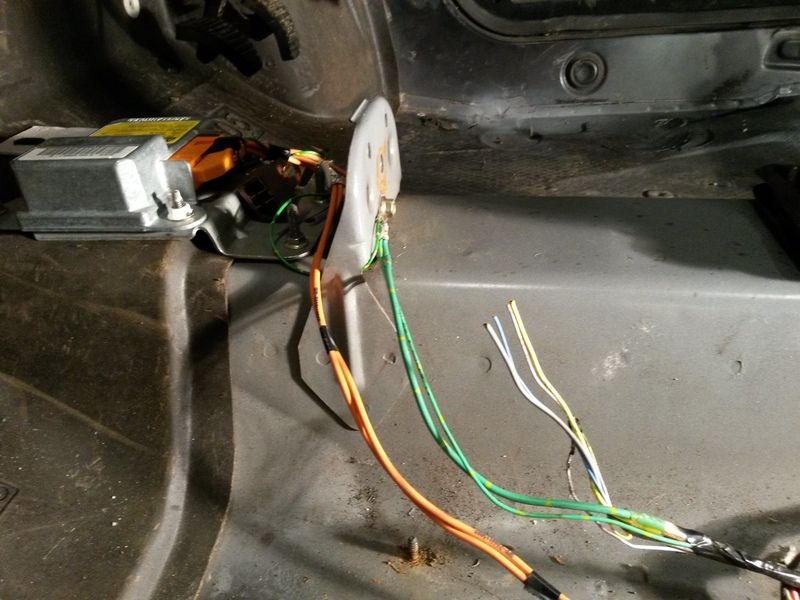
Wiring for roof console re-attached and thread back through.(aerial as well)


Then after stripping what felt like everything from the dam thing, I got the bulkhead insulation back in along with the airbag ecu and wiring...


All floor sound deadening in..


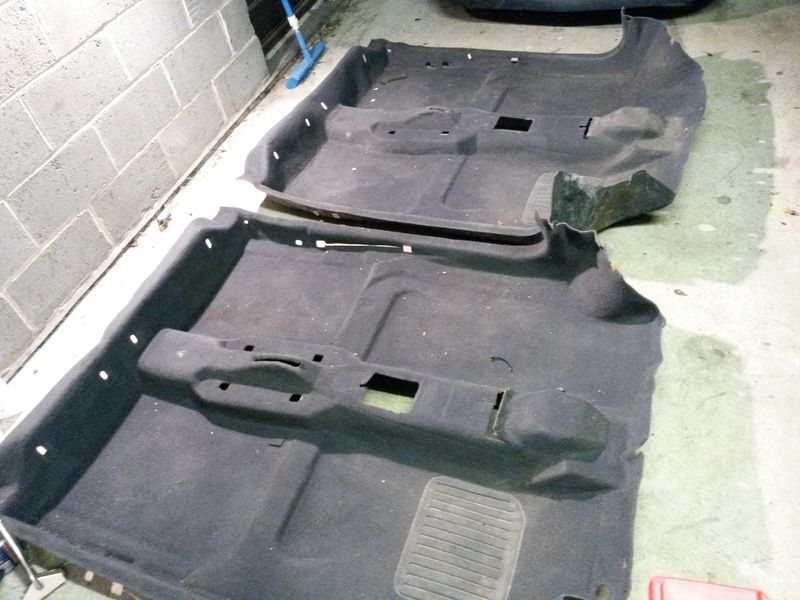
I also seem to be at the stage now with these 106's/Saxo's where I seem to have quite a few of the same part! Picked the best carpet...


And to finish off for now, heater, blower and ducting all in along with the loom all clipped in to place.


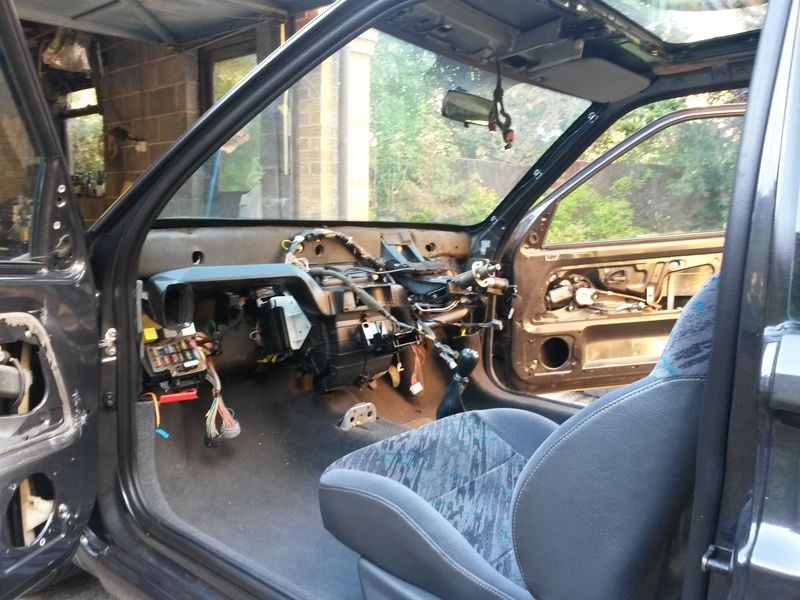
Dash next, once my back, knees, neck etc recovers....
lincolndanny is offline   Reply With Quote
Old 13th December 2015, 19:06   #27
Dan-Subtlem
Forum Section Moderator
Track / Motorsport PrepCentral South Region MemberSouth East Region Member
 
Dan-Subtle's Avatar
 
Join Date: Aug 2006
Location: Westgate on Sea/Bexley
Posts: 17,223
Car(s): Series 1 Rallye
iTrader Score: 151 (99%)
Dan-Subtle is a well respected team memberDan-Subtle is a well respected team memberDan-Subtle is a well respected team memberDan-Subtle is a well respected team memberDan-Subtle is a well respected team memberDan-Subtle is a well respected team memberDan-Subtle is a well respected team memberDan-Subtle is a well respected team memberDan-Subtle is a well respected team memberDan-Subtle is a well respected team memberDan-Subtle is a well respected team member
Default

Any updates with this?
__________________
Quote:
Originally Posted by AlexB View Post
You know me
In balls deep and worry about the consiquences after
Dan-Subtle is offline   Reply With Quote
Old 13th December 2015, 20:27   #28
lincolndanny
Newbie
 
Join Date: Jun 2013
Posts: 26
lincolndanny is on a distinguished road
Default

Quote:
Originally Posted by Dan-Subtle View Post
Any updates with this?
Still making progress Dan and trying to get the old girl on the road for the new year.

Funnily enough I posted an update elsewhere today(bit quiet here really now )


Common issue on these little buggers. Nothing for it but to chop it out and repair it properly. If only Peugeot/Citroen had seam sealed them properly in the first place eh?

Choppy choppy.


Then a bit of snip, trim, snip, trim, prime, weld, grind etc


Then onto another layer, gets rather boring but hey it's got to be done. At least I got to use a hammer for this one...


And to rap it up for now I ground the welds back and gave them a coat of etch.


There's a frilly bit left on this side but I'll worry about that next year when the suns out...


Best check the other side out now and see what that's like!

If you want to see what I've been upto recently on it...

http://autoshite.com/topic/22466-fre...t-hatch-shite/
lincolndanny is offline   Reply With Quote
Old 13th December 2015, 23:17   #29
willsy
West Midlands
Track / Motorsport PrepWest Midlands Region Member
 
willsy's Avatar
 
Join Date: Nov 2005
Location: Nuneaton (West Mids)
Posts: 13,835
Blog Entries: 4
Car(s): '64 Volvo V40 R’Design, '89 Ph1 309 GTi, ‘97 Mk1 S
iTrader Score: 125 (100%)
willsy is absolutely fabulous!willsy is absolutely fabulous!willsy is absolutely fabulous!willsy is absolutely fabulous!willsy is absolutely fabulous!willsy is absolutely fabulous!willsy is absolutely fabulous!willsy is absolutely fabulous!willsy is absolutely fabulous!willsy is absolutely fabulous!willsy is absolutely fabulous!
Default

Fantastic job of that welding Danny! Very nice to see the attention to detail adding the ribbing back in as it should be and not just slapping an 'it'll do/MOT passable' patch on like many do. It'll be the perfect repair when you get around to doing the last little bit that the arch liner fixes to.

Fancy doing some welding on my 309? ;-)
willsy is offline   Reply With Quote
Old 14th December 2015, 11:23   #30
SimpleJoee
Frequent Poster
 
SimpleJoee's Avatar
 
Join Date: Oct 2013
Location: Bridgend, South Wales
Posts: 948
Car(s): Mk1 VTS, FF BG 182
SimpleJoee is on a distinguished road
Default

Some very nice welding there, looking good mate!
__________________
Quote:
Originally Posted by Brettles1986 View Post
I'm a massive cunt with a tiny pecker
SimpleJoee is offline   Reply With Quote
Old 20th December 2015, 20:11   #31
lincolndanny
Newbie
 
Join Date: Jun 2013
Posts: 26
lincolndanny is on a distinguished road
Default

Managed to gain a couple of hours in the garage this afternoon so thought I had best take a look at the inner arch on the nearside.


Removing the arch liner revealed further crustiness.


It's always worth cleaning everything back before you start cutting to see just how far the rust has crept. It's amazing what lurks under seam sealer and stone chip.


Plenty to be on with on this side as you can see. Fortunately it's not rotted the whole way along so I think breaking it down in to 3 separate sections is going to be the best way forward.

I've decided to start with the forward most rot first as it looks the worst and is a combination of 3 separate layers.


So cut out the first layer back to good metal to reveal the crusty second layer underneath.


Second layer cut out again to sound metal. Fortunately, the last layer is made of nice thick metal(it's a strengthener) so although slightly pitted from surface rust, it's cleaned up well.


Finished off tonight with a good coat of Bilt Hamber rust converter to remove any last traces of rust on the last layer.


Finish work on Tuesday for Christmas until the 4th January, so hoping to have both rear arches completely welded up by then.
lincolndanny is offline   Reply With Quote
Old 20th December 2015, 20:33   #32
willsy
West Midlands
Track / Motorsport PrepWest Midlands Region Member
 
willsy's Avatar
 
Join Date: Nov 2005
Location: Nuneaton (West Mids)
Posts: 13,835
Blog Entries: 4
Car(s): '64 Volvo V40 R’Design, '89 Ph1 309 GTi, ‘97 Mk1 S
iTrader Score: 125 (100%)
willsy is absolutely fabulous!willsy is absolutely fabulous!willsy is absolutely fabulous!willsy is absolutely fabulous!willsy is absolutely fabulous!willsy is absolutely fabulous!willsy is absolutely fabulous!willsy is absolutely fabulous!willsy is absolutely fabulous!willsy is absolutely fabulous!willsy is absolutely fabulous!
Default

You got cracking with that quickly since the pic earlier. Doesn't look too bad overall then. :-)
willsy is offline   Reply With Quote
Old 20th December 2015, 20:45   #33
lincolndanny
Newbie
 
Join Date: Jun 2013
Posts: 26
lincolndanny is on a distinguished road
Default

Quote:
Originally Posted by willsy View Post
You got cracking with that quickly since the pic earlier. Doesn't look too bad overall then. :-)
It looks bad but it should be plain sailing on this side as fortunately it's not spread to any of the strengthening ribs. Just nice flat patches on this side

I've also given all the fixings on the beam, heatshields and the brake lines a good blast with the penetrating fluid. Going to try and remember to repeat that exercise each time I go in there so that when it comes to stripping the beam, it might pull apart a bit easier...
lincolndanny is offline   Reply With Quote
Old 26th December 2015, 15:05   #34
mark16v
Established Member
 
mark16v's Avatar
 
Join Date: Jan 2005
Location: Up North
Posts: 1,642
mark16v is a jewel in the roughmark16v is a jewel in the roughmark16v is a jewel in the roughmark16v is a jewel in the rough
Default

great project coming up really clean
mark16v is offline   Reply With Quote
Old 5th January 2016, 17:44   #35
Ben_SaxoForte
Saxperience Forum Bum
 
Ben_SaxoForte's Avatar
 
Join Date: Mar 2009
Location: Stoke-on-trent
Posts: 2,640
Car(s): Mk5 Golf GTTDI Mk2 VTR Project
Ben_SaxoForte is on a distinguished road
Default

Very nice work on this I'm amazed how good you have made the patches look all other welding on the rear arches ive seen on saxos always looks a right bodge.
Ben_SaxoForte is offline   Reply With Quote
Old 5th January 2016, 18:09   #36
SimpleJoee
Frequent Poster
 
SimpleJoee's Avatar
 
Join Date: Oct 2013
Location: Bridgend, South Wales
Posts: 948
Car(s): Mk1 VTS, FF BG 182
SimpleJoee is on a distinguished road
Default

If I can weld a quarter as good as you one day I'll be amazed! Cracking work.
__________________
Quote:
Originally Posted by Brettles1986 View Post
I'm a massive cunt with a tiny pecker
SimpleJoee is offline   Reply With Quote
Old 5th January 2016, 18:38   #37
DaCrazyOne
Frequent Poster
 
Join Date: Sep 2013
Location: Space
Posts: 873
Car(s): JuliustoogyJD
DaCrazyOne is on a distinguished road
Default

id be also looking under the front arches and under where ecu sits and also where fuse box is to make sure the metal is not rotted or gone soft very common problem just had mine both welded up. No harm in checking while you out n about with cutting n welding
DaCrazyOne is offline   Reply With Quote
Old 5th January 2016, 20:47   #38
lincolndanny
Newbie
 
Join Date: Jun 2013
Posts: 26
lincolndanny is on a distinguished road
Default

Thanks for the comments guys Really appreciate it.

I managed to get the o/s finished over Chtristmas. First off was the front section.


Then moved on to the rear and centre section of rot.


And finally with the majority of the welds knocked back. I'll finish them off when it's ready for stone chip and paint. Primer just protects it for now

lincolndanny is offline   Reply With Quote
Old 5th January 2016, 21:18   #39
m11kvy
Infrequent Poster
North East Region Member
 
m11kvy's Avatar
 
Join Date: Aug 2008
Location: North East
Posts: 194
Car(s): VTS
m11kvy is on a distinguished road
Default

Awesome job on the welding and good luck with this. I've subscribed
m11kvy is offline   Reply With Quote
Old 5th January 2016, 23:08   #40
djx11b
Frequent Poster
Scotland Region Member
 
Join Date: Mar 2008
Location: Glasgow
Posts: 565
Car(s): Saxo Vts Mk1 1997
iTrader Score: 15 (100%)
djx11b is on a distinguished road
Default

Would love to weld like this need to learn. Great job looking good.
djx11b is offline   Reply With Quote
Reply

Bookmarks


Posting Rules
You may not post new threads
You may not post replies
You may not post attachments
You may not edit your posts

BB code is On
Smilies are On
[IMG] code is On
HTML code is Off

Forum Jump


All times are GMT. The time now is 22:16.