This comes up a fair amount so thought i would knock up a very quick and easy guide. (this is based using photoshop cs3)
1) first up create your sig as per normal with a size of 468 x 60 and at a resolution of 72. for my example i am using a single image if you are making sig with multiple layers flattern them before continuing (select the layers ctrl E)
2) with your single layer then duplicate it so you have a second copy, as below

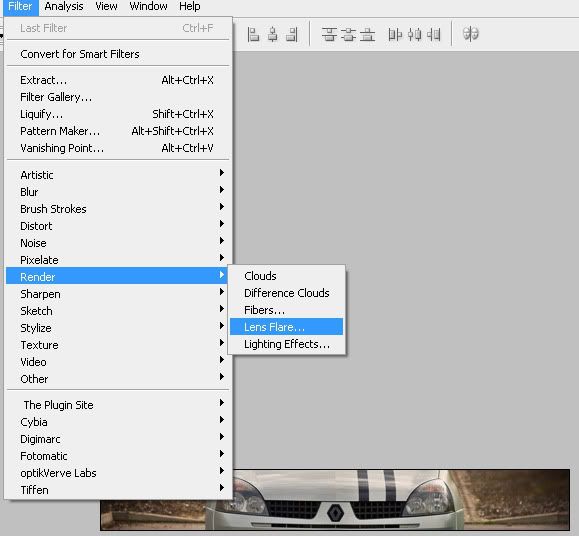
3) with the top layer selected go filter > render > lens flare.

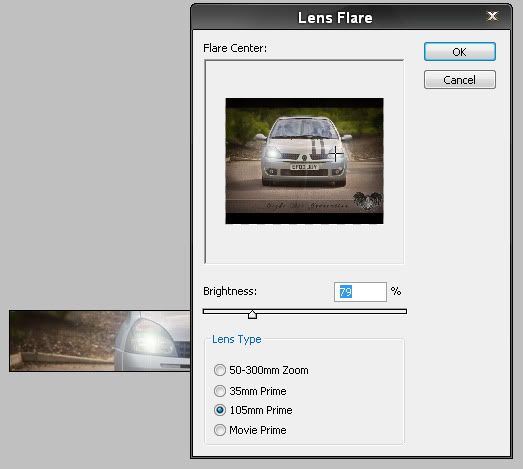
adjust the amount and type to suit the look you are after

you will need to repeat this process twice ( one lens flare per headlight)
your top layer will look something like this

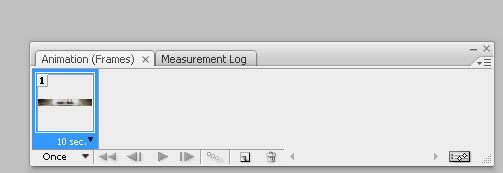
4) Now make sure you have the animation palette open this can be found by going window > animation
it should look like the box below, if it doesnt click on the icon in the bottom right of the palette and it will change the view from a timeline to frame like this

5) On the animation palette click the new frame icon (left of the bin icon), select the first frame and make sure only the background layer is selected on your normal photoshop layers (hide the layer where the headlights are turned on by click the eye icon). On the second frame make sure the layer where the headlights are on is visable. basically giving you OFF/ON
then select both layers, click the drop down and change the time from 10sec to something more suitable, also set the the play loop from once to forever

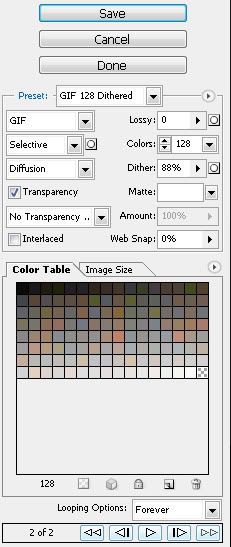
6) now you are ready to save you animation. go File > save for web and devices and it will open a pop up window.
make sure on the save settings you have the image as a gif file, click a save. job done

should look something like this

hope this guide is of some help guys (obviously the speed can be increased by swaping the 1second frame duration to something less like 0.5 seconds and brightness/ size and type of headlight beam is adjusted in the initial lens flare setting)
cheers
James

