Mobile Devices: Lite Theme Citroën: Citroën Trader | Saxo Trader | C2 Trader Peugeot: Peugeot Trader | 106 Trader Enthusiast: Saxperience


Go Back   Saxperience - Citroen Saxo Forum > Citroen Saxo Related Forums > Saxo Problems & Queries
Register Member Photo AlbumsBlogs FAQ Calendar Experience

Saxo Problems & Queries If you're having problems with your Saxo and you're after a bit of advice, check this forum out...

Reply
 
Thread Tools Display Modes
Old 25th April 2011, 16:06   #1
rhysg
Regular Poster
 
rhysg's Avatar
 
Join Date: Feb 2011
Location: Houghton-Le-Spring
Posts: 366
Car(s): C2 vts
rhysg is on a distinguished road
Default help ?? dash lights, how to change

hey, im wanting some white dash lights to replace thr red ones, can somone help and give me some instructions or a brief idea of what to do, thanks guys
rhysg is offline   Reply With Quote
Old 25th April 2011, 16:47   #2
Gibbo-Vtr
Saxperience Forum Bum
East Midlands Region Member
 
Gibbo-Vtr's Avatar
 
Join Date: Apr 2010
Location: Ilkeston Derby
Posts: 3,697
Car(s): Red Mk1 R Silver Mk2 S & Mk2 Seat Leon.
iTrader Score: 5 (100%)
Gibbo-Vtr is on a distinguished road
Default

This was on a Mk2,
But is near enough the same as a Mk1.

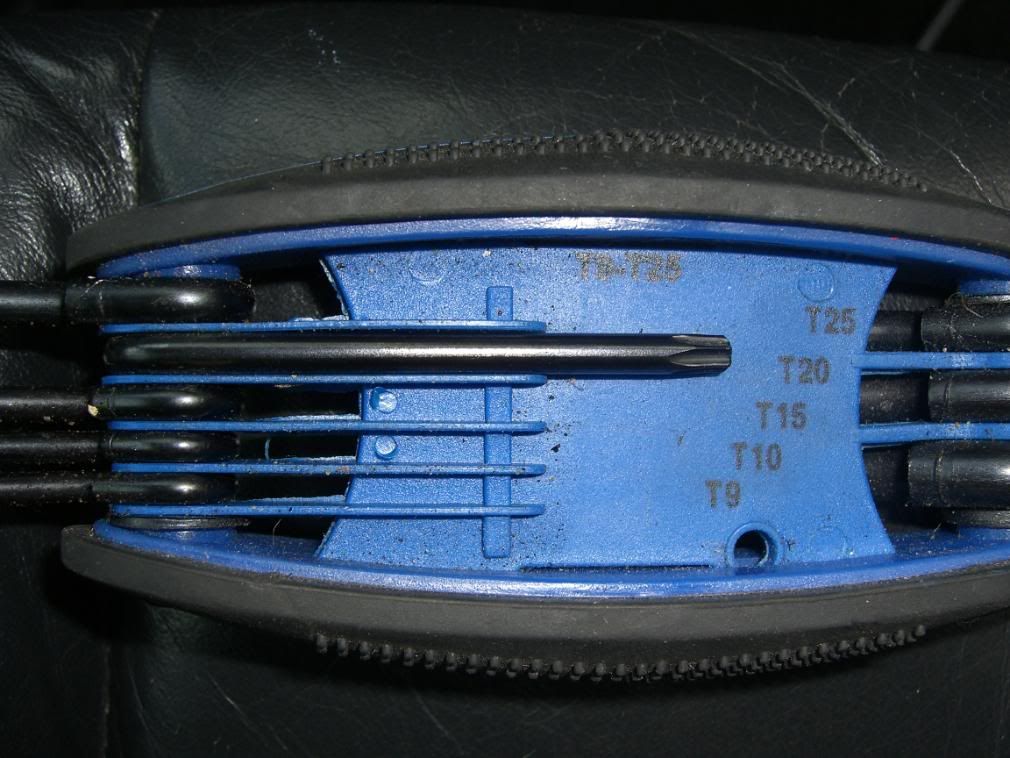
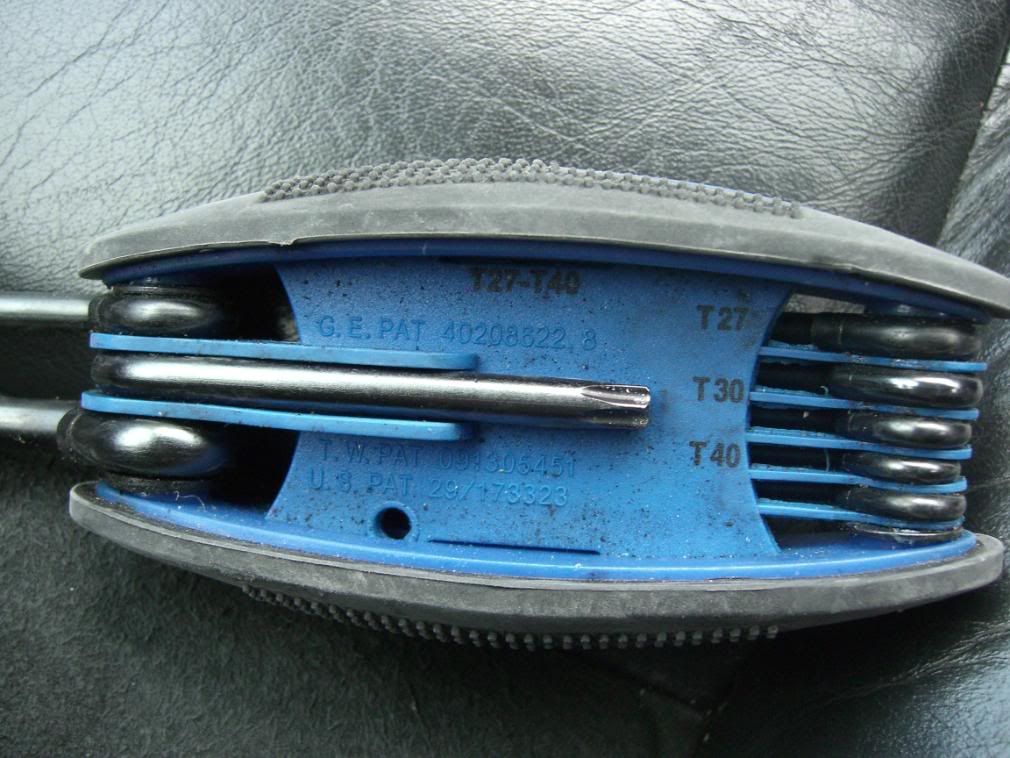
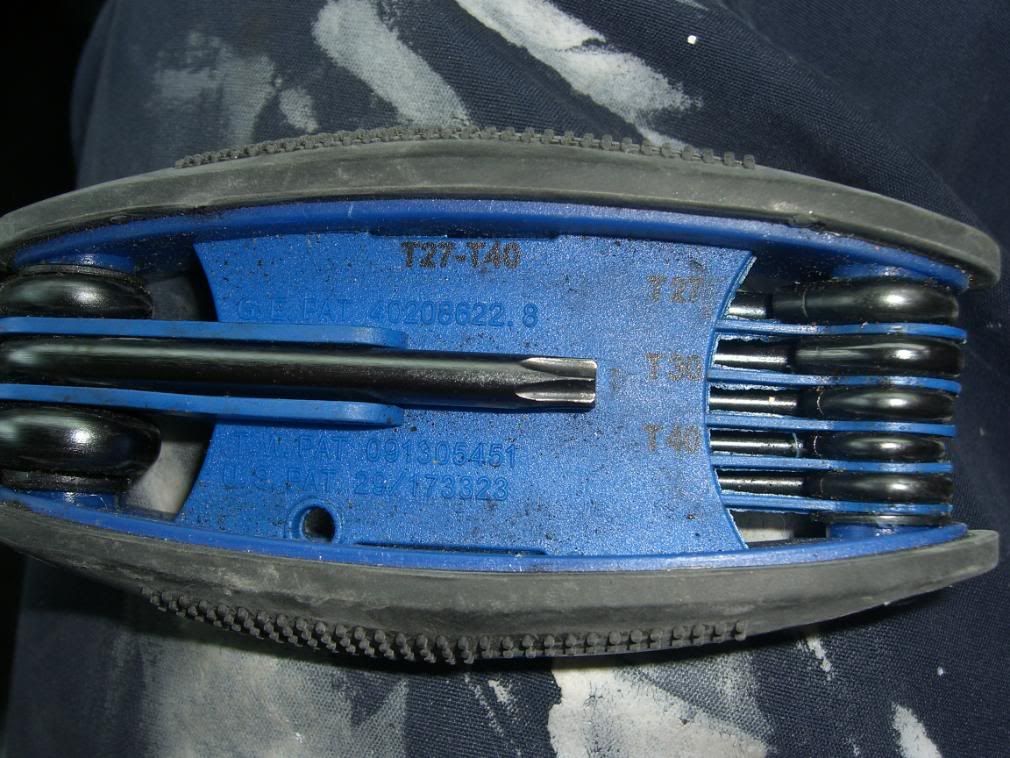
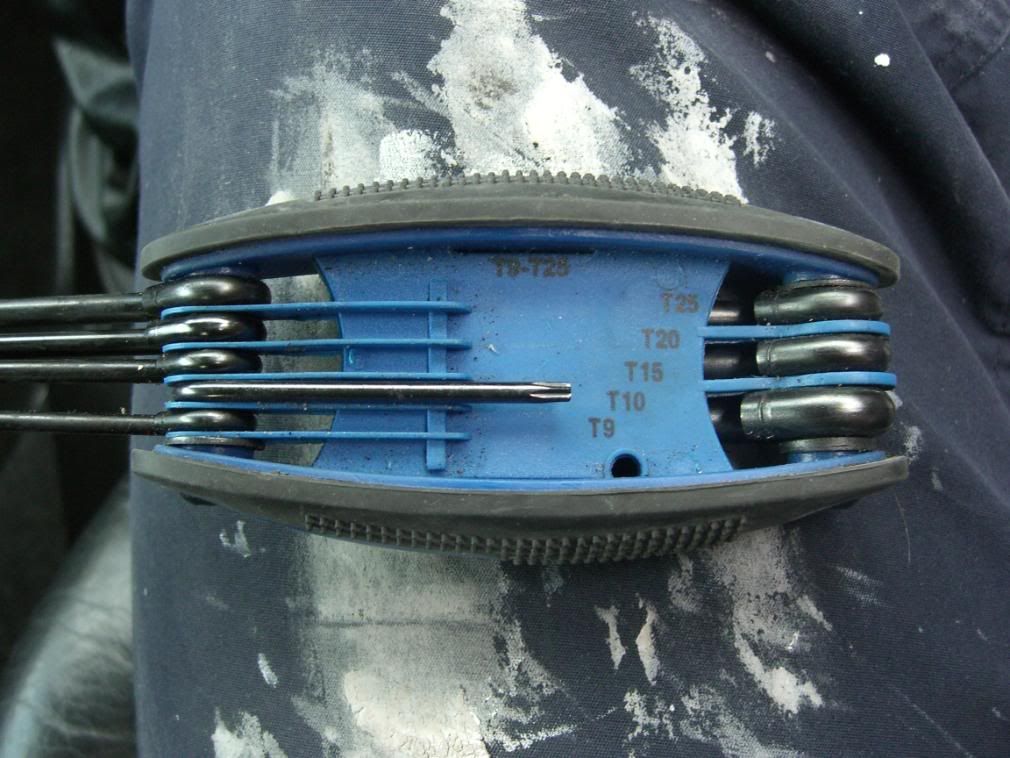
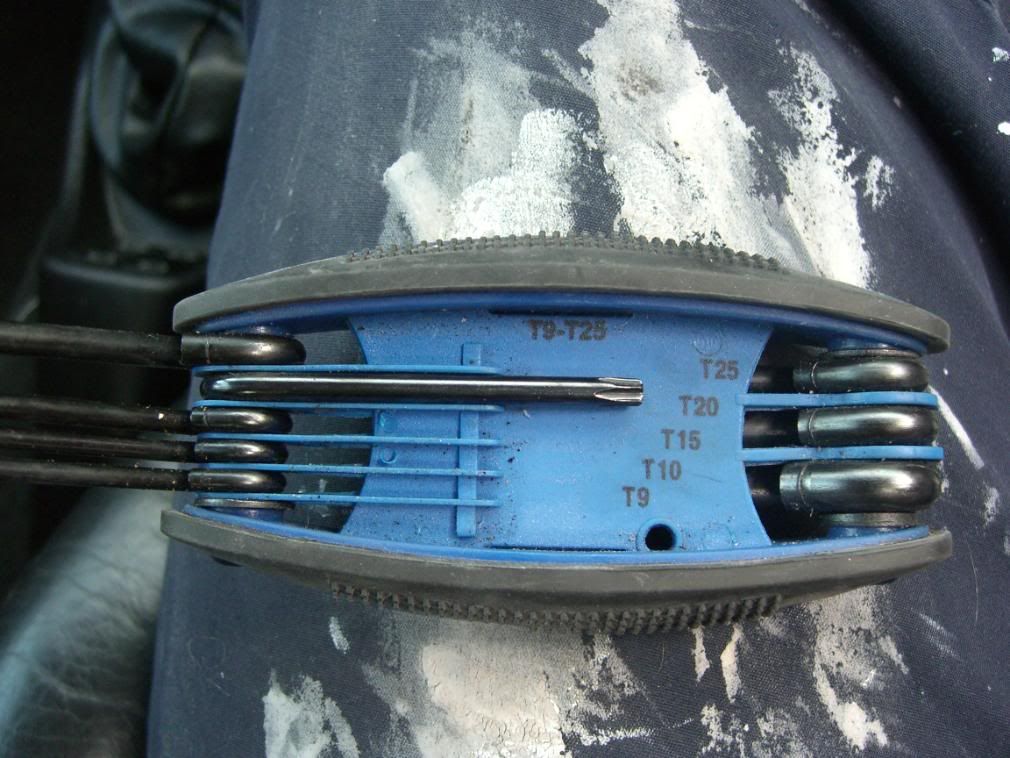
You will need the following tools;

Torx bits - T10,T20,T30,T50
tiny flat headed screwdriver
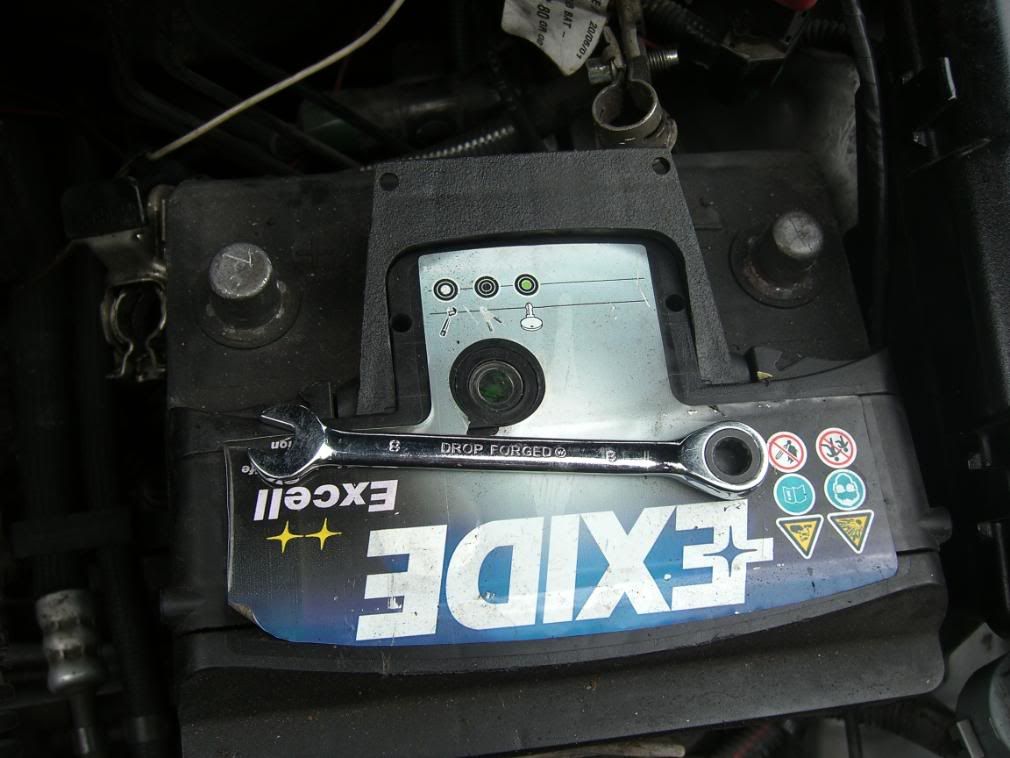
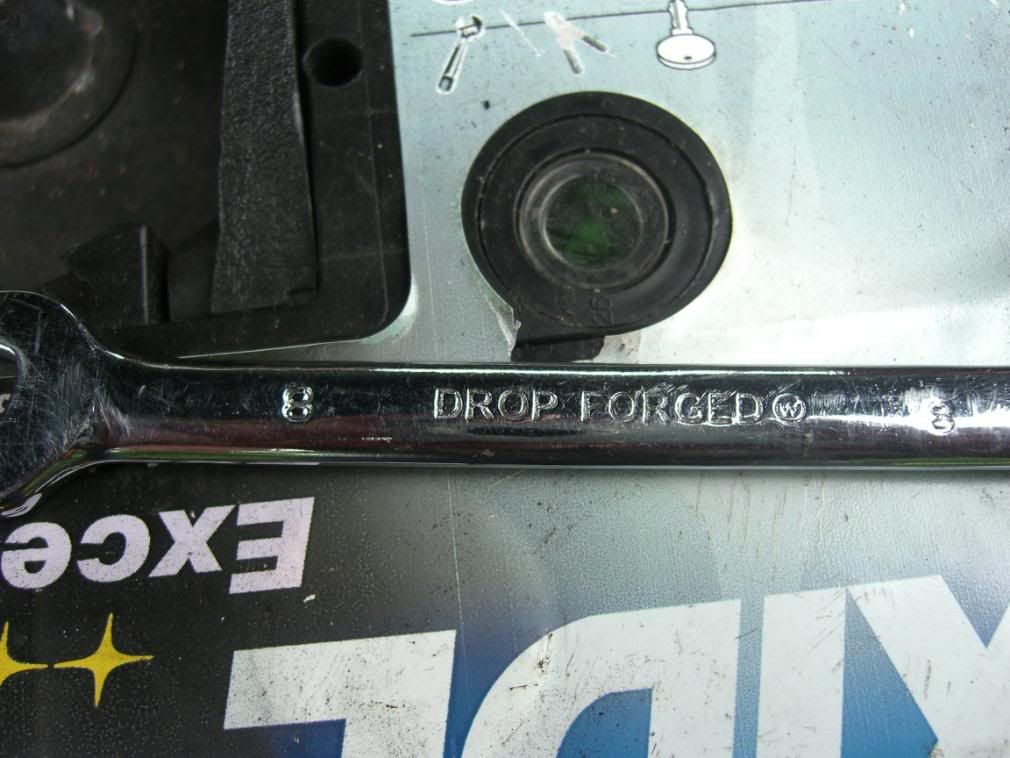
possibly 8mm spanner

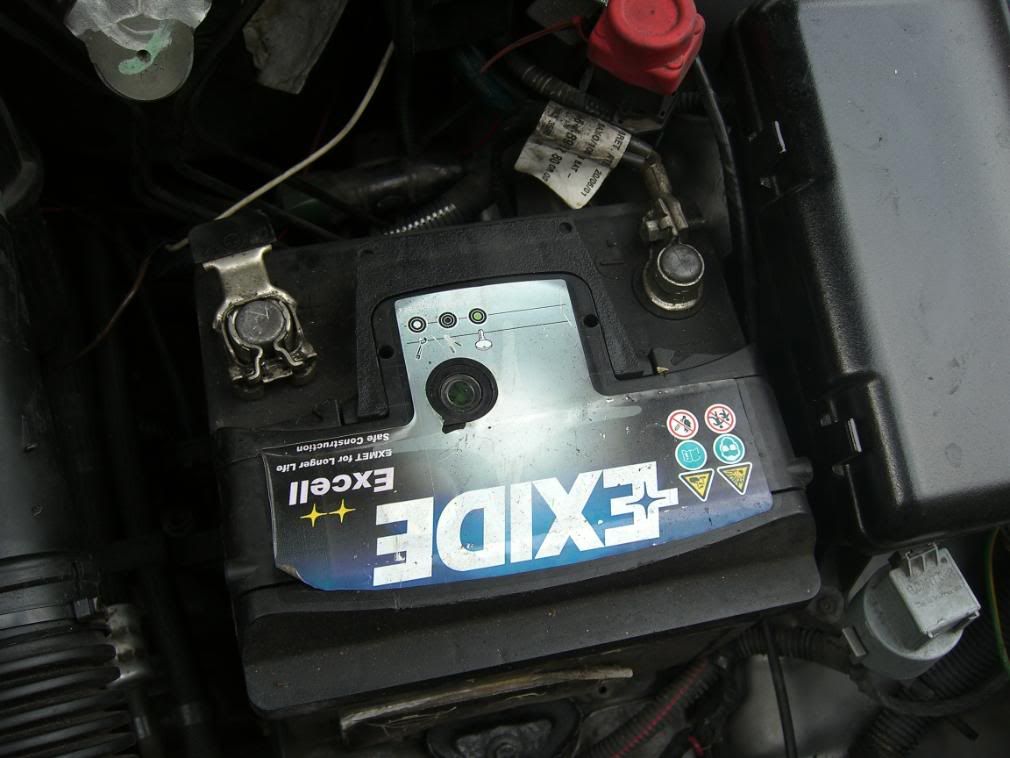
1. first things first, becasue your steering wheel has an airbag in you need to disconnect the battery and leave it for atleast 10 mins for the charge to leave the airbag. i had to use an 8mm spanner to take my negative terminal off the battery. i decided to take both terminals off for some reason but you could just take the positive one off.


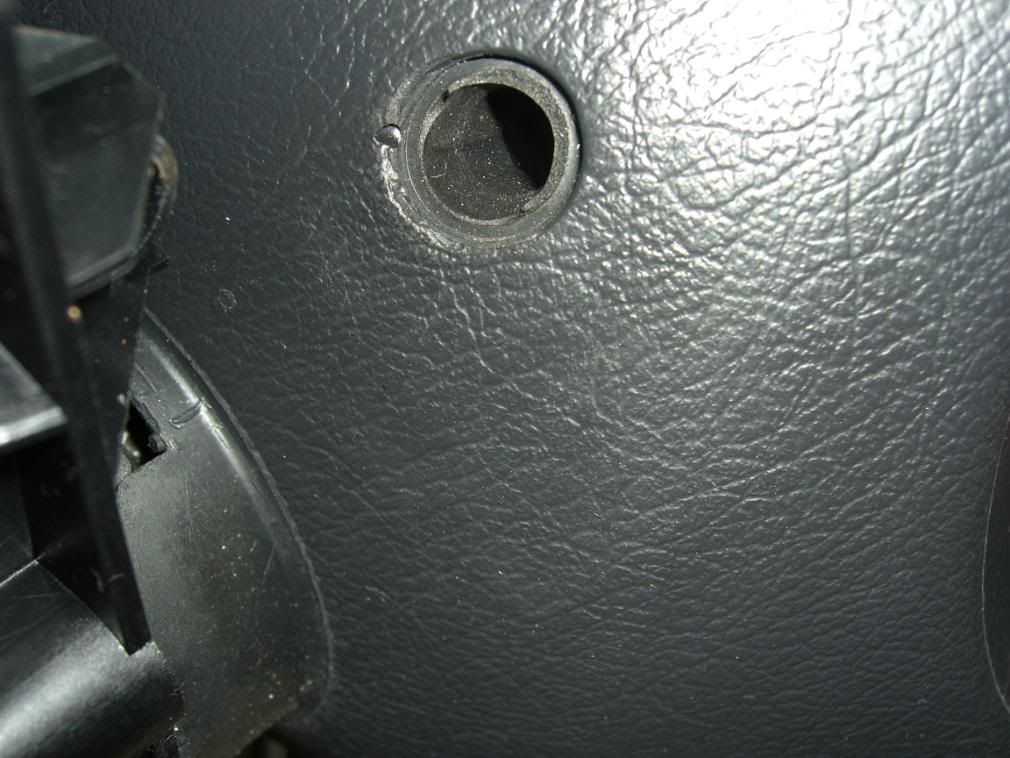
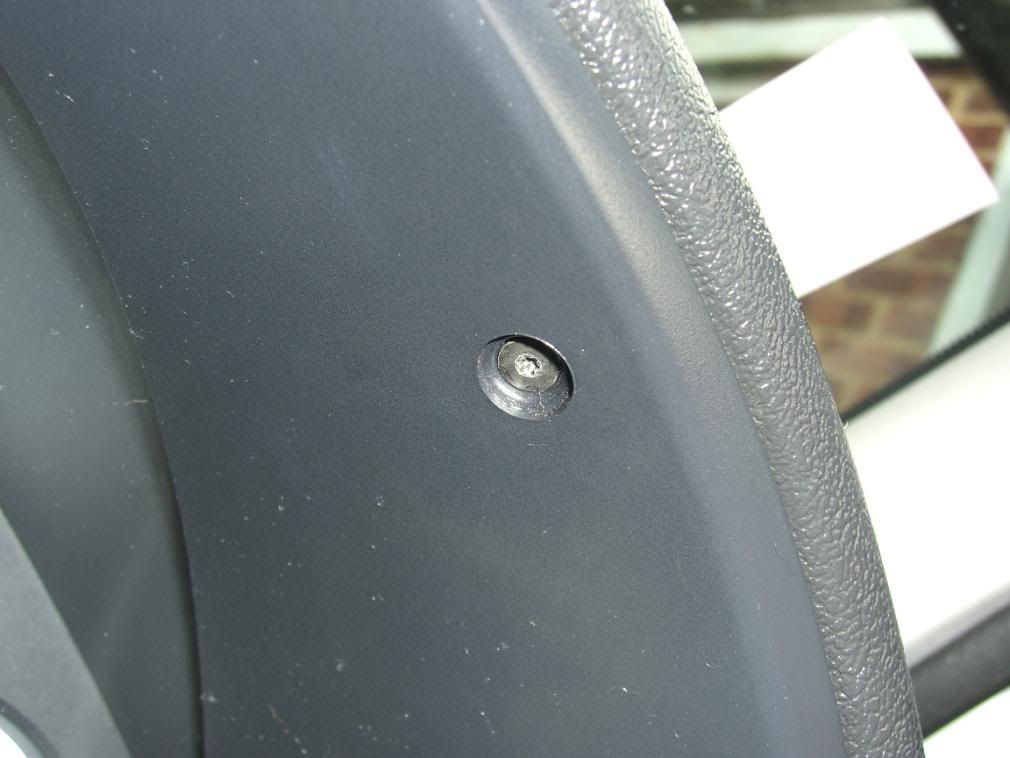
2. you then need to take the plastic pannel off under the steering wheel. you need a T20 torx bit for this. there is a screw each side.


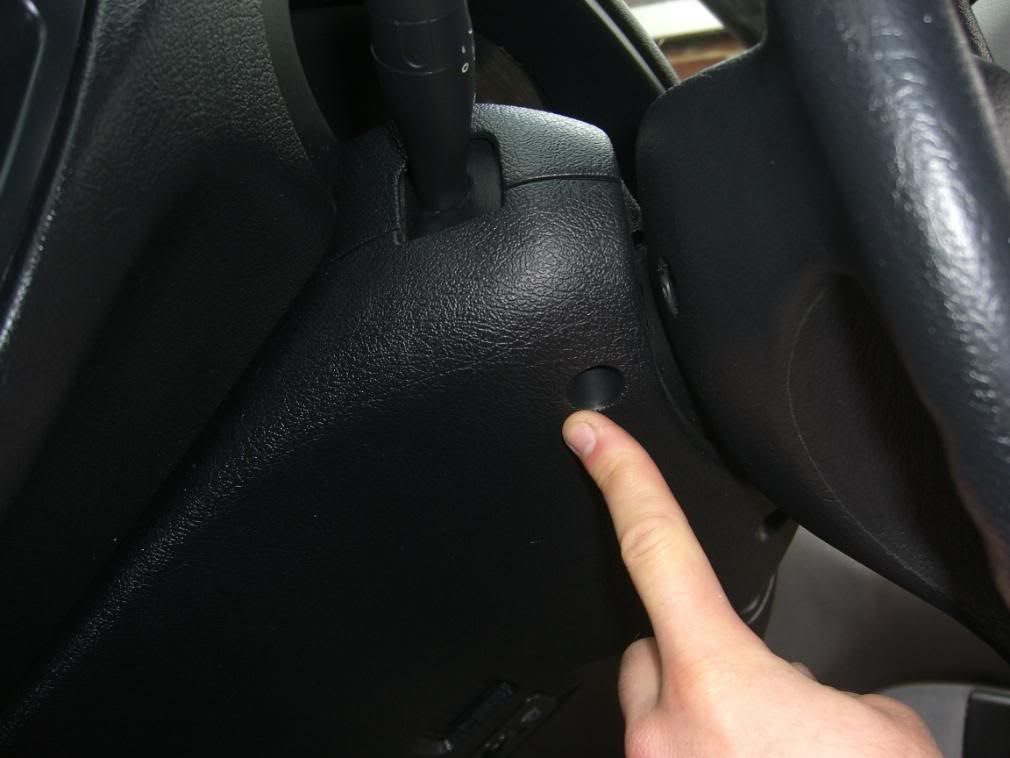
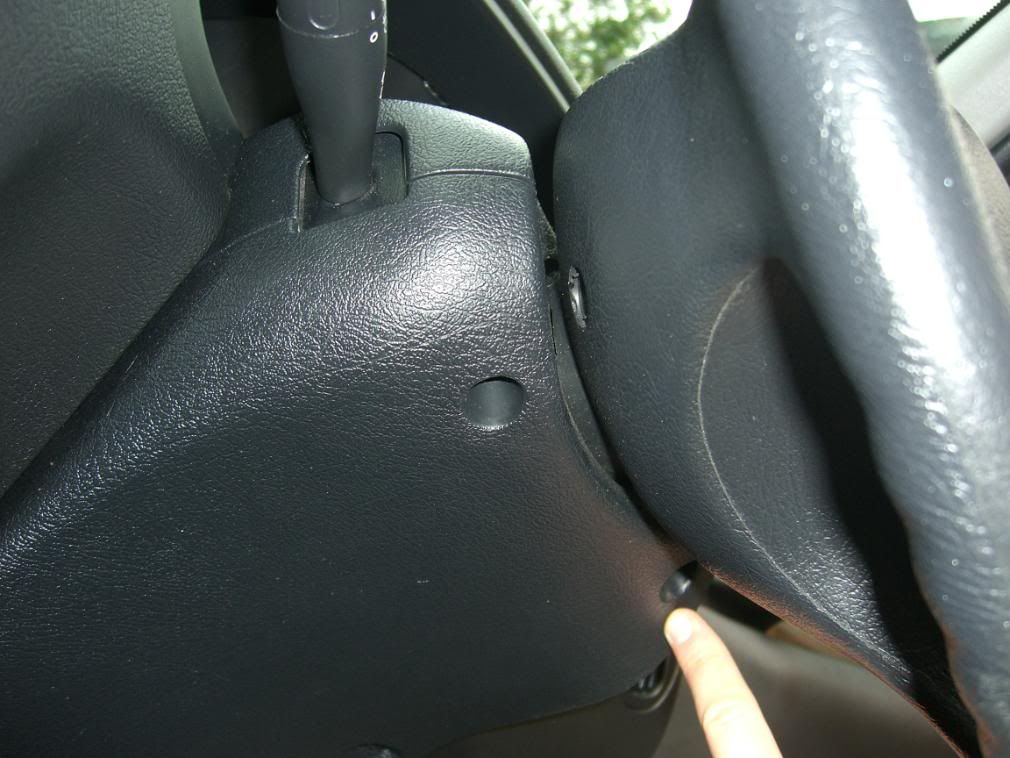
3. this then just pulls down, out and off


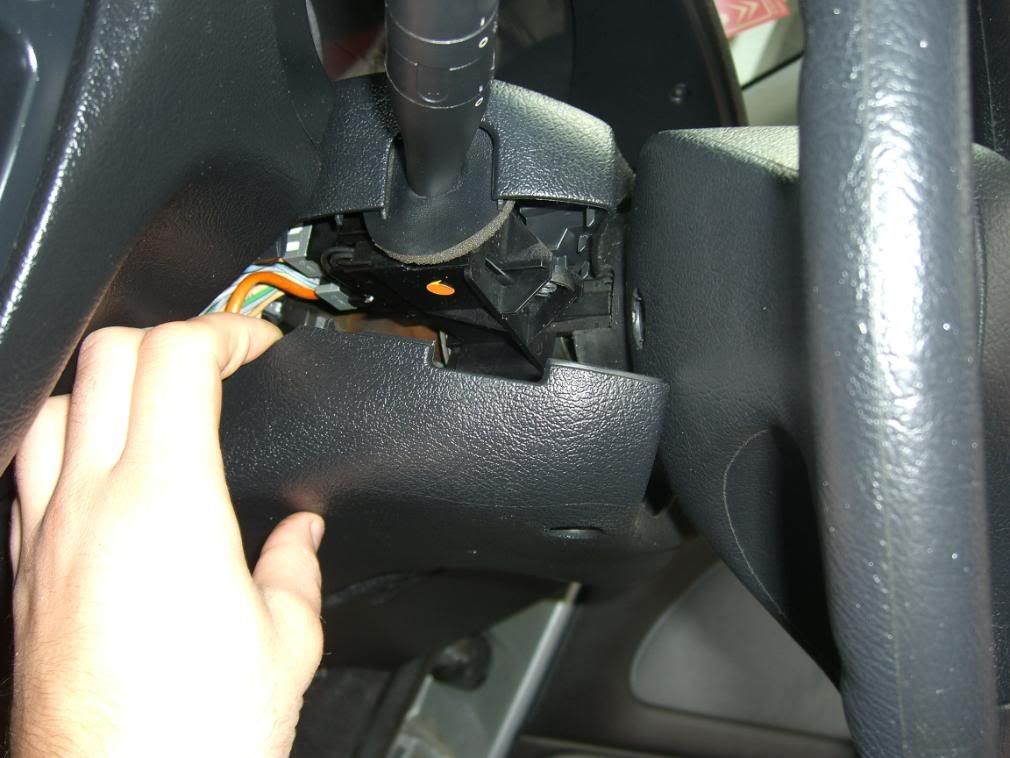
4. pull the top part of the cover off and you should have something that looks like this


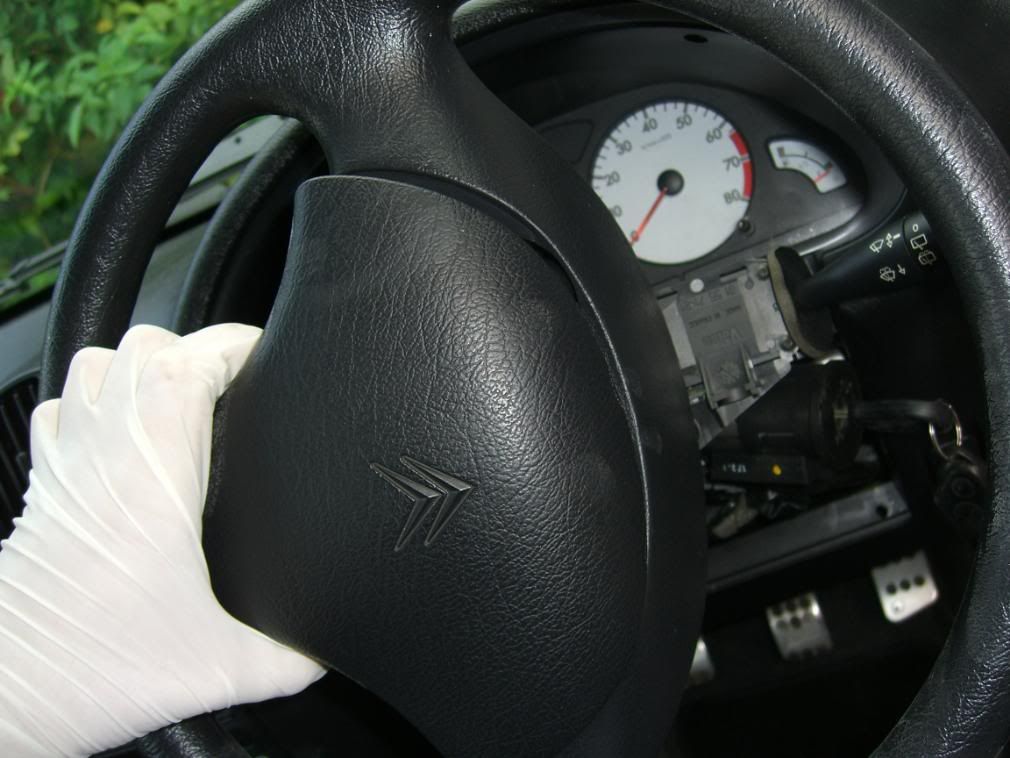
5. by the time you have done this 10 mins should have passed so its time to take the air bag out of the steering wheel. YOU NEED TO BE VERY CAREFULL WITH THE AIRBAG, IT CAN GO OFF AT ANYTIME IF NOT HANDLED WITH CARE

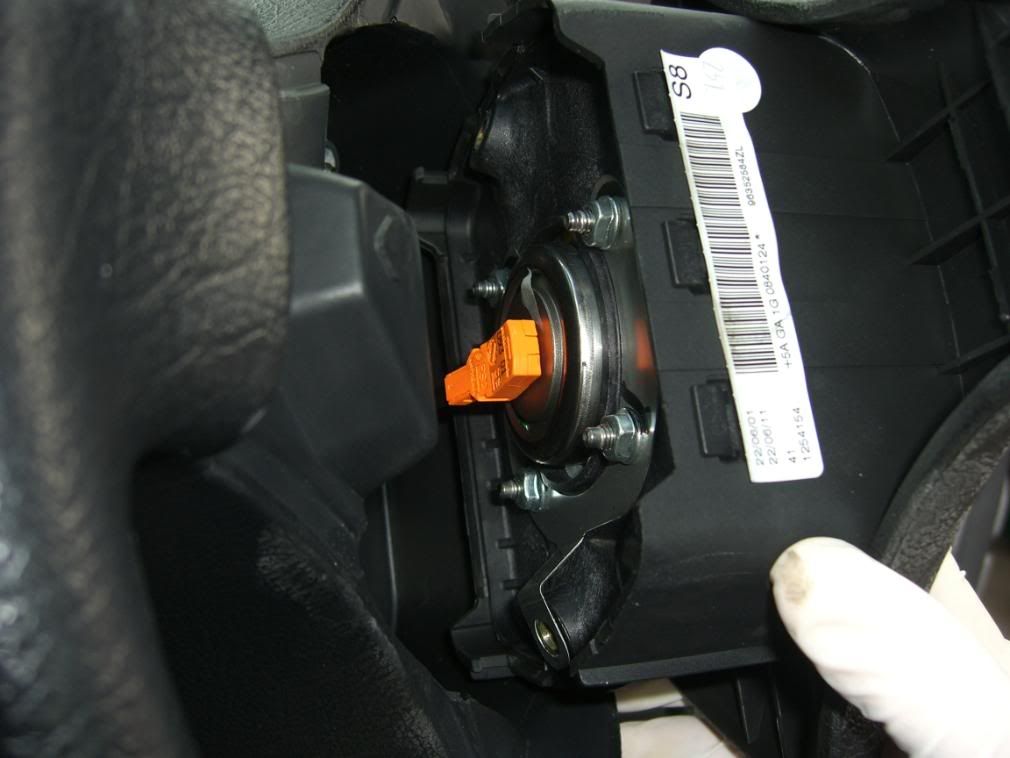
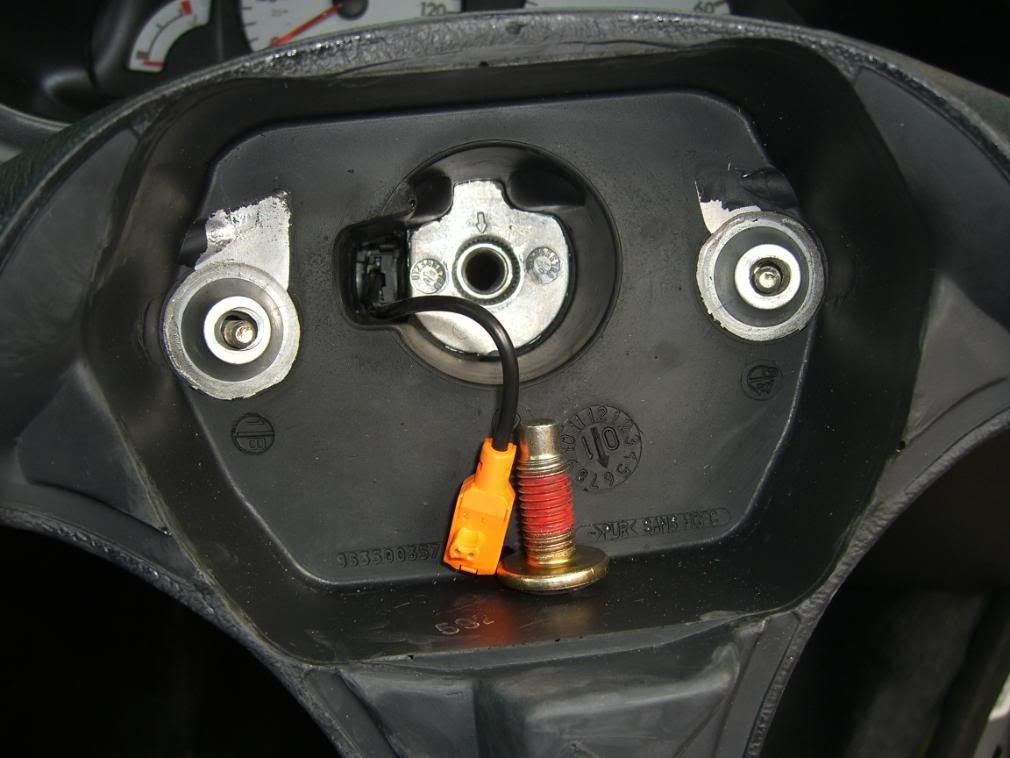
there are two T30 bolts behind the steering wheel that hold the airbag in, these bolts do not come out once they have been loosed. its just the air bag that comes out


4. the airbag should not be loose and you are able to gently pull it out, dont pull it all the way out until you have disconnected it from the airbag loom


the airbag loom plug just pulls out


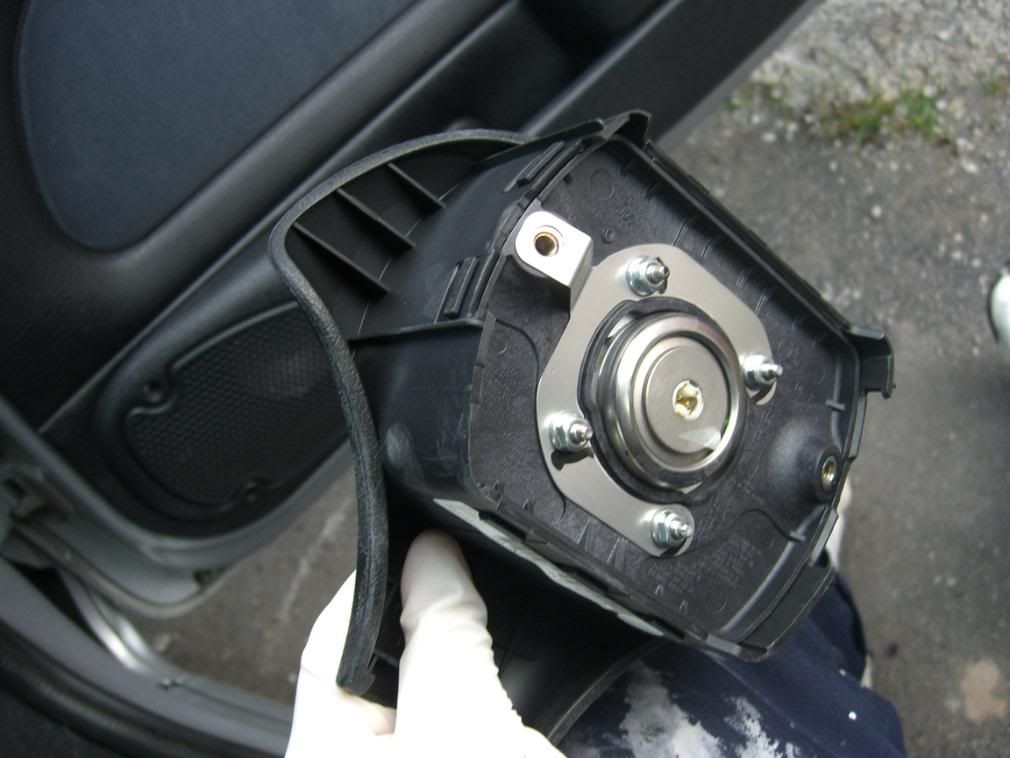
5. it should not look like this


6. PUT YOUR AIRBAG SOMEWHERE SAFE UNTIL YOU NEED IT AGAIN


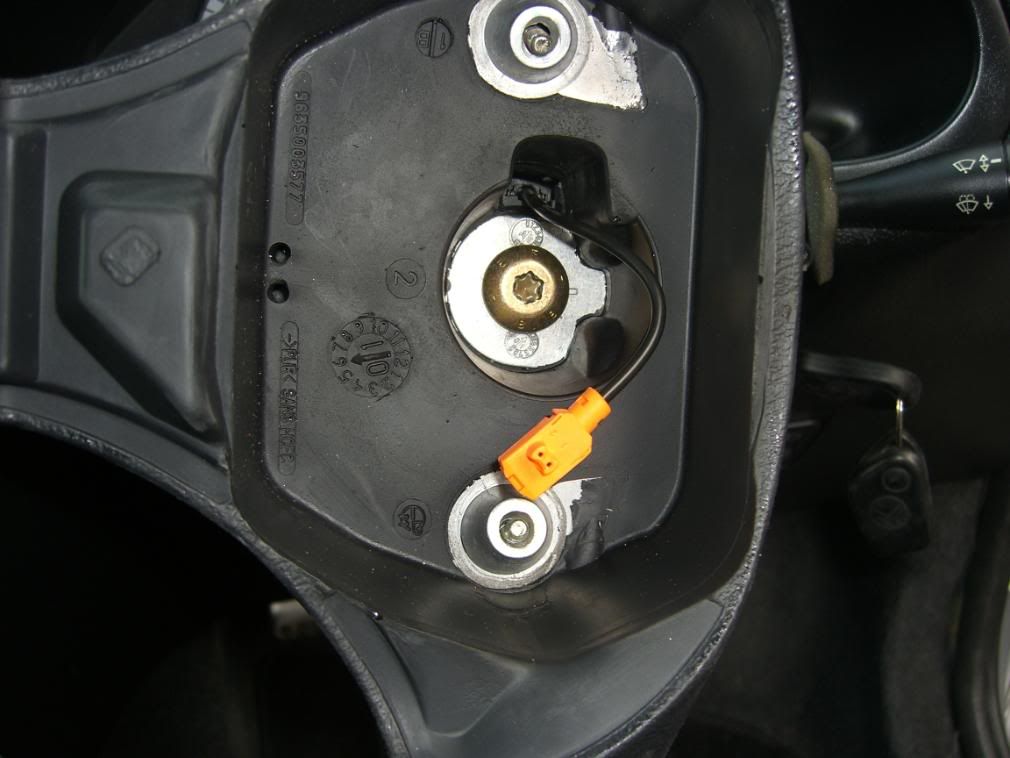
7. you now need to take the bolt out that holds the steering wheel on, the bolts is a T50 head.


take this out, i found it easyer to put the steering lock on


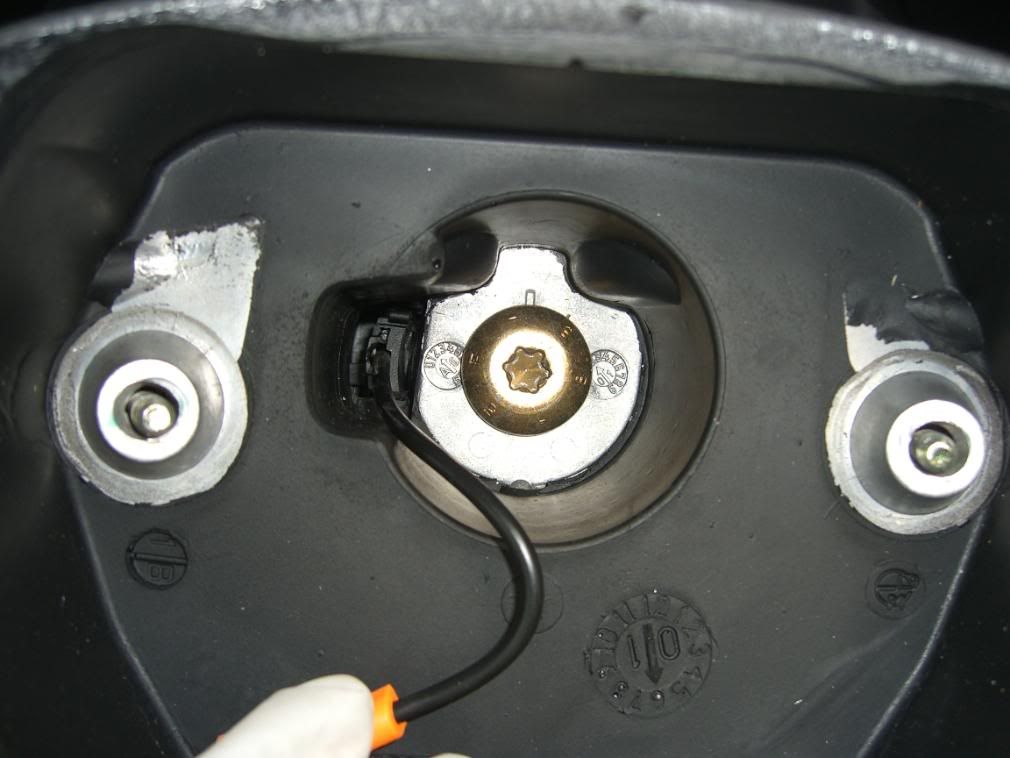
8. you now need to mark a notch on the splines that the steering wheel fits onto before taking the steering wheel off, this will make it alot easier when putting it back together so the wheel is lined up with the actual car wheels

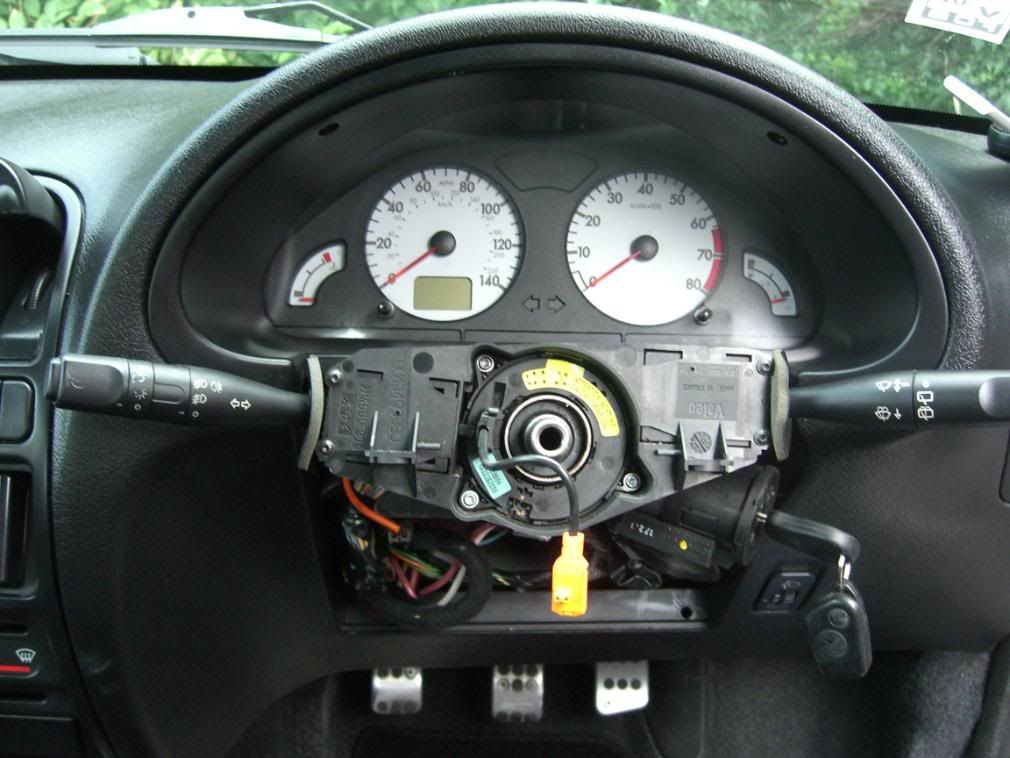
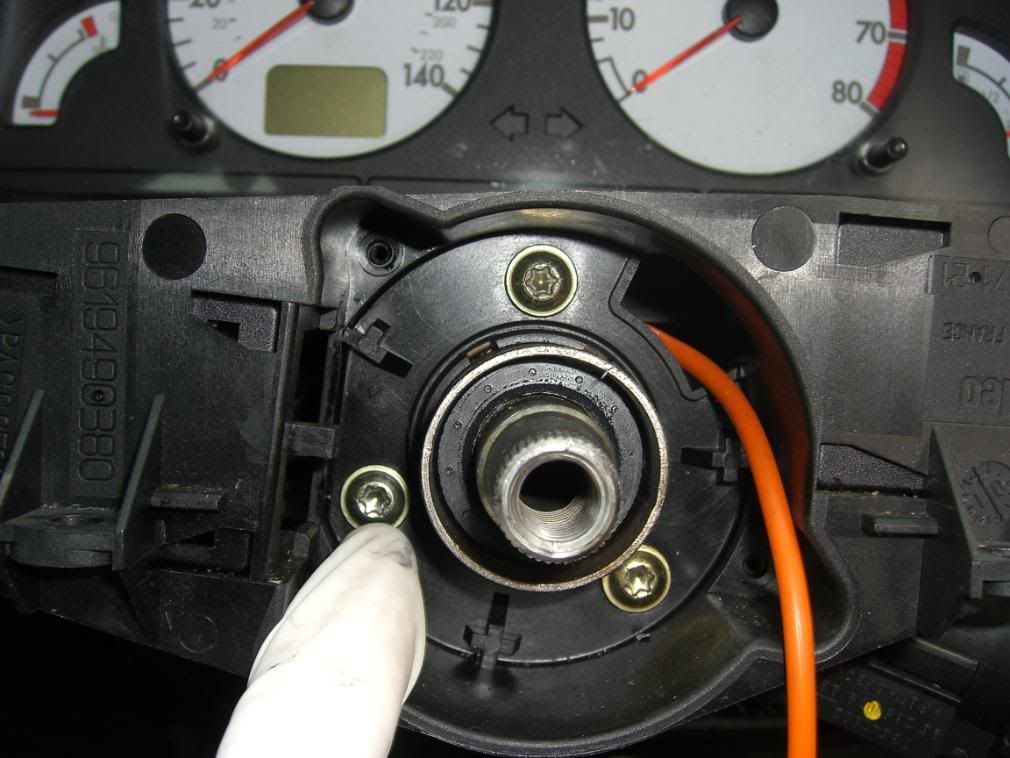
9. you now need to pull the steering wheel off but be very carefull not to catch the orange plug as you pull it off as it will rip it off the airbag ring

once pulled off it should look like this


[QUOTE=Mark51;2466439]10. you now need to take the three T20 screws out that hold the airbag ring in


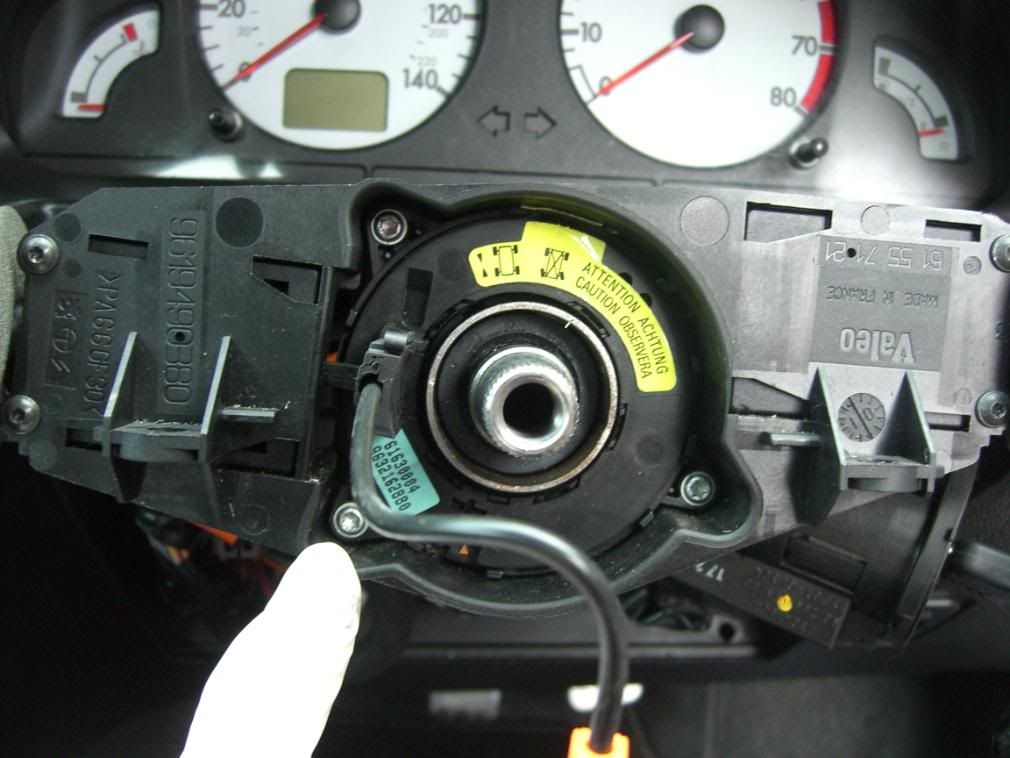
11. once these have been taken out you now need to take the ring out but need to hold the indicator thingy down so it can come out. i used a electrical screwdriver to hold it down until the ring had pasted this but i have used a bit of paper and card in the past


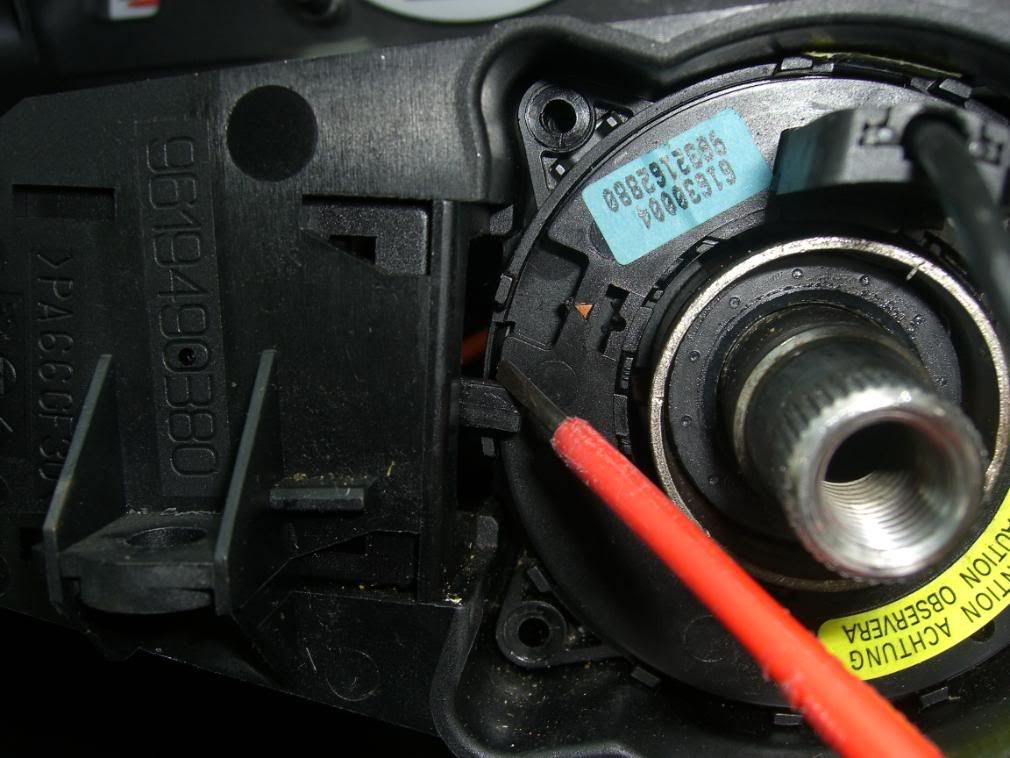
try to keep the ring in the same position when you have taken it off as you need to put it back on in the same position. it only spins something like 3.5 turns both ways until it stops so if you put it back on with one side having less turns than the other it will smash it off when you turn full lock to the side that has less turns that the other.

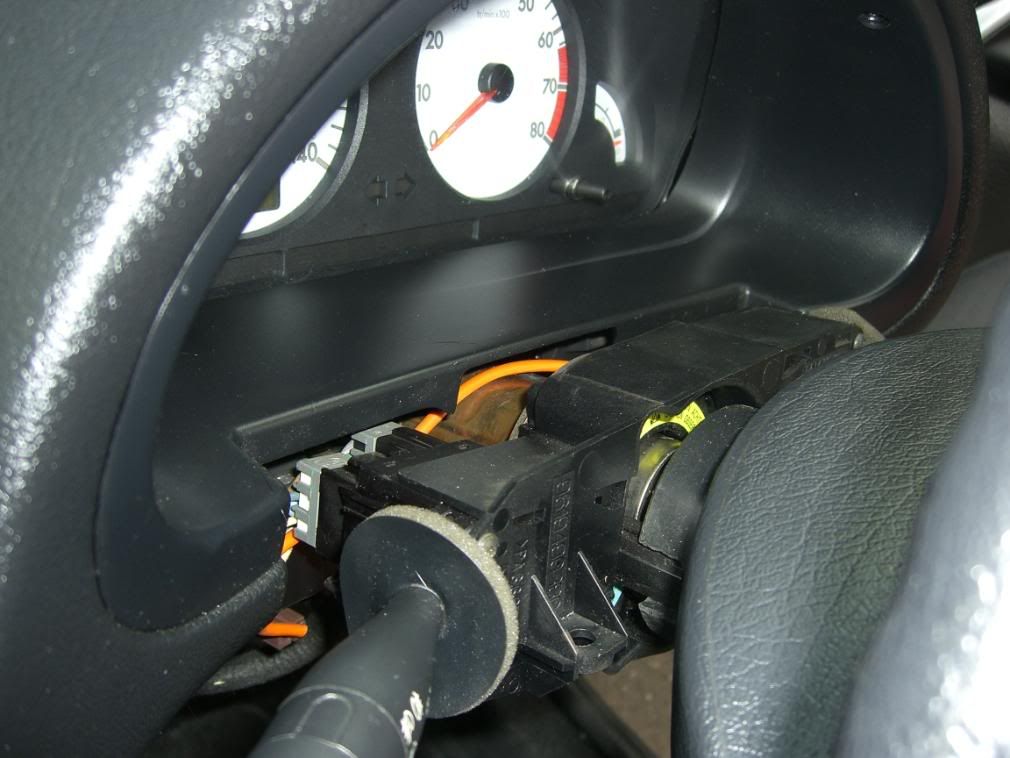
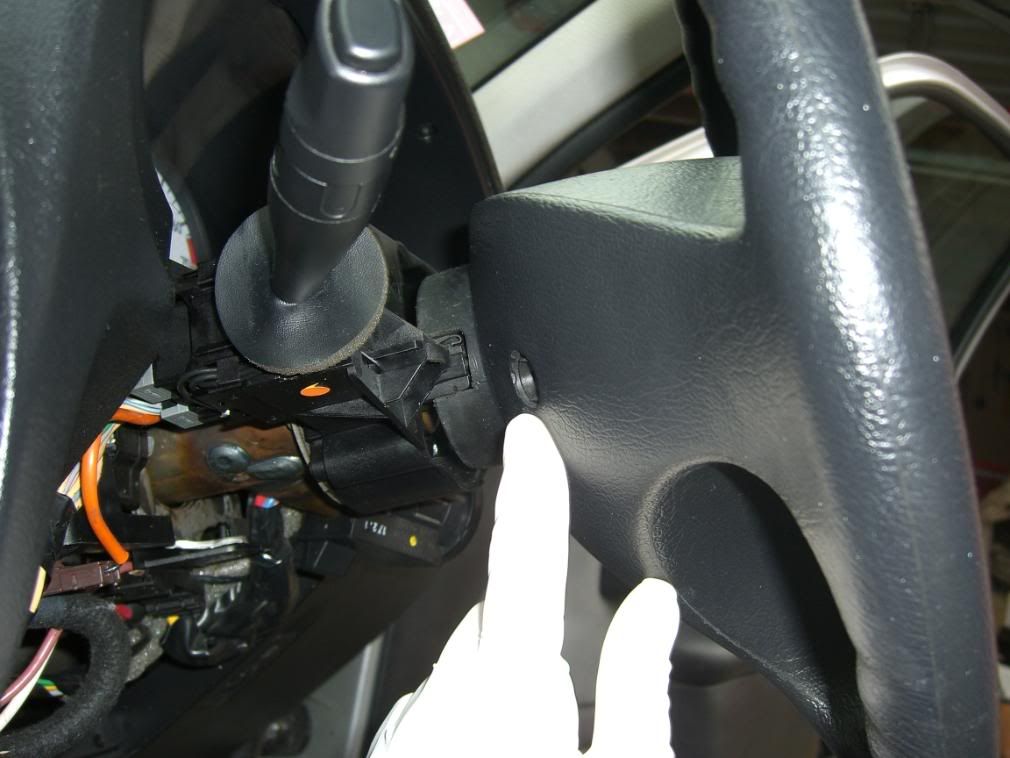
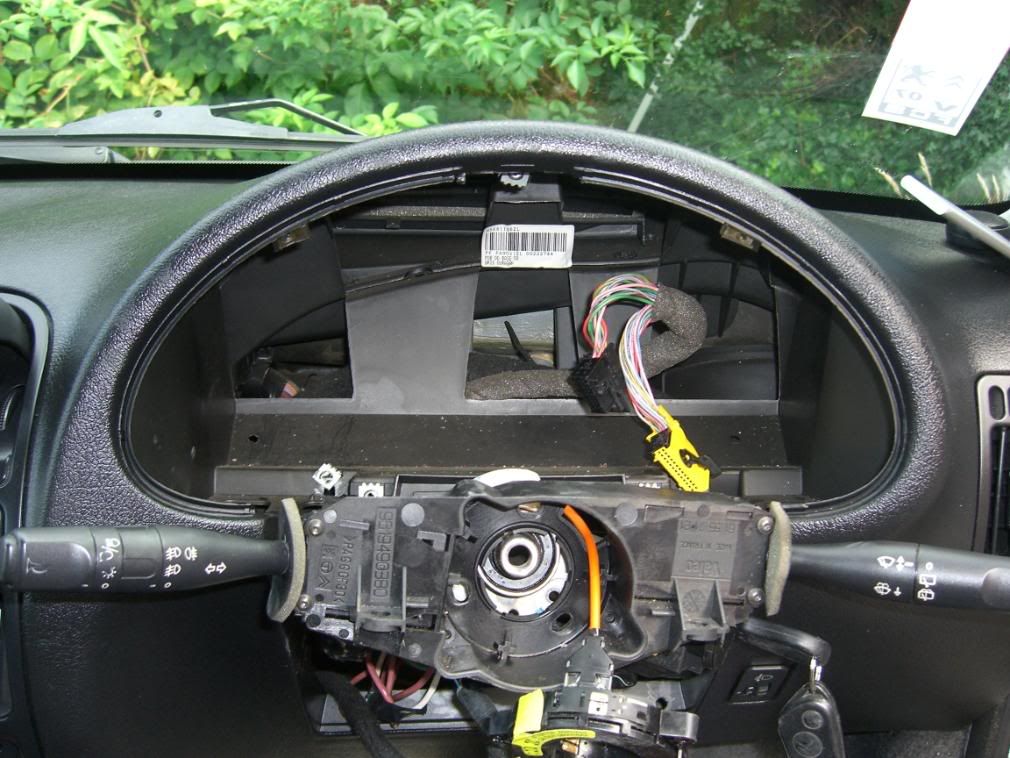
12. you now need to take the three T30 bolts out that hold the indicator stalks off


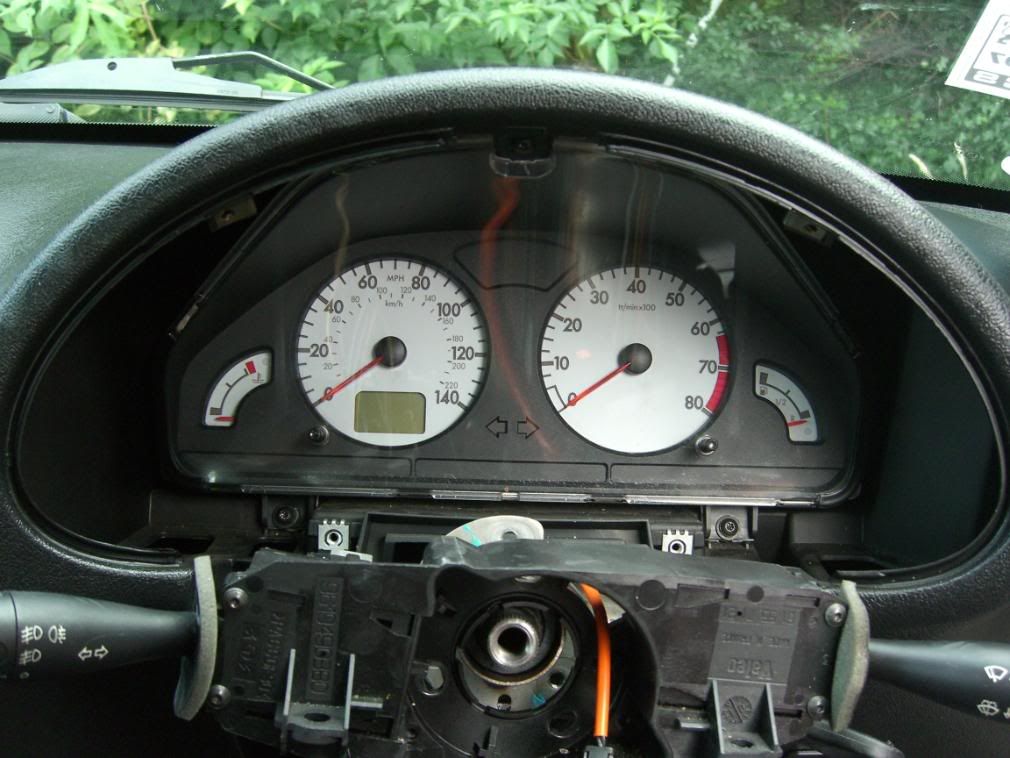
13. you can now pull the off slightly


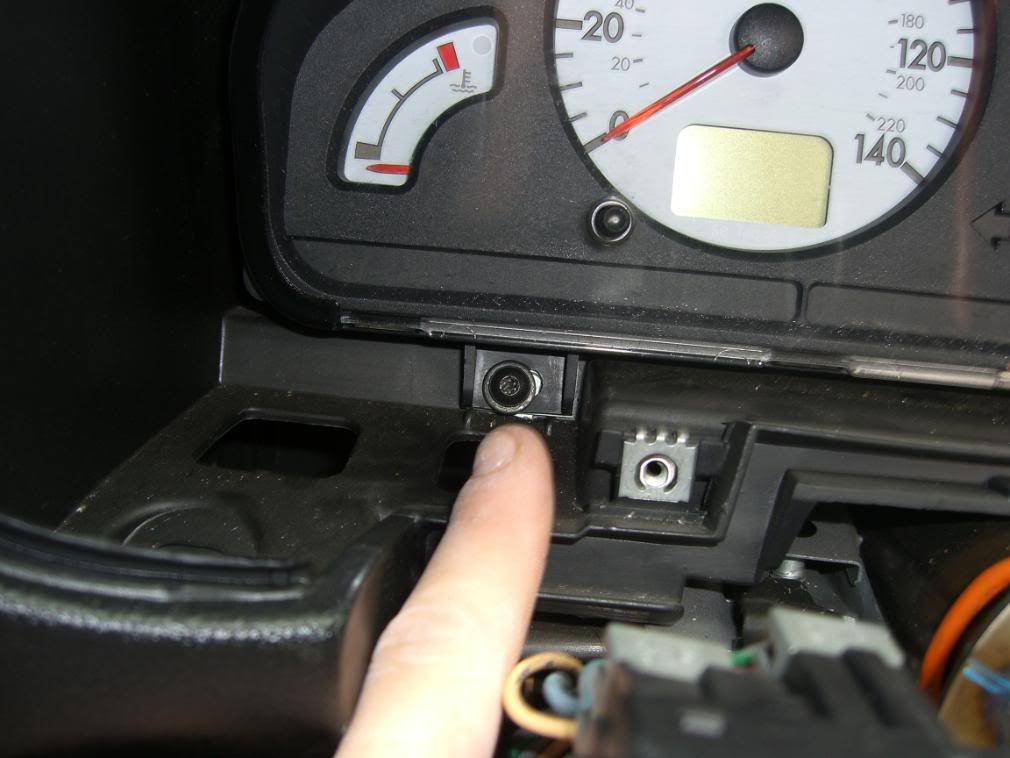
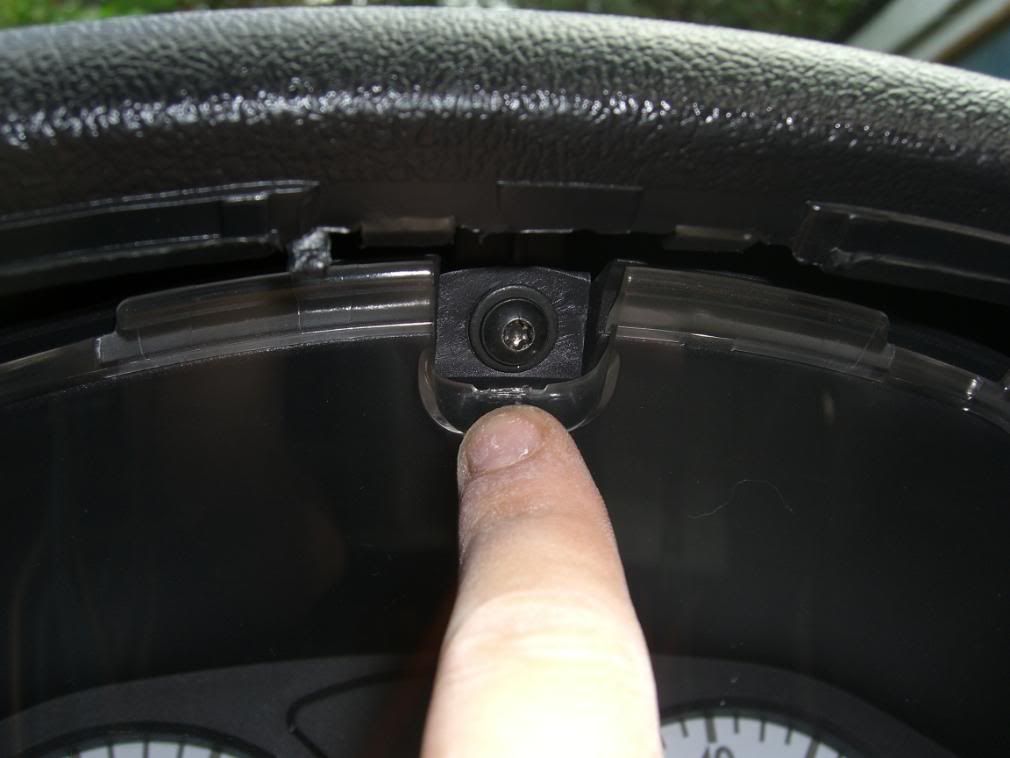
14. this now allows you to access the two screws that hold the dial surround in. there is one on each side


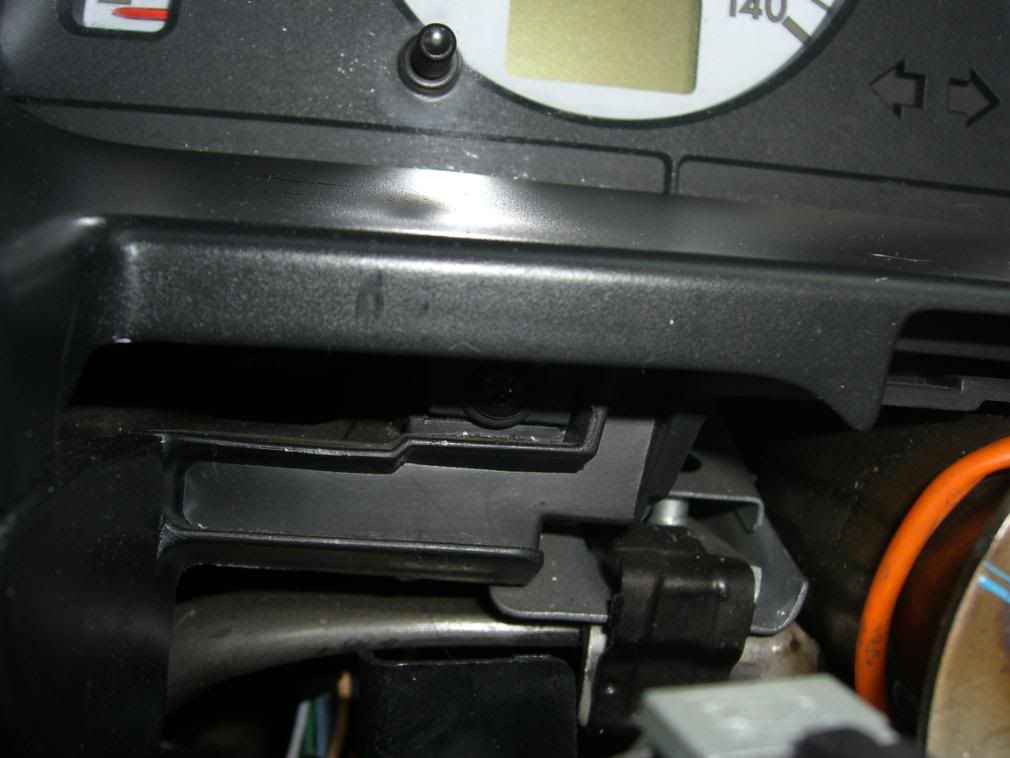
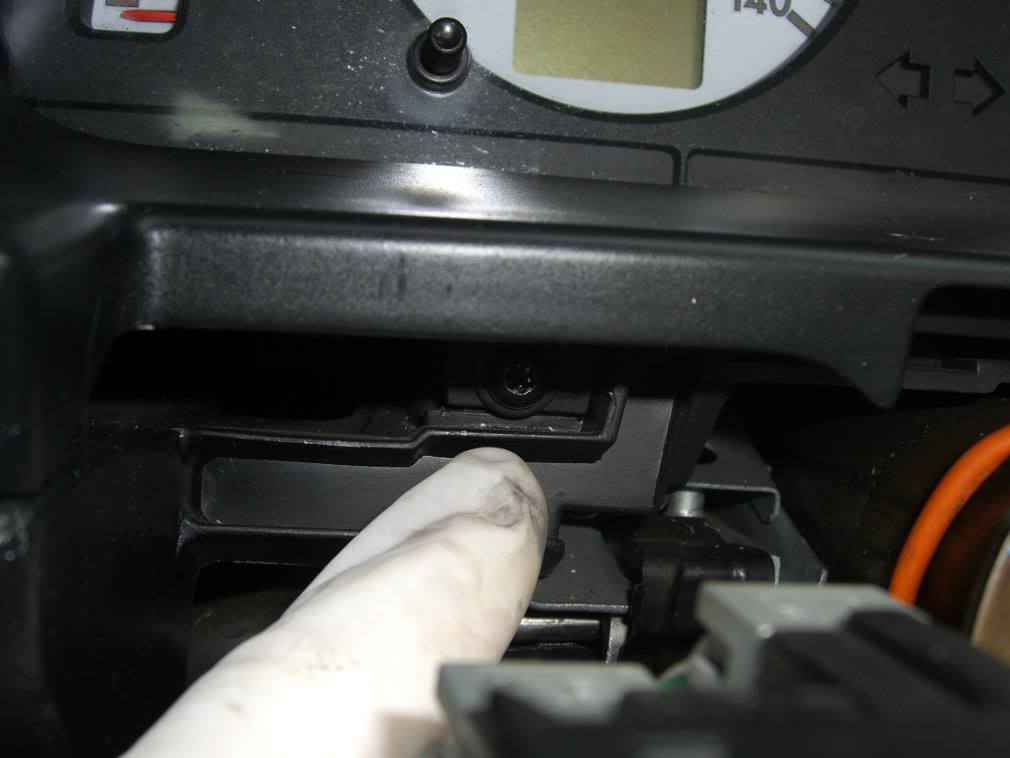
15. you need to take out the final two screws that hold this in, you need a T10 bit to take this out


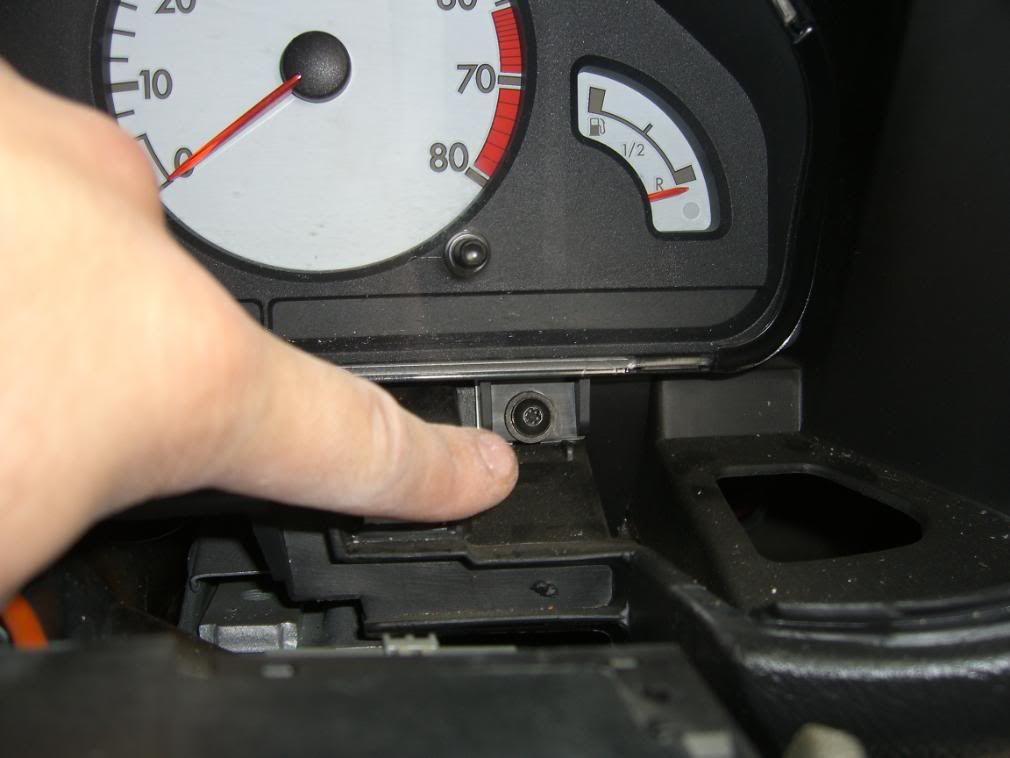
16. this will now just pull out, pull the top out first. it will now look like this


17. there are now another three screws to take out that hold the dials in, these are T20 screws


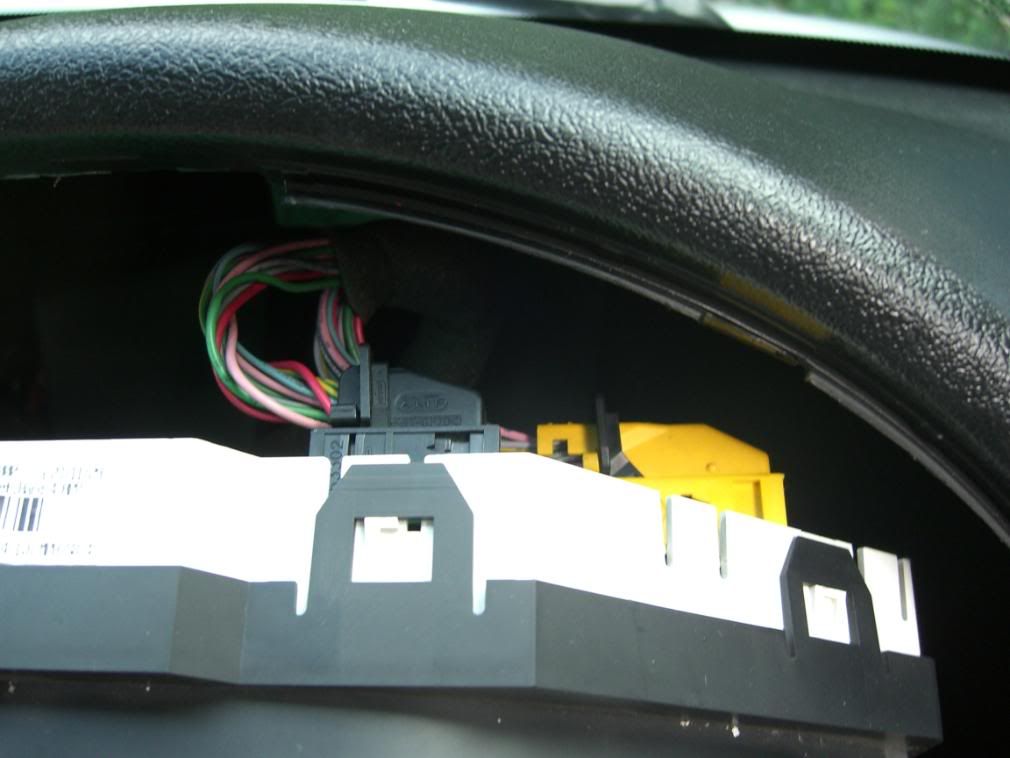
18. there should be two connections behind the dials.
yellow controls the dial lights
black controls the warning lights

you need to push the release catch down on the top of then before the release clip will come off.


19. gently pull the dials out trying to avoid scratching the front of the dials on anything.

20. it should now look like this


Afterwards in the back of the clocks are little screw in L.E.D's all you need to do is change them (remembering that you need ones that fit.)

to put them back together just follow these steps in reverse remembering not to connect the battery until last.

__________________
LittleRed
Quote:
Originally Posted by Tommo87 View Post
Tottally golly unrelated but that ^ is one of the nicest (possibly the nicest) mk1s I've seen IMO.
Quote:
Originally Posted by -shuggles- View Post
Gibbo I <3 your car,so much better than mine
Quote:
Originally Posted by mimi179 View Post
Gibbo I luv ya, aww! X

Last edited by Gibbo-Vtr; 25th April 2011 at 16:50.
Gibbo-Vtr is offline   Reply With Quote
The Following 2 Users Say Thank You to Gibbo-Vtr For This Useful Post:
Old 25th April 2011, 17:32   #3
Lukus-vtr
Frequent Poster
 
Lukus-vtr's Avatar
 
Join Date: Feb 2011
Location: Mansfield/Nottinghamshire
Posts: 586
Car(s): Austin Mini Mayfair Saxo VTR Punto MK2B Sporting
iTrader Score: 1 (100%)
Lukus-vtr is on a distinguished road
Default

Can't fault that guide there. I've used white and blue LED's in my dials. The one's you need are http://www.phenoptix.co.uk/shop/ultr...ac8uirsp6rrcj5

I assume its the same for a MKI I used these in a MKII. You'll have to solder these in the place of your existing lights.
Lukus-vtr is offline   Reply With Quote
Old 25th April 2011, 17:52   #4
vtr_matt1983
Infrequent Poster
 
Join Date: Apr 2011
Location: darley dale, derbyshire
Posts: 194
Car(s): 99 vtr 97 vr6 highline
vtr_matt1983 is on a distinguished road
Default

cheers dude just done mine really good guide if its not already should be sticky
vtr_matt1983 is offline   Reply With Quote
Old 25th April 2011, 18:15   #5
-jay-vtr
Regular Poster
 
-jay-vtr's Avatar
 
Join Date: Apr 2010
Location: Derby
Posts: 256
Car(s): Mk1 Vts
-jay-vtr is on a distinguished road
Default

All that just to change some dial lights lol
Good guide mate
__________________
Quote:
Originally Posted by Stissy View Post
down syndrome one extra chromosome touch my scone like a bishops throne
Quote:
Originally Posted by Gibbo-Vtr View Post
47 chromosomes? .. I'm down with that.
-jay-vtr is offline   Reply With Quote
Old 25th April 2011, 20:23   #6
danny-vts
Saxperience Post Whore
Central Counties Region MemberEast Midlands Region Member
 
danny-vts's Avatar
 
Join Date: Dec 2010
Location: Chesterfield/Nottingham
Posts: 7,147
Car(s): dead vts. twisted 106 gti. '03' vtrrrr
iTrader Score: 37 (100%)
danny-vts is on a distinguished road
Default

its easier just to drop the steering column by undoing the 3 bolts. but good guide either way lol.
to the OP , if its mk1 they are bulbs. if its mk2 they are leds'
__________________
Quote:
Originally Posted by saxo180 View Post
Ross may be a faggot (which actually he is, but don't mention it to his face - he's quite sensitive), but at least he's not an uneducated fucktard.
The smurf vts R.I.Pieces
danny-vts is offline   Reply With Quote
Reply

Bookmarks


Posting Rules
You may not post new threads
You may not post replies
You may not post attachments
You may not edit your posts

BB code is On
Smilies are On
[IMG] code is On
HTML code is Off

Forum Jump


All times are GMT. The time now is 02:56.